
Ensuring that your emergency exit lights are fully operational is a critical component of building safety. One of the most important tests you can perform is the 90-minute test emergency exit lights, which verifies that your lights will stay on for the required duration during an emergency.

This test isn’t just a regulatory requirement; it’s a vital safety measure that can save lives by ensuring that exit routes remain illuminated during power outages.
However, many people are unsure of how to properly conduct this test or why it’s necessary. In this guide, we’ll walk you through the steps to perform a 90-minute test on your emergency exit lights, ensuring that your system is both compliant and reliable.
The 90-minute test for emergency exit lights is designed to confirm that your lighting system can sustain illumination for the full duration required by safety standards. To perform this test, you’ll need to simulate a power outage by disconnecting the main power supply to the emergency lights.
This forces the lights to rely solely on their backup batteries. Immediately after cutting the power, start a timer for 90 minutes.
During the test, periodically check the lights to ensure they are consistently bright and steady. Any signs of dimming or flickering could indicate that the battery is weakening. After the 90 minutes have elapsed, assess whether the lights are still fully operational.
If any lights fail to remain on for the entire period, it’s a clear sign that the batteries need to be replaced or that the lights require further maintenance.
By regularly performing this 90-minute test, you can ensure that your emergency exit lights are ready to guide people to safety in case of an emergency, thereby maintaining compliance with safety regulations and protecting the lives of building occupants.
Understanding the 90-Minute Test Requirement
The 90-minute test for emergency exit lights plays a crucial role in ensuring safety during power outages. Various safety regulations mandate this test to confirm that emergency lighting systems function properly when needed.
This test not only ensures compliance with building codes and safety standards but also maintains the safety and security of any facility. By performing the 90-minute test, you verify that emergency lights can provide adequate illumination throughout an emergency, allowing occupants to evacuate safely.

Several key standards require the 90-minute test. The National Fire Protection Association (NFPA) 101 Life Safety Code mandates monthly 30-second tests and an annual 90-minute test to confirm that emergency lights can run for the full duration of an emergency.
This testing ensures the batteries in the emergency lights are capable of supporting the lights for the entire emergency period. Similarly, the Occupational Safety and Health Administration (OSHA) requires that emergency lighting systems be tested to verify they can operate for at least 90 minutes during an emergency.
These regulations protect lives by ensuring exit routes remain illuminated during a prolonged power failure. Failure to comply with these testing requirements can result in serious safety hazards, such as inadequate lighting during an evacuation, leading to injuries or fatalities.
Non-compliance can also result in fines, legal liabilities, and higher insurance premiums. Adhering to these regulations is essential to maintaining a reliable, effective, and compliant emergency lighting system.
Preparation for the 90-Minute Test
Before conducting a 90-minute test on your emergency exit lights, proper preparation is crucial to ensure the process is efficient and accurate. This involves gathering the necessary tools and equipment, as well as preparing the testing area to minimize any potential disruptions.

Gathering the Necessary Tools and Equipment
To perform the 90-minute test effectively, gather a few essential tools. Use a timer or stopwatch to accurately track the 90-minute duration. A voltage tester or multimeter helps verify that the lights are running on battery power and checks the battery’s health.
If your emergency lights have a test button, use it to simulate a power outage easily. Keep a flashlight handy, especially if the area becomes dark during the test.
For a more streamlined process, invest in an emergency light tester. These devices simulate power outages and automatically test the lights and batteries, providing detailed feedback on performance. This approach ensures faster, more accurate testing while meeting regulatory requirements.
Preparing the Testing Area
Preparing the testing area is a critical step to ensure the test runs smoothly and without unnecessary interruptions. Start by identifying the circuit breakers or power sources that control the emergency exit lights. Clearly label these circuits to avoid confusion during the test.
Next, inform building occupants about the upcoming test. This is especially important in commercial or multi-tenant buildings where turning off the power might cause confusion or disruption.
A simple notice explaining the purpose and duration of the test can help prevent any misunderstandings. If the test is being conducted during business hours, consider scheduling it during a time when the impact on operations will be minimal.
Additionally, clear any obstacles or hazards from the area around the emergency lights. This will allow you to inspect the fixtures thoroughly during the test.
Ensure the testing area is safe and accessible to conduct a thorough and efficient test, ultimately verifying that your emergency exit lights are ready to function properly during a real emergency.
Step-by-Step Guide to Conducting the 90-Minute Test
To conduct the 90-minute test on emergency exit lights, first switch off the main power supply to simulate a power outage. Ensure the lights stay illuminated for the full 90 minutes. If any lights flicker, dim, or fail before the test concludes, inspect for battery or wiring issues.
Step 1: Power Down the Emergency Lighting Circuit
The first step in conducting a 90-minute test is to safely disconnect the power supply to the emergency lighting circuit. This step is crucial as it simulates a real power outage, forcing the emergency lights to rely solely on their backup batteries.
To begin, locate the appropriate circuit breaker in your electrical panel and switch it off. This will cut the power to the emergency lights, allowing you to observe how they perform under battery power. It’s essential to ensure that all lights immediately switch over to battery power without delay.
This transition is a critical indicator that the emergency lighting system is functioning correctly. Use a voltage tester or multimeter to confirm that the circuit is completely off and that the lights are not receiving any power from the main supply.
Once you’ve confirmed that the lights are operating solely on battery power, you can proceed with the rest of the test.
Step 2: Start the Timer
After the lights have switched to battery power, the next step is to set a timer for 90 minutes. This is the duration that your emergency lights must remain illuminated to meet safety regulations. Accuracy is key here, so use a reliable timer or stopwatch to track the time precisely.
Start the timer as soon as the power is disconnected to ensure that the full test duration is covered.
During this period, the lights should stay on without any signs of fading or dimming. It’s important to avoid interruptions during this time; do not restore power or make adjustments until the full 90 minutes have passed. If possible, record the start and end times of the test for documentation purposes.
This ensures that you have a clear record of when the test began and ended, which can be useful for compliance reporting.

Step 3: Monitor Light Output Throughout the Test
As the 90-minute test progresses, it’s essential to monitor the light output at regular intervals. Check the lights every 10 to 15 minutes to observe their brightness and consistency. The lights should remain bright and steady throughout the entire test period.
Any signs of dimming, flickering, or uneven light distribution could indicate a problem with the battery or the light fixture itself. These issues may compromise the effectiveness of the emergency lighting system during a real power outage.
Make a note of any irregularities you observe, as these will need to be addressed after the test. Consistent monitoring helps you catch potential problems early, ensuring that your emergency lighting system remains reliable and compliant.
Step 4: Inspect for Physical and Operational Issues
While the lights are on, take the opportunity to conduct a thorough inspection of the fixtures for any physical or operational issues. Check for signs of wear and tear, such as cracks in the housing, loose or corroded connections, or damage to the light bulbs. These physical issues can affect the performance and longevity of the emergency lights.
Additionally, ensure that the lights are mounted securely and that there is no obstruction that could hinder their visibility. The lights should remain steady, with no flickering or inconsistent illumination throughout the test.
If you find any damage or operational issues, document them immediately and plan for necessary repairs or replacements. A detailed inspection during the test helps maintain the overall integrity of your emergency lighting system.
Step 5: Evaluate the Performance at the End of the Test
Once the 90-minute timer has expired, it’s time to evaluate the overall performance of your emergency lighting system. Assess whether all the lights are still functioning correctly and if they maintained consistent brightness throughout the entire duration of the test.
If the lights dim, flicker, or turn off before the 90 minutes are up, the batteries likely have issues and may need replacement. This evaluation is crucial for determining whether you can rely on your emergency lights during an actual power outage.
Document any lights that failed to meet the full 90-minute requirement, and schedule maintenance or replacements as needed. A successful test ensures that your emergency lighting system is ready to provide safe and effective illumination in the event of an emergency.
Recording and Documenting the Test Results
Keeping detailed records of your 90-minute emergency exit light tests is not only a best practice but often a requirement for compliance with safety regulations. Accurate documentation provides a clear history of your maintenance activities and ensures that you can quickly address any issues that arise.
In your records, be sure to include the date and time of the test, noting when it began and ended. Document the performance of each light, specifically whether it maintained full illumination for the entire 90 minutes. If any lights dimmed, flickered, or failed, make a note of these issues and describe the actions taken or planned to resolve them.
Additionally, record any observations about the physical condition of the lights, such as signs of wear or damage. Detailed documentation helps you track the reliability of your emergency lighting system over time and provides essential information during inspections or audits.
Common Pitfalls to Avoid During the 90-Minute Test
Conducting a 90-minute test on emergency exit lights may seem straightforward, but there are several common mistakes that can compromise the accuracy and effectiveness of the test. One frequent error is failing to start the timer exactly when the power is cut, which can lead to an inaccurate test duration.
To avoid this, always synchronize the start of the timer with the moment you disconnect the power. Another common mistake is not monitoring the lights throughout the test. Without periodic checks, you might miss signs of battery weakness, such as dimming or flickering, that could indicate a problem.
Additionally, some people overlook the importance of inspecting the physical condition of the lights during the test, which can result in unnoticed issues that affect performance. To ensure a thorough and accurate test, follow the steps meticulously, monitor the lights at regular intervals, and document everything carefully.
This approach will help maintain the reliability of your emergency lighting system and ensure compliance with safety standards.
Post-Test Actions and Maintenance
If any of your emergency exit lights fail the 90-minute test, immediate action is required to restore full functionality and ensure safety. Begin by identifying the cause of the failure—this could be due to an aging or faulty battery, a malfunctioning light fixture, or wiring issues.
Replace any defective batteries or fixtures as soon as possible and re-test the system to confirm that the issue has been resolved. It’s also a good idea to review the performance of similar lights to determine if additional replacements might be necessary to prevent future failures.
Ongoing maintenance is crucial for keeping your emergency lighting system in compliance with safety regulations. Regularly schedule shorter tests, such as monthly 30-second tests, to monitor the system’s readiness between annual 90-minute tests.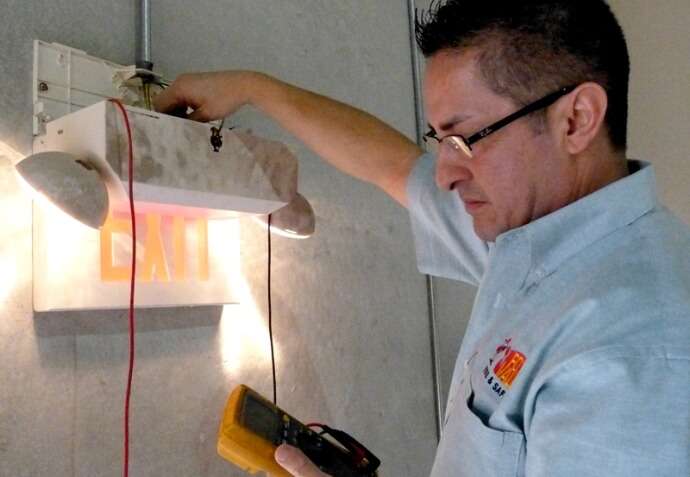
Additionally, keep a detailed log of all maintenance activities, including test results, repairs, and replacements. This proactive approach not only ensures the reliability of your system but also helps you stay compliant with safety standards, reducing the risk of penalties or liabilities.
Conclusion
The 90-minute test is a vital component of maintaining a safe and compliant emergency lighting system. By regularly conducting this test, you ensure that your emergency exit lights are prepared to function effectively in the event of a power outage, providing essential illumination for safe evacuations.
Proper documentation and timely maintenance are key to keeping your system in top condition. To maintain safety and compliance, make it a priority to schedule your next 90-minute test, review the results, and address any necessary repairs or replacements promptly.
Regular attention to your emergency lighting system will help protect lives and keep your facility in line with regulatory standards.
