
The best way to install LED strip corner profiles is to plan the corner angle, cut aluminum channels accurately, mount with screws or clips, apply the strip on a clean heat-transfer surface, connect low-voltage wiring safely, then test brightness and voltage before closing the diffuser.
This is a practical guide for contractors, distributors, and lighting teams who need clean linear lighting with low callback risk. Poor corner installation causes light gaps, visible dark spots, peeling strip, cracked diffusers, voltage drop, and client complaints. In commercial projects, those issues lead to rework, delayed handovers, and margin erosion.
From our manufacturing-floor perspective, most failures come from weak preparation, wrong profile choice, or no electrical planning. This article gives a field-ready method based on factory testing, installer feedback, and real project conditions.
1. What are LED strip corner profiles and why do they matter?
LED strip corner profiles are aluminum channels designed to hold LED tape at an angle, usually 45 degrees, inside corners, cabinet edges, shelves, displays, and architectural coves; buyers new to this product can first review what are LED strip corner profiles before planning installation. They act as a mounting base, heat sink, mechanical guard, and visual finishing part.
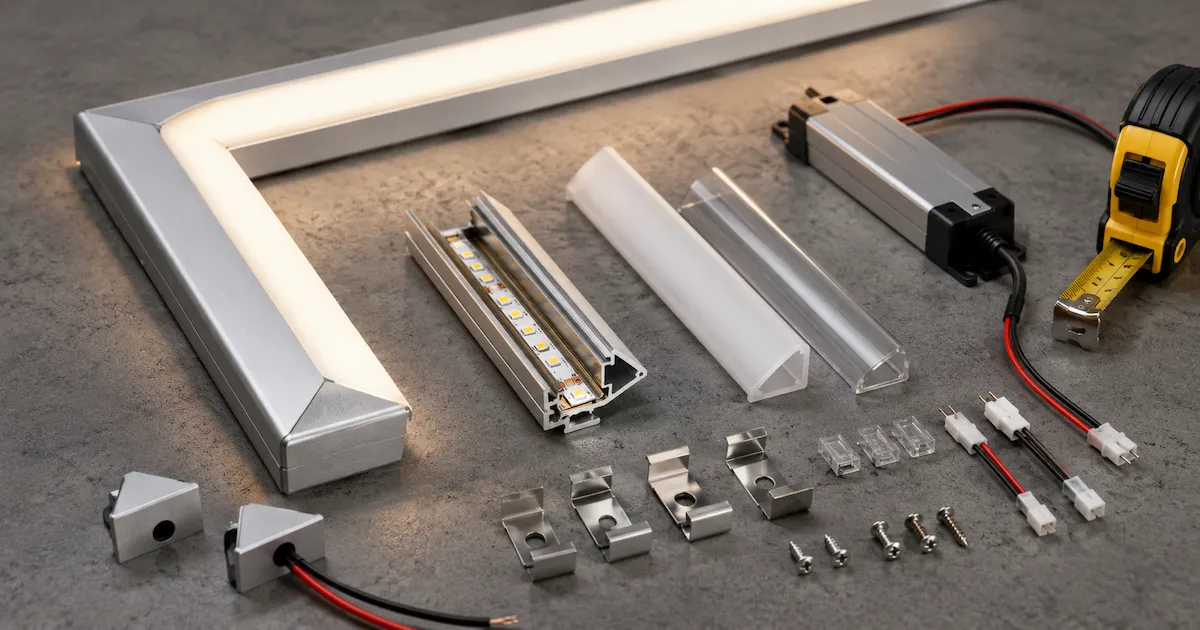
The profile matters because LED tape alone rarely gives a professional result. Bare strip can show dots, collect dust, peel from painted surfaces, and run hotter than expected. In lab tests, lumen output can vary due to diffuser loss, but thermal stability usually improves when the strip is bonded to a clean aluminum surface.
| Profile Function | What It Does | Business Benefit |
|---|---|---|
| Heat dissipation | Moves heat away from LED chips | Longer service life, fewer claims |
| Angle control | Places light at 30°, 45°, or 90° positions | Cleaner beam direction |
| Diffusion | Softens dots and glare | Better finish in hotels and retail |
| Mechanical protection | Covers solder joints and strip edges | Less damage during cleaning |
| Mounting stability | Gives a screw-fixed base | Lower peeling risk |
2. Which corner profile type fits the project?
Choose the right profile based on location, viewing distance, strip width, wattage, diffuser style, and maintenance access. A slim 8 mm inner width may suit low-wattage cabinet lighting but will overheat with high-power strips. A deeper profile with a milky diffuser hides LED dots better with low-density SMD strips, especially when buyers understand how to choose the right cover from an ultimate guide to LED strip diffusers.
Be aware: bigger profiles can conflict with glass, hinges, or decorative trims. Always check clearance before purchase.
| Corner Profile Type | Best Use | Typical Inner Width | Key Risk |
|---|---|---|---|
| 45° surface corner | Cabinets, shelves, display cases | 8–12 mm | Visible dots if diffuser is shallow |
| Deep corner profile | Hotels, offices, premium interiors | 10–15 mm | Needs more space |
| Outside corner profile | Columns, furniture edges | 8–12 mm | Impact risk |
| Waterproof corner channel | Bathrooms, covered outdoor areas | 10–15 mm | Sealing quality controls lifespan |
| Heavy-duty aluminum profile | Commercial fit-outs, long runs | 12–20 mm | Higher material cost |
3. How should you plan measurements, power, and layout before cutting?
Measure each corner run separately, check angle accuracy, mark feed points, and define driver, controller, dimmer, and service-access locations. Drywall and panels often vary by millimeters over long runs.
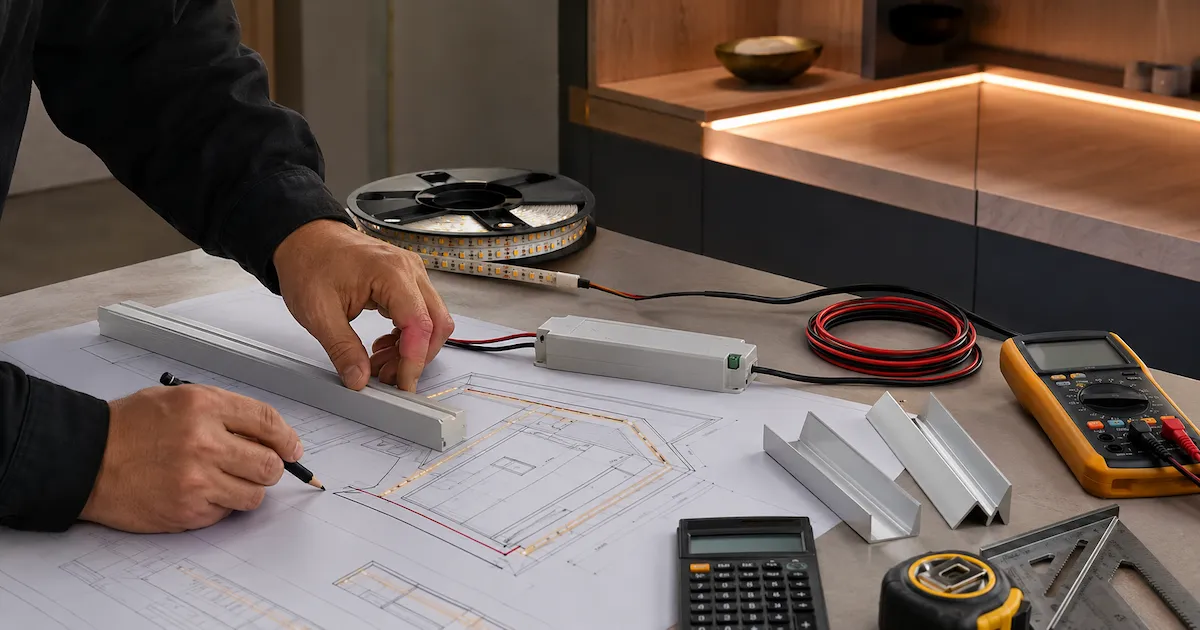
A practical process: measure the physical run, subtract space for end caps, mark cable exits, then confirm diffuser removal method. For electrical layout, add driver headroom—e.g., a 5 m 24V strip at 14.4 W/m needs ~72 W; specify at least a 90 W driver with 20% reserve, or follow a proper LED profile drivers calculation method for larger projects. For long runs, feed from both ends or add mid-feeds.
| Planning Item | Recommended Check | Why It Matters |
|---|---|---|
| Run length | Measure each section twice | Reduces waste and recutting |
| Corner angle | Check with angle tool | Prevents open miter gaps |
| Driver capacity | Add 15–25% headroom | Reduces thermal stress |
| Cable route | Mark before drilling | Avoids visible holes |
| Service access | Confirm diffuser removal | Saves labor during repair |
For a quick visual overview of how LED strip installation works before cutting and mounting the corner profiles, this neutral step-by-step video can help readers understand the basic installation flow.
4. What tools and materials do you need for a clean installation?
Use tools that make accurate cuts, reliable fixing, and safe electrical joints: a fine-tooth miter saw, deburring tool, measuring tape, square, marker, low-voltage cable, soldering station or approved connectors, mounting clips or screws, alcohol wipes, and PPE. Use a vacuum attachment while cutting on dust-sensitive sites.
Clean the aluminum channel with isopropyl alcohol before bonding. On powder-coated or dusty surfaces, mounting tape may fail—use screws or clips for long-term stability.
| Tool or Material | Recommended Specification | Use Case |
|---|---|---|
| Miter saw blade | Fine tooth, non-ferrous metal rated | Clean aluminum cuts |
| Deburring tool | Hand deburrer or fine file | Removes sharp edges |
| Alcohol wipes | 90%+ isopropyl alcohol | Cleans strip bonding surface |
| Screws | Stainless or zinc plated | Stable mounting |
| Low-voltage cable | Sized by current and distance | Reduces voltage drop |
| Heat shrink tube | Adhesive-lined for damp areas | Protects solder joints |
5. How do you cut and prepare aluminum corner profiles?
Mark the profile, clamp firmly, and cut slowly to avoid burrs. Decide between butt joints and 45° miter joints—miters look cleaner but need precision. After cutting, deburr both aluminum and diffuser; metal shavings can short solder pads, so installers should also understand the common mistakes when cutting LED strips before preparing the final profile run.
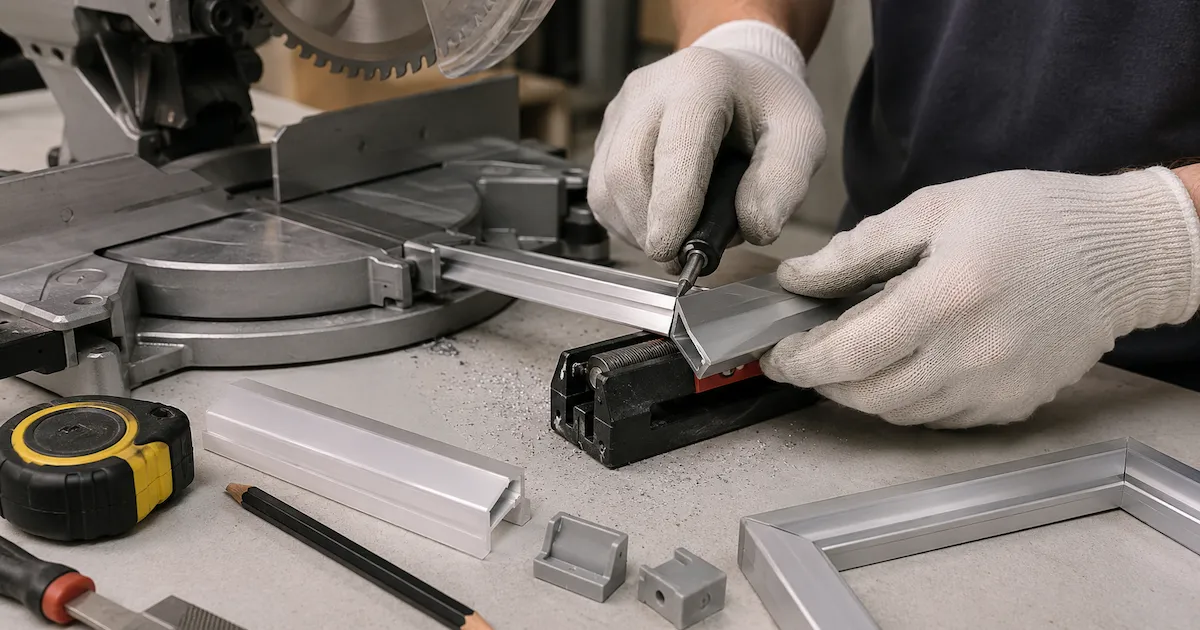
Cut diffusers carefully—PMMA and PC can crack if cut too fast. For repeat projects, consider factory pre-cut profiles and labeled lengths to reduce site labor and keep finishes consistent.
| Cut Type | Best For | Finish Level | Installer Note |
|---|---|---|---|
| Straight butt cut | Hidden corners, utility areas | Good | Fast and forgiving |
| 45° miter cut | Visible corners, hotel interiors | High | Needs angle accuracy |
| Factory pre-cut | Chain stores, OEM fixtures | Very high | Reduces site variation |
| Field trim cut | Renovation sites | Medium | Keep spare diffuser length |
6. How do you mount profiles on inside and outside corners?
Align profiles with a laser line or straightedge. For inside corners, set the profile tight without forcing it—shim if walls are uneven, especially when you need to install LED strip corner channel under cabinet with a clean, serviceable finish. For outside corners, use mechanical fixing (screws or clips) to resist impact.
Pre-drill for hardwood or dense substrates. In gypsum board, fix into framing or use proper anchors. Typical mounting spacing: 300–500 mm for light-duty profiles; reduce spacing for heavy profiles.
| Mounting Method | Strength | Best Location | Risk |
|---|---|---|---|
| Double-sided mounting tape | Low to medium | Short, low-watt indoor runs | Peeling on dusty paint |
| Spring clips | Medium | Cabinets, shelves, serviceable runs | Clip spacing affects straightness |
| Screws through profile | High | Long commercial runs | Visible screw heads if not planned |
| Hybrid tape + screws | High | Fast fit with backup strength | Needs careful alignment |
7. How do you install the LED strip inside the corner profile?
Ensure the channel is clean and dry. Peel the backing slowly and press the strip evenly along the aluminum base. Do not stretch the PCB or bend the strip sharply at corners. For 90° turns, use soldered jumper wires, L-connectors, or a small hidden gap.
Avoid folding strips; that can crack copper tracks or damage COB phosphor. If installers struggle, consider pre-soldered corner jumpers from the factory.
| Strip Type | Corner Handling | Best Profile Match | Note |
|---|---|---|---|
| SMD 2835 | Use jumper at turns | Medium-depth diffuser profile | Dots may show at close range |
| COB strip | Gentle curve only | Shallow or medium profile | Smooth line, check heat |
| High-watt strip | Avoid tight bends | Larger aluminum body | Needs strong heat path |
| RGB/RGBW strip | Use correct multi-core jumper | Wider profile | Keep polarity clear |
8. How do you handle wiring, drivers, and voltage drop?
Use the correct constant-voltage driver, match voltage to strip type, size cables for current, and place feed points to control voltage drop. 24V is often preferable for longer runs because current is lower.
Voltage drop causes dim ends, color shift, and unstable dimming. For long coves, feed both ends or split into shorter circuits. Use soldered joints where vibration or heat makes connectors risky, and always label polarity on site to avoid common mistakes in LED strip light wiring during installation.
| Feature | 12V LED Strip | 24V LED Strip |
|---|---|---|
| Current at same wattage | Higher | Lower |
| Voltage drop over long runs | More noticeable | Lower |
| Cut interval | Shorter | Longer |
| Best use | Short cabinets, small fixtures | Long coves, commercial profiles |
| Field recommendation | Good under 3–5 m | Better for 5 m+ runs |
9. How do you test, commission, and fix common faults?
Test before and after closing the diffuser. Check polarity, voltage at driver and far end, current draw, dimming response, and visible uniformity. Field testing must include the whole system—driver, dimmer, cables, and strip—not just the tape.
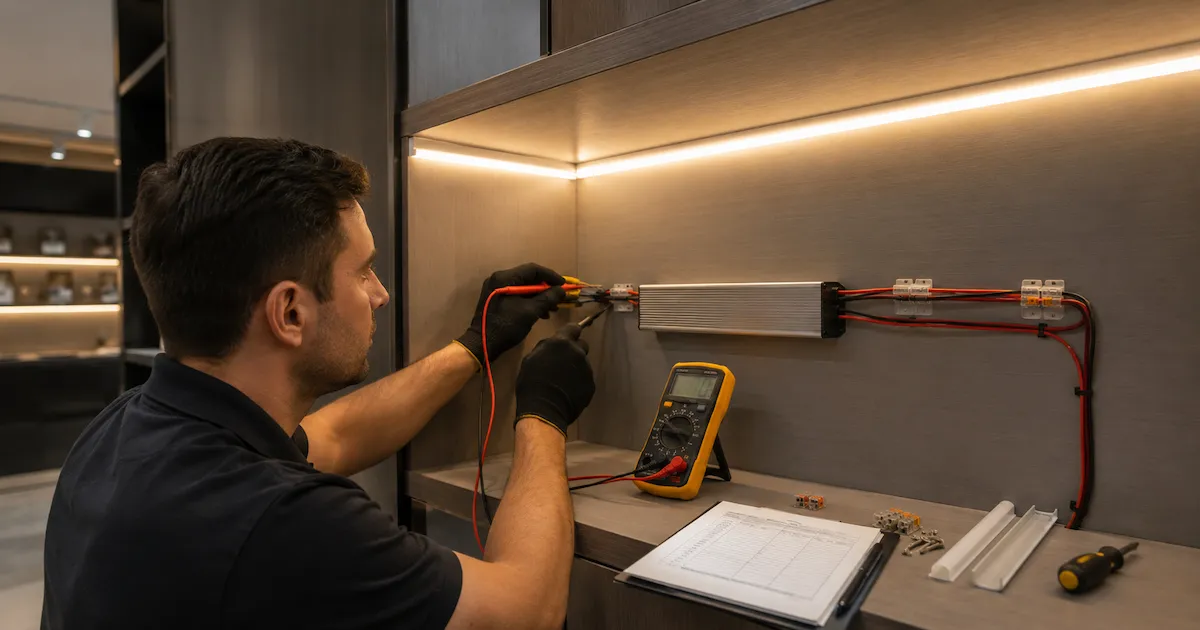
Common fixes: feed both ends for voltage drop, replace mismatched drivers for flicker, and solder jumpers for dark corners; for deeper fault diagnosis, use a proper guide on troubleshooting flickering LED strip lights. Document test results for handover.
| Symptom | Likely Cause | Quick Fix | Prevention |
|---|---|---|---|
| Dim light at far end | Voltage drop | Feed both ends | Use 24V and thicker cable |
| Strip peeling inside profile | Dirty aluminum or heat | Clean and replace strip | Wipe channel before bonding |
| Dark corner | Cracked PCB or poor connector | Use jumper wire | Do not fold strip sharply |
| Diffuser won’t fit | Burrs or wrong strip width | Deburr and check size | Confirm profile inner width |
| Flicker | Driver/dimmer mismatch | Replace control gear | Test dimming before handover |
| Color mismatch | Mixed batch or voltage drop | Replace section or add feed | Specify binning and batch control |
10. What specifications should buyers set for repeatable projects?
Set clear specifications: profile drawing with tolerances, inner width, outer dimensions, alloy (e.g., 6063), surface finish, diffuser material and transmittance, end cap style, clip spacing, strip compatibility, and packing method.
Also specify LED strip voltage, wattage per meter, CRI, CCT tolerance, IP rating, PCB width, adhesive brand, reel length, lead wire length, and connector type. For multi-site projects, request golden samples and production photos.
| Specification Item | What to Request | Why It Helps |
|---|---|---|
| Profile drawing | PDF/DWG with tolerances | Confirms fit before order |
| Aluminum material | 6063 aluminum or agreed grade | Stable extrusion quality |
| Diffuser type | PC or PMMA, clear/frosted/milky | Controls glare and dot visibility |
| Strip match | PCB width and wattage limit | Avoids overheating and poor fit |
| Lead wires | Length, color, gauge, connector | Speeds site installation |
| Certifications | CE, RoHS, UL/CB where required | Supports local compliance |
Conclusion
Treat LED strip corner profiles as a complete system: aluminum channel, diffuser, LED strip, wiring, driver, mounting method, and testing. Clean cuts, stable fixing, correct voltage, good heat transfer, and documented specs reduce callbacks. If unsure about voltage drop, profile size, or corner wiring, send engineering drawings for review before installation.
FAQ
Q1: What is an LED strip corner profile?
An LED strip corner profile is an aluminum channel that holds LED tape at an angled position, often 45 degrees. It improves heat dissipation, protects the strip, and directs light into cabinets, coves, shelves, or architectural corners.
Q2: How do I install LED strip corner profiles without dark spots?
Use a suitable profile depth, choose a diffuser that matches LED density, avoid folding the strip at 90-degree turns, and use soldered jumpers or proper L-connectors at corners. Test the light line before fitting the diffuser.
Q3: Should I use screws or adhesive tape for corner profiles?
For short indoor runs, quality mounting tape may work if the surface is clean. For commercial projects, long runs, warm areas, or exposed corners, screws or clips give better long-term stability.
Q4: Is 12V or 24V better for LED strip corner profiles?
Both work, but 24V is usually better for longer runs because it has lower current at the same wattage and less visible voltage drop. For small cabinets or short fixtures, 12V can still be practical.
Q5: Can I cut LED strip corner profiles on site?
Yes. Use a fine-tooth blade for aluminum, clamp the profile, cut slowly, and deburr the edges. Remove metal dust before installing the strip. For repeated projects, factory pre-cut lengths improve consistency.
