
1. What should you know before installing drywall LED channel on ceilings?
Drywall LED channel is a specialised type of LED aluminum profile with plaster-in side wings designed to become part of the finished ceiling. The wings hold joint compound, while the central groove houses the LED strip and diffuser. This creates a clean linear light line with no visible surface-mounted fixture body.
You’ll see it in hotel corridors, retail ceiling coves, office meeting rooms, luxury villa kitchens, and showroom display zones. If the line waves, cracks, or shows dotting, the client notices immediately.
Aluminum is not only for looks. It moves heat away from the PCB, supporting the thermal management needed for efficient LED lighting and helping the strip maintain its output over time.
Common installation types include:
- Straight recessed lines across plasterboard ceilings
- Perimeter lines around ceiling borders
- Cross-shaped or geometric ceiling designs
- Wall-to-ceiling light slots for indirect effects
- Linear task lighting above counters or desks
| Ceiling LED channel term | Meaning | Why it matters on site |
|---|---|---|
| Plaster-in wing | Perforated side flange | Holds mud and reduces cracking |
| Inner width | Space for LED strip PCB | Must match 8 mm, 10 mm, or 12 mm strip |
| Recess depth | Channel body height | Must clear drywall thickness and structure |
| Diffuser | Opal or clear cover | Controls dot-free appearance |
| Driver access | Service point for power supply | Reduces future ceiling damage |
Understanding the dimensions, diffuser type and heat requirements helps contractors avoid the most common mistakes when choosing LED strip channels, because every later installation step depends on these decisions.
2. Which tools, materials, and safety checks are needed?
Before the ceiling is cut, gather the right tools. A drywall LED channel installation usually needs a laser level, measuring tape, drywall saw or router, miter saw with aluminum blade, drill, screws, low-voltage cable, wire connectors, joint compound, mesh tape (if required), primer, paint, LED strip, driver, dimmer, and diffuser.
The AC input side of the driver must follow applicable electrical construction rules and workplace-safety requirements. In many regions, a licensed electrician must handle mains wiring. Keep drivers in accessible locations such as access panels, cabinets, service voids, or rated electrical boxes.
Commonly missed items cause delays: end caps, feed holes, short jumper wires, and matching connectors. A missing connector can cost hours on site.
| Item | Recommended check | Site risk if ignored |
|---|---|---|
| Aluminum channel | Width, depth, plaster wings | Strip does not fit or ceiling needs rework |
| LED strip | Voltage, wattage, CCT, CRI | Dim line, hot strip, or color mismatch |
| Driver | Output voltage and load range | Flicker, shutdown, or short life |
| Cable | Correct gauge for run length | Voltage drop and uneven brightness |
| Dimmer | PWM, 0-10V, DALI, Triac match | Poor dimming or buzzing |
| Diffuser | Opal for dot-free finish | Visible LED dots in low ceilings |
Pro Tip: “Plan the driver and feed point before the profile. Most ceiling service problems come from hidden power supplies, not from the aluminum channel itself.”
3. How do you plan the ceiling layout and driver location?
Use a laser line to mark the full path of the drywall LED channel. Check it against joists, ducts, sprinklers, speaker cables, and fire-rated barriers. Never assume the cavity is empty.
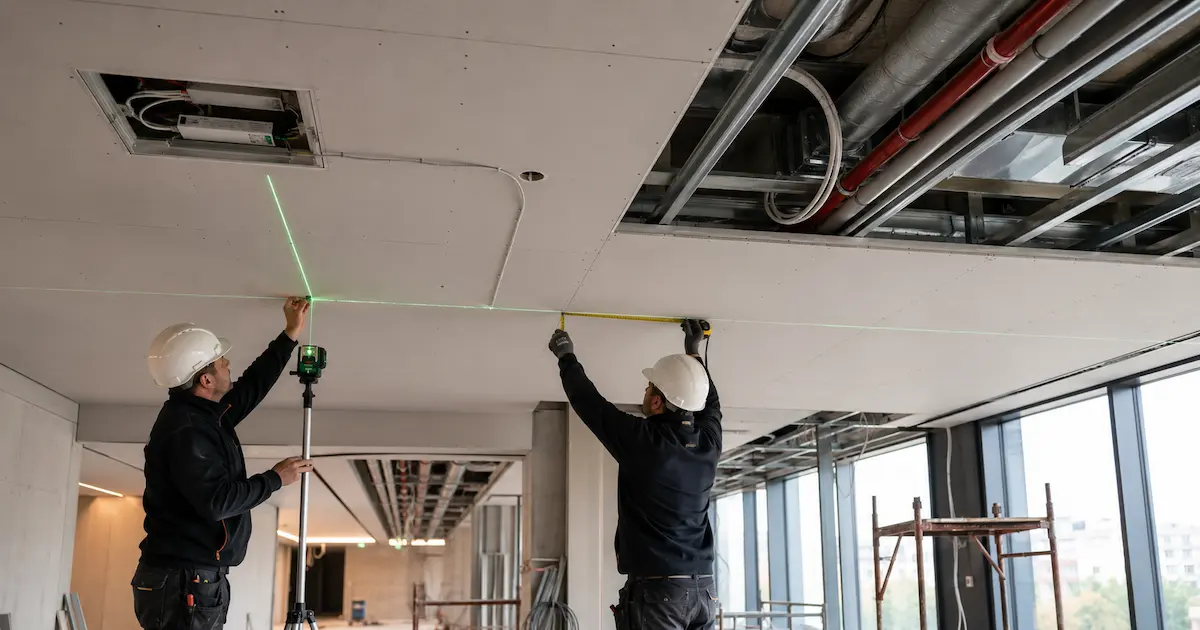
Set the driver location early. For short decorative runs, one driver may feed several channels. For long corridors, distributed drivers reduce voltage drop and simplify service.. Feed long strips from both ends when practical.
Layout checks should include:
- Channel centerline and visible width
- Distance from vents, sprinklers, and access panels
- Driver position and service access
- Cable entry direction into each profile
- Maximum strip length per feed
- Dimming control location
When tested, a long single-end feed on a 12V strip shows faster brightness loss than a 24V option at the same wattage. For commercial ceiling lines, 24V is often more practical.
| Voltage option | Best use | Main benefit | Main limitation |
|---|---|---|---|
| 12V LED strip | Short decorative runs under 5 m | Easy sourcing | Higher current and more voltage drop |
| 24V LED strip | Most ceiling channel projects | Lower current and longer runs | Driver/dimmer must match 24V |
| Constant current strip | Engineered systems | Stable output over set lengths | Less flexible for field cutting |
4. How do you choose the right drywall LED channel profile?
The channel profile controls appearance, heat, and installation speed. For ceilings, plaster-in profiles with perforated wings are preferred because joint compound bonds through the holes and reduces hairline cracks.
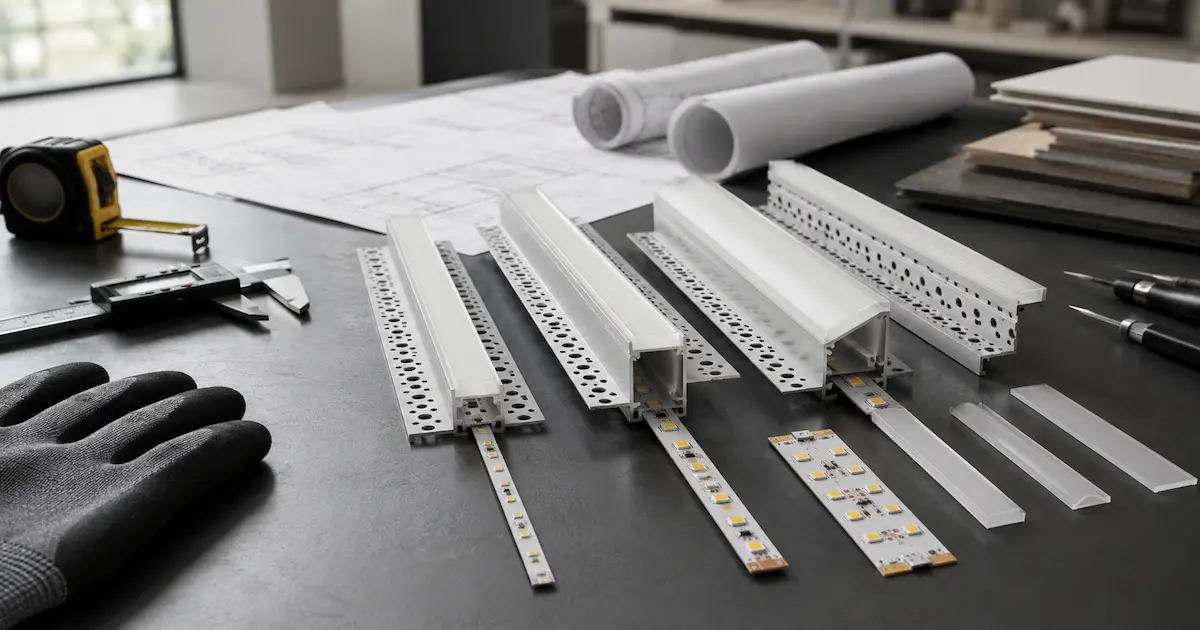
When choosing the right LED strip light profile, check three dimensions before ordering: inside width, body depth and diffuser height. A 10 mm LED strip needs a channel that accepts 10 mm PCB width without squeezing solder pads.COB or high-density SMD strips still require properly sized LED channels for light diffusion when the ceiling is low or the light line is viewed directly.
Opal diffusers may reduce output by 15%–35% depending on material and thickness. Include that loss in lighting calculations.
| Profile type | Ceiling use case | Visual result | Installation note |
|---|---|---|---|
| Narrow plaster-in | Accent lines and corridors | Slim, clean line | Needs accurate cutting |
| Deep plaster-in | Direct view dot-free | Softer continuous light | Requires more cavity depth |
| Corner plaster-in | Wall-ceiling edges | Angled wash effect | Needs careful miter cuts |
| Wide plaster-in | Higher lumen ceiling lines | Stronger output | More mudding work |
The right profile reduces rework and protects strip life through better heat control.
5. How do you cut the drywall opening and prepare the ceiling?
Mark the cut width based on the channel body, not the wing width. Wings sit on the drywall surface and get covered with compound.
The drywall opening and profile must both remain straight, so follow the correct method when cutting aluminium channel for LED strip lighting to avoid bent flanges, rough joints and damaged diffuser grooves. For small jobs, a sharp drywall saw works. Cut slowly near corners and avoid tearing the paper face; damaged paper makes mudding harder.
Check ceiling structure after opening the slot. If the channel crosses framing, add blocking, revise the line, or choose a lower-profile channel. If the ceiling is fire-rated, follow approved methods.
| Ceiling condition | Preparation action | Reason |
|---|---|---|
| New drywall | Install channel after board fixing | Cleanest finish and alignment |
| Existing painted ceiling | Score paint edge before cutting | Reduces paper tear |
| Metal stud ceiling | Check framing direction | Helps screw placement |
| Fire-rated ceiling | Confirm approved method | Maintains code compliance |
| Uneven ceiling plane | Shim or adjust fixing | Keeps light line straight |
Patience here avoids costly fixes later.
6. How do you fix the channel, wire the strip, and control heat?
A professional LED aluminum profile installation should always begin with dry-fitting the complete channel run before applying joint compound. Fix it with suitable screws through the wings or mounting holes. Use enough fixing points to prevent movement during mudding, but avoid deforming the aluminum.
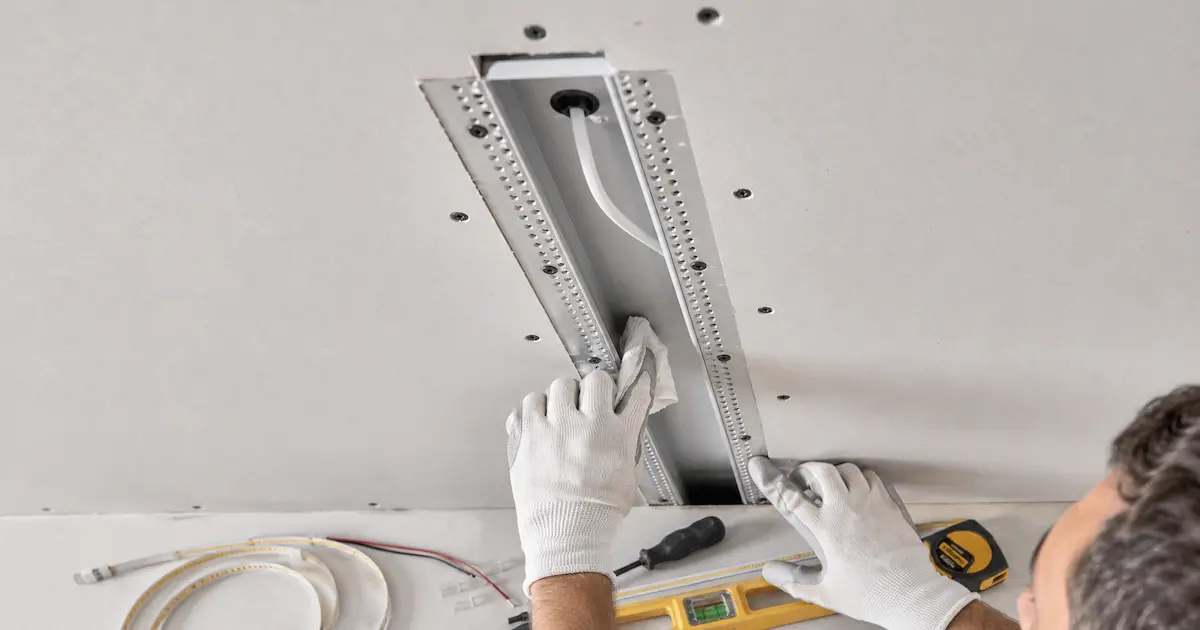
Run low-voltage cable into the channel through a drilled feed hole. Protect the cable edge with a grommet if needed. Leave service slack, but do not crowd the profile.
Clean the aluminum surface before applying LED strip. Dust or oil weakens adhesive. For higher wattage strips, use mechanical retention or thermal tape rated for aluminum contact. Poor adhesion creates air gaps that raise strip temperature.
| Installation factor | Good practice | Failure risk |
|---|---|---|
| Channel fixing | Screw evenly along the line | Wavy profile after compound dries |
| Cable entry | Smooth hole with strain relief | Damaged insulation |
| Strip mounting | Clean aluminum and press firmly | Peeling and hot spots |
| Strip power | Stay within rated length per feed | Voltage drop |
| Heat path | Use aluminum contact surface | Shorter LED life |
This is where lighting performance and ceiling workmanship meet. The following renovation walkthrough shows how plaster-in LED channels can be positioned and integrated into a drywall ceiling to create a clean, recessed line of light.
7. How do you apply joint compound, sand, and paint around the channel?
Mudding makes or breaks the visual finish. Apply mesh tape over the wings if recommended, then a base coat of compound, pressing it through the perforations and feathering it onto the ceiling board.
Mask the diffuser slot during finishing. Dried compound inside the channel is hard to remove and may prevent the diffuser from clipping correctly.
Use thin coats rather than one thick coat. After the base coat dries, sand lightly, apply a finish coat, sand again, prime, and paint. Low-angle light reveals small waves, so skim quality matters.
| Finish stage | Action | Checkpoint |
|---|---|---|
| Masking | Cover channel groove | No compound inside diffuser track |
| Base coat | Fill wing holes and feather edges | Profile locked firmly |
| Finish coat | Widen the feathered area | No visible ridge |
| Sanding | Use fine grit and light pressure | Channel edge stays sharp |
| Painting | Prime before final coat | Same sheen across ceiling |
Masking before painting prevents scraping later.
8. How do you install the LED strip and diffuser after finishing?
Wait until sanding dust and paint have settled before installing the LED strip. Vacuum the channel and wipe the aluminum with isopropyl alcohol. Let it dry. Then apply the strip, pressing along copper-free areas where possible.
Cut only at marked cut points. Keep solder joints slim and insulated. Pre-soldered custom lengths reduce site work and improve consistency.
Test the strip before fitting the diffuser: polarity, CCT, dimming response, and brightness uniformity. For tunable white or RGBW systems, check every channel.
| Strip Installation Check | Acceptable Practice | Problem to Avoid |
|---|---|---|
| Surface cleaning | Alcohol wipe, dry channel | Adhesive release |
| Strip pressure | Even pressure | Damaged LEDs |
| Cut points | Cut only at marked pads | Dead segment |
| Corners | Use leads or rated bend strip | Cracked PCB |
| Diffuser fitting | Snap in after test | Trapped dust inside |
Test the strip before and after diffuser fitting to catch issues early.
9. How do you test performance, voltage drop, and dimming quality?
Turn the system on at full output for at least 30 minutes. Check for flicker, dark ends, color mismatch, driver noise, and excessive heat. Use a multimeter at the far end of long runs to measure voltage under load.
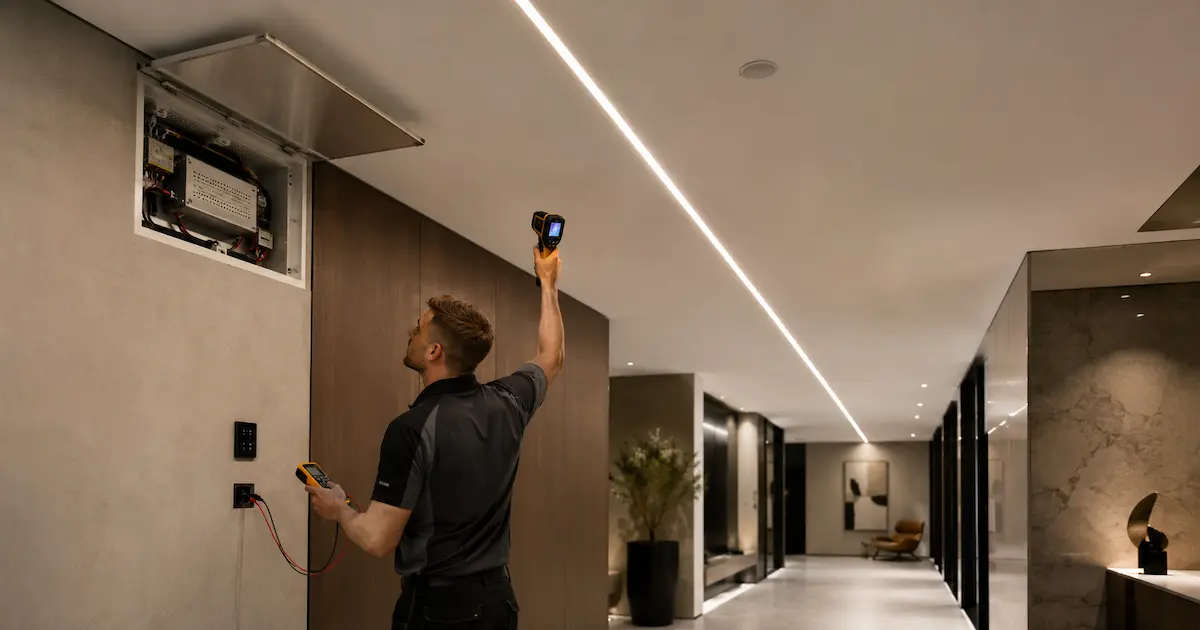
Voltage drop is a common fault. A 24V strip may still light at 21V, but the far end can appear warmer or dimmer. Test dimming at several levels (100%, 50%, 10%, minimum). Understanding flicker basics helps explain why some drivers produce unstable light at low loads or drop out near the bottom of their dimming range.
| Test item | How to check | Acceptable result |
|---|---|---|
| Voltage at far end | Measure under full load | Within design range |
| Surface temperature | Thermal camera or probe | Within strip rating |
| Dimming | Test several levels | No flicker or drop-out |
| Color consistency | Visual and meter check | No obvious CCT shift |
| Driver sound | Listen near access point | No buzzing in quiet areas |
Finding faults before handover saves time and cost.
10. What common problems happen after installation, and how can you fix them?
Most ceiling channel problems have clear causes, and symptoms such as unstable dimming should be diagnosed using a structured process for fixing flickering LED strip lights before any finished plaster is removed. Begin diagnosis with power, then wiring, then strip, then mechanical fit. Avoid removing plaster until electrical faults are ruled out.
Common issues:
| Problem | Likely cause | Practical fix |
|---|---|---|
| Strip does not light | Wrong polarity, no driver output, bad connector | Check driver output and reverse polarity if safe |
| Dim far end | Voltage drop or run too long | Feed from both ends or use thicker cable |
| Visible LED dots | Shallow profile or low LED density | Use COB strip or deeper opal diffuser profile |
| Diffuser falls out | Slot blocked or profile deformed | Clean slot and replace damaged section |
| Cracks along channel | Poor mud bond or movement | Re-tape, re-mud, and add fixing points |
| Flicker | Driver and dimmer mismatch | Replace with matched control gear |
Record every fix for repeat projects; logs help procurement select better components next time.
Conclusion
Installing drywall LED channel on ceilings requires coordination between lighting, electrical, framing, and finishing trades. Plan the run, choose a profile sized for strip wattage, manage voltage drop, protect heat dissipation, and test thoroughly before handover. The best installations look effortless because the technical work was done correctly. If you are unsure about voltage drop or driver placement, send engineering drawings to your supplier for manual load and feed calculations.
FAQ
Q1: What is a drywall LED channel for ceilings?
A drywall LED channel is an aluminum profile designed to be recessed into plasterboard ceilings. It holds LED strip lighting and a diffuser while its side wings are covered with joint compound for a seamless linear light effect.
Q2: Can I install drywall LED channel in an existing ceiling?
Yes, but it takes more care than new construction. You need to locate framing, cables, pipes, and ducts before cutting. Existing painted ceilings also need careful scoring, patching, sanding, and repainting.
Q3: Is 12V or 24V better for ceiling LED channel installation?
For most ceiling runs, 24V is better because it carries lower current at the same wattage and reduces voltage drop. Short decorative runs can still use 12V if the cable length and load are small.
Q4: How do I avoid visible dots in a ceiling LED channel?
Use a deeper profile, an opal diffuser, and high-density LED strip or COB strip. Also check viewing distance; low ceilings need better diffusion because people see the line more directly.
Q5: Where should the LED driver be installed?
Install the driver in an accessible, ventilated service location such as an access panel, cabinet, ceiling void with approved access, or rated electrical enclosure. Do not bury the driver behind finished drywall.
