
RV owners face constant challenges with inadequate lighting that drains battery power and creates dim, unwelcoming spaces. Here’s what many don’t realize: LED Strip Lights for RV: Complete Installation Guide solutions can help you understand how LED strip lights transform your motorhome into a bright, energy-efficient haven while extending battery life significantly. Quality LED strips designed for recreational vehicles offer superior illumination, consume minimal power, and withstand the vibrations and temperature changes common in mobile living.
Choosing appropriate LED strip lights for your RV requires understanding voltage requirements, waterproof ratings, and installation techniques specific to motorhomes. This comprehensive guide covers everything from selecting compatible strips to professional installation methods that ensure long-lasting performance on the road.
1. What Makes LED Strip Lights Perfect for RV Applications?

LED strip lights have revolutionized RV lighting due to their exceptional energy efficiency and versatility. But here’s what sets them apart: these flexible lighting solutions consume up to 85% less power than traditional incandescent bulbs while producing superior brightness levels.
RV electrical systems typically operate on 12V DC power, making LED strips naturally compatible with motorhome batteries. Unlike fluorescent fixtures that struggle with voltage fluctuations, LED strips maintain consistent performance across varying power conditions. Their solid-state construction eliminates fragile filaments that break during travel vibrations.
Low Power Consumption Benefits
Power efficiency becomes critical when boondocking or dry camping without shore power connections. Standard RV lighting can drain batteries within hours, while LED strips extend usable time dramatically. A typical 16-foot LED strip consumes only 24 watts compared to 160 watts for equivalent fluorescent lighting.
Flexible Installation Options
LED strips bend around curves, fit into tight spaces, and mount virtually anywhere inside your RV. Their thin profile allows installation under cabinets, along ceiling edges, or behind furniture without requiring major modifications. Adhesive backing simplifies mounting on clean surfaces.
Temperature Tolerance
Quality RV LED strips operate reliably from -40°F to 185°F, handling extreme weather conditions encountered during travel. This temperature range exceeds most RV environments, ensuring consistent performance regardless of climate or season.
| Feature | LED Strips | Traditional RV Lights |
|---|---|---|
| Power Draw | 1.5W per foot | 15W per bulb |
| Lifespan | 50,000 hours | 2,000 hours |
| Heat Output | Minimal | High |
| Vibration Resistance | Excellent | Poor |
| Dimming Capability | Yes | Limited |
2. How Do You Choose the Right Voltage for Your RV System?
Voltage compatibility forms the foundation of successful LED strip installation in recreational vehicles. This is where many projects fail: mismatched voltages can damage expensive components or create safety hazards in confined RV spaces.
Most modern RVs operate on 12V DC systems, though some larger motorhomes incorporate 24V configurations for certain applications. Understanding your specific electrical setup prevents costly mistakes and ensures optimal performance from your LED lighting investment.
Identifying Your RV’s Electrical System
Check existing light fixtures, battery voltage ratings, and converter specifications to determine system voltage. Most travel trailers, fifth wheels, and Class B motorhomes use 12V systems exclusively. Larger Class A motorhomes may combine 12V DC for lighting with 24V for other systems.
12V vs 24V LED Strip Considerations
12V LED strips offer wider availability, lower costs, and simpler installation procedures. They connect directly to RV batteries through fuse boxes or existing light circuits. 24V strips provide slightly better efficiency over long runs but require voltage converters in most RV applications.
Voltage Drop Calculations
Longer LED strip runs experience voltage drop that reduces brightness and efficiency. Calculate maximum run lengths based on wire gauge and total current draw. Use thicker wires or add intermediate power connections for runs exceeding manufacturer specifications.
Power Supply Requirements
Dedicated LED drivers or direct battery connections provide stable power for strip lights. Avoid connecting to circuits powering motors or other high-draw devices that create voltage fluctuations. Install inline fuses rated at 125% of maximum strip current draw.
3. Which Waterproof Ratings Should RV LED Strips Have?
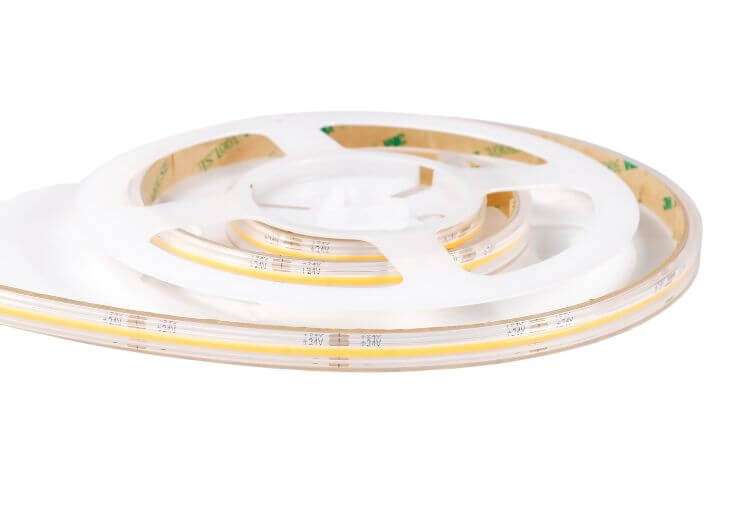
Moisture protection becomes essential in RV environments where humidity, condensation, and occasional water exposure threaten electronic components. Here’s the reality: inadequate waterproofing leads to premature failures and potential electrical hazards in mobile living spaces.
IP (Ingress Protection) ratings indicate protection levels against dust and water intrusion. RV applications typically require IP65 or higher ratings for areas exposed to moisture, while dry interior locations may accept IP20 rated strips with lower costs.
Understanding IP Rating Codes
IP ratings use two digits indicating protection levels. First digits (0-6) represent solid particle protection, while second digits (0-8) indicate liquid protection. IP65 strips resist water jets from any direction, suitable for most RV interior applications.
Critical Moisture Areas in RVs
Bathrooms, kitchens, and areas near windows require higher protection levels due to shower steam, cooking vapors, and condensation. Consider IP67 or IP68 rated strips for these locations, especially near sinks or shower areas.
Silicone Coating vs Channel Protection
Silicone-coated strips offer basic moisture protection suitable for general interior use. Aluminum channels with covers provide superior protection while improving heat dissipation and creating professional appearances. Channel systems allow easy strip replacement without removing adhesive residue.
Connector Waterproofing
Connections represent weak points in waterproof systems. Use heat-shrink tubing, silicone sealant, or waterproof connectors at all splice points. Avoid exposed copper connections that corrode in humid RV environments.
| IP Rating | Protection Level | RV Application |
|---|---|---|
| IP20 | Basic touch protection | Dry interior areas |
| IP44 | Splash resistant | General cabin areas |
| IP65 | Jet water resistant | Kitchens, near windows |
| IP67 | Temporary submersion | Bathrooms, wet areas |
| IP68 | Continuous submersion | Exterior applications |
4. What Installation Methods Work Best in RVs?
Proper installation techniques ensure LED strips remain secure during travel while providing easy access for maintenance and modifications. The secret lies in: choosing mounting methods that accommodate RV movement, vibration, and thermal expansion without compromising adhesion or electrical connections.
RV interiors present unique challenges including curved surfaces, limited access, and materials that may not accept standard adhesives. Professional installation approaches account for these factors while creating clean, reliable lighting systems.
Surface Preparation Requirements
Clean all mounting surfaces with degreasing agents to remove road film, cooking residue, and protective coatings that prevent adhesive bonding. Sand glossy surfaces lightly to improve adhesion. Allow surfaces to dry completely before applying strips.
Adhesive vs Mechanical Mounting
3M VHB tape provides superior holding power compared to standard adhesive backing on LED strips. Mechanical mounting using clips or channels offers removability but requires drilling holes in RV surfaces. Consider hybrid approaches combining both methods for maximum security.
Managing Wire Routing
Route power wires through existing cable paths when possible to maintain clean appearances. Use wire molding or raceways for exposed runs, securing every 12 inches to prevent movement during travel. Avoid routing near heat sources or moving components.
Dealing with Curved Surfaces
Many RV interiors feature curved walls and ceilings that challenge straight LED strip installation. Cut strips at designated points and use corner connectors to navigate curves smoothly. Flexible strips bend around gentle curves without cutting.
Access Planning
Plan installation routes that allow future access for repairs or modifications. Avoid permanently covering connections or controllers behind fixed panels. Mark wire locations for future reference.
5. How Much Power Do RV LED Strips Actually Consume?

Accurate power consumption calculations prevent battery drain issues and ensure adequate electrical capacity for your LED lighting system. What surprises most RV owners: even extensive LED strip installations consume less power than a single traditional light fixture.
Power requirements depend on strip length, LED density, brightness settings, and controller features. Understanding these variables helps design systems that balance illumination needs with available battery capacity.
Calculating Total Power Draw
Multiply strip length by watts per foot specifications to determine base power consumption. Add controller power draw (typically 1-3 watts) and factor in efficiency losses for dimming or color-changing features. Include safety margins of 20% for battery capacity planning.
Battery Capacity Considerations
Deep cycle batteries safely discharge to 50% capacity, effectively halving usable power for LED calculations. A 100Ah battery provides roughly 600 watt-hours of usable energy for LED strips drawing 50 watts continuously for 12 hours.
Comparing LED vs Traditional RV Lighting
Traditional RV lighting systems often draw 200-400 watts total, while comprehensive LED strip installations typically consume 50-100 watts for superior illumination. This 75% reduction extends boondocking time significantly.
Solar Panel Sizing
LED strip power consumption affects solar panel requirements for off-grid camping. A 100-watt solar panel easily supports 50 watts of LED strips during sunny conditions while maintaining battery charge for nighttime use.
| System Component | Power Draw (Watts) | Daily Usage (Hours) | Energy Required (Wh) |
|---|---|---|---|
| 32ft LED Strips | 48W | 6 hours | 288Wh |
| RGB Controller | 3W | 6 hours | 18Wh |
| Dimmer Switch | 1W | 1 hour | 1Wh |
| Total System | 52W | – | 307Wh |
6. Which Color Temperatures Create the Best RV Ambiance?
Color temperature selection dramatically impacts RV interior comfort and functionality throughout different times of day. Here’s what lighting professionals know: warm colors promote relaxation while cool colors enhance alertness and task performance.
Measured in Kelvin (K), color temperature ranges from warm yellows (2700K) to cool blues (6500K). Many RV owners benefit from tunable white strips that adjust color temperature based on activities and time of day.
Warm White Applications (2700K-3000K)
Warm white creates cozy, relaxing atmospheres perfect for evening activities, dining, and bedtime routines. These temperatures reduce blue light exposure that can interfere with sleep patterns during extended RV living.
Neutral White Benefits (3500K-4000K)
Neutral white provides balanced illumination suitable for general activities without being too stark or too warm. This range works well for main living areas where multiple activities occur throughout the day.
Cool White Advantages (5000K-6500K)
Cool white enhances alertness and color accuracy, making it ideal for reading, cooking, and detailed tasks. Morning use of cool white helps establish circadian rhythms when natural sunlight isn’t available.
Tunable White Technology
Tunable white LED strips combine warm and cool LEDs with controllers that adjust color temperature dynamically. Program automatic schedules that provide cool white during day and warm white at night for optimal comfort.
RGB Color Options
RGB strips offer full color spectrums for mood lighting and special occasions. While not practical for primary illumination, RGB accents create engaging atmospheres for entertainment and relaxation.
7. What Controllers and Dimming Options Work Best?

LED strip controllers determine functionality, ease of use, and integration with existing RV electrical systems. The game-changer is: selecting controllers that provide desired features while maintaining reliability in mobile environments.
Controller options range from simple on/off switches to sophisticated systems with smartphone apps, voice control, and automated scheduling. Choose features that match your usage patterns and technical comfort level.
Basic Switch Controls
Standard wall switches provide reliable operation with minimal complexity. Install dimmer switches rated for LED loads to prevent flickering and extend strip life. Look for switches designed for 12V DC operation rather than AC dimmers.
Remote Control Systems
IR or RF remote controllers offer convenience without requiring smartphone apps or internet connections. Choose remotes with adequate range for RV interiors and simple button layouts that work in dark conditions.
Smartphone App Integration
WiFi-enabled controllers provide advanced features including custom color programming, scheduling, and integration with smart home systems. Ensure controllers work without internet connections for off-grid camping.
Voice Control Compatibility
Alexa and Google Assistant compatibility adds hands-free convenience for RV lighting control. These systems require internet connections and compatible controllers with cloud-based features.
PWM vs Constant Current Dimming
PWM (Pulse Width Modulation) dimming works well for basic applications but may cause flickering with some LED strips. Constant current dimming provides smoother operation but costs more and requires compatible strips.
| Controller Type | Complexity | Features | RV Suitability |
|---|---|---|---|
| Wall Switch | Low | On/Off, Basic Dimming | Excellent |
| IR Remote | Medium | Colors, Brightness, Effects | Very Good |
| WiFi App | High | Full Control, Scheduling | Good (with internet) |
| Voice Control | High | Hands-free Operation | Fair (requires internet) |
8. How Do You Handle Wiring and Electrical Connections Safely?
Safe electrical practices become critical in RV environments where space limitations and vehicle movement create unique hazards. What many DIY installers miss: proper wire sizing, fusing, and connection techniques prevent fires and ensure reliable operation.
RV electrical systems require special attention to vibration resistance, moisture protection, and heat management. Following automotive wiring standards rather than residential practices ensures long-term reliability.
Wire Gauge Selection
Calculate wire gauge based on current draw and run length to prevent voltage drop and overheating. Use automotive primary wire rated for temperature extremes and vibration resistance. Avoid household electrical wire not designed for mobile applications.
Fuse Protection Requirements
Install fuses within 18 inches of power sources to protect against short circuits. Size fuses at 125% of maximum strip current draw. Use automotive blade fuses rather than glass tube fuses that break during vibration.
Connection Methods
Solder connections provide superior reliability compared to twist-and-tape methods. Cover all connections with heat-shrink tubing for moisture protection and strain relief. Avoid wire nuts that loosen during travel.
Grounding Considerations
Maintain proper grounding connections to RV chassis through existing ground points. Avoid creating ground loops that cause interference with electronic devices. Use star grounding configurations for multiple strip installations.
Circuit Protection
Install circuit breakers or fuses at main power sources and consider individual protection for each strip run. Label all circuits clearly for future troubleshooting and maintenance.
Professional vs DIY Installation
Complex installations involving multiple zones, controllers, and integration with existing RV systems may require professional installation. Simple single-strip installations typically work well for experienced DIY installers.
9. What Are the Best Mounting Locations Inside RVs?

Strategic LED strip placement maximizes illumination while minimizing installation complexity and potential damage during travel. The key insight: working with existing RV features rather than against them creates more professional results with better long-term reliability.
RV interiors offer numerous mounting opportunities that provide both functional lighting and aesthetic enhancement. Consider furniture layouts, ceiling heights, and daily usage patterns when planning strip locations.
Under-Cabinet Installations
Kitchen and bathroom cabinets provide excellent mounting locations for task lighting. Install strips toward the front edges to minimize shadows on work surfaces. Use aluminum channels to protect strips and create clean lines.
Ceiling Perimeter Lighting
Mounting strips along ceiling edges creates ambient lighting that makes spaces appear larger while providing general illumination. This location keeps strips away from potential damage while being easily accessible for maintenance.
Toe-Kick and Floor Lighting
Low-level lighting helps with nighttime navigation without disturbing sleeping occupants. Install strips under furniture toe-kicks or along floor edges using channels that protect against foot traffic.
Storage Area Illumination
Closets, pantries, and storage compartments benefit from motion-activated LED strips that automatically illuminate when doors open. Choose strips with integrated sensors or add separate motion controllers.
Reading and Task Areas
Install dedicated strips above beds, desks, and seating areas for focused lighting. Use warm white strips with dimming capability to reduce eye strain during extended reading sessions.
Accent and Mood Lighting
RGB strips behind TVs, around windows, or highlighting architectural features create engaging atmospheres for relaxation and entertainment. Keep accent lighting separate from functional lighting circuits.
| Location | Purpose | Recommended Type | Installation Notes |
|---|---|---|---|
| Under Cabinets | Task Lighting | Cool White, High CRI | Front-mounted for minimal shadows |
| Ceiling Perimeter | Ambient Lighting | Warm White, Dimmable | Use channels for clean appearance |
| Floor Level | Safety Lighting | Warm White, Motion | Protect from foot traffic |
| Storage Areas | Utility Lighting | Cool White, Motion | Battery-powered options available |
10. How Do You Maintain and Troubleshoot RV LED Strip Systems?
Regular maintenance and systematic troubleshooting approaches keep LED strip systems functioning reliably throughout years of RV travel. Here’s what experienced RV owners understand: proactive maintenance prevents small issues from becoming major problems on the road.
RV environments subject electrical systems to constant vibration, temperature changes, and moisture exposure that can cause gradual degradation. Scheduled inspections and preventive measures extend system life significantly.
Routine Inspection Procedures
Check connections monthly for signs of corrosion, loosening, or overheating. Look for dimming sections that indicate voltage drop or LED degradation. Verify that all mounting hardware remains secure after travel.
Cleaning and Care
Clean LED strips with soft, dry cloths to remove dust and cooking residue that reduces light output. Avoid harsh chemicals or excessive moisture that can damage protective coatings. Clean aluminum channels periodically to maintain heat dissipation.
Common Failure Modes
Connection failures represent the most common LED strip problems in RVs. Vibration loosens connections while moisture causes corrosion. Individual LED failures typically indicate manufacturing defects or excessive heat exposure.
Troubleshooting Procedures
Start troubleshooting with power source verification using multimeters to check voltage levels. Work systematically from power sources toward strips, checking each connection point. Isolate problems by testing individual strip sections.
Replacement Strategies
Keep spare strip sections and connectors for field repairs during extended trips. Choose systems with readily available replacement parts rather than proprietary components that require special ordering.
Warranty Considerations
Document installation procedures and maintain purchase records for warranty claims. Many LED strip failures occur within first year of operation, making warranty coverage valuable for quality systems.
Conclusion
LED strip lights transform RV interiors with energy-efficient illumination that extends battery life while creating comfortable living spaces. Successful installations require careful attention to voltage compatibility, waterproof ratings, and proper mounting techniques that withstand travel conditions.
Proper planning addresses power requirements, color temperature selection, and controller features that match your specific needs and technical comfort level. Quality components combined with professional installation techniques ensure years of reliable operation on the road.
Investing in appropriate LED strip systems pays dividends through reduced power consumption, extended battery life, and enhanced RV living experiences. Remember this: taking time to plan and install systems correctly prevents frustrations and safety issues during your travels.
FAQ
Q1: Can I install LED strip lights myself, or do I need professional help?
Basic LED strip installations work well for experienced DIY enthusiasts with electrical knowledge. Simple single-zone systems with direct battery connections typically present manageable projects. However, complex installations involving multiple controllers, integration with existing RV systems, or modifications to electrical panels benefit from professional installation. Always follow local electrical codes and manufacturer instructions regardless of installation approach.
Q2: How long do LED strip lights typically last in RV applications?
Quality LED strips designed for automotive/RV use typically last 30,000-50,000 hours under normal operating conditions. This translates to 10-15 years of typical RV usage patterns. However, extreme temperatures, poor installation practices, or low-quality components can reduce lifespan significantly. Proper heat management and quality power supplies maximize LED strip longevity in mobile applications.
Q3: Will LED strips work with my existing RV dimmer switches?
Most existing RV dimmer switches designed for incandescent bulbs don’t work properly with LED strips, causing flickering or complete failure. LED-compatible dimmers specifically designed for 12V DC operation provide smooth dimming performance. Replace incompatible dimmers or use LED strips with integrated controllers rather than attempting to adapt existing switches.
Q4: How much will a complete LED strip lighting system cost for my RV?
Complete LED strip systems for typical RVs range from $200-800 depending on coverage area, features, and quality levels. Basic single-color strips with simple controls cost less, while RGB systems with smartphone apps and multiple zones increase costs. Factor in additional expenses for controllers, mounting hardware, and professional installation if required. Quality systems provide better reliability and longer lifespans.
Q5: Can LED strips handle the vibration and movement of RV travel?
High-quality LED strips designed for automotive applications handle RV travel vibrations without problems when properly installed. Solid-state LED construction eliminates fragile filaments found in traditional bulbs. However, proper mounting techniques, secure connections, and vibration-resistant wiring prevent failures during travel. Avoid cheap strips not designed for mobile applications that may fail under stress.
