
Achieve Perfect Light Diffusion with aluminum Channels is essential for creating visually appealing and functional lighting environments. Light diffusion reduces glare, softens shadows, and ensures uniform light distribution, which is particularly important in both residential and commercial settings. Aluminum channels play a crucial role in this process by housing LED strips and diffusers that manage and enhance light output.
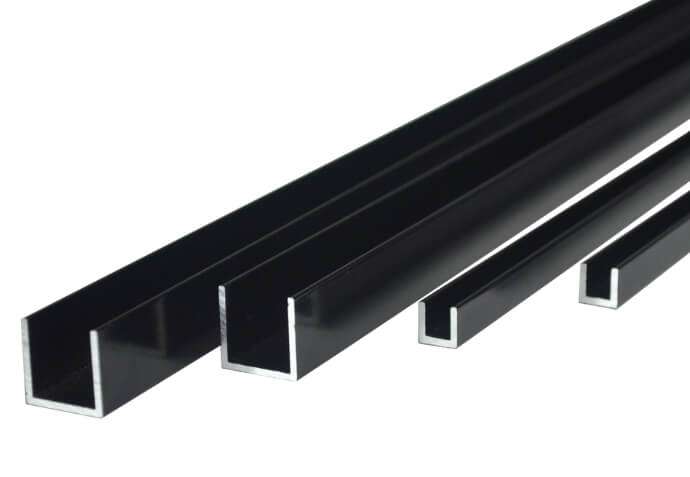
Aluminium channels not only protect LED strips from dust, moisture, and physical damage but also assist in heat dissipation and provide a sleek, professional finish to lighting installations. This article will delve into the benefits of light diffusion, the role of aluminium channels, and provide a comprehensive guide on how to achieve perfect light diffusion with aluminium channels.
Dive into this comprehensive guide to achieve perfect light diffusion with aluminium channels, exploring tips, techniques, and practical advice to enhance your LED lighting projects.
What is Light Diffusion?
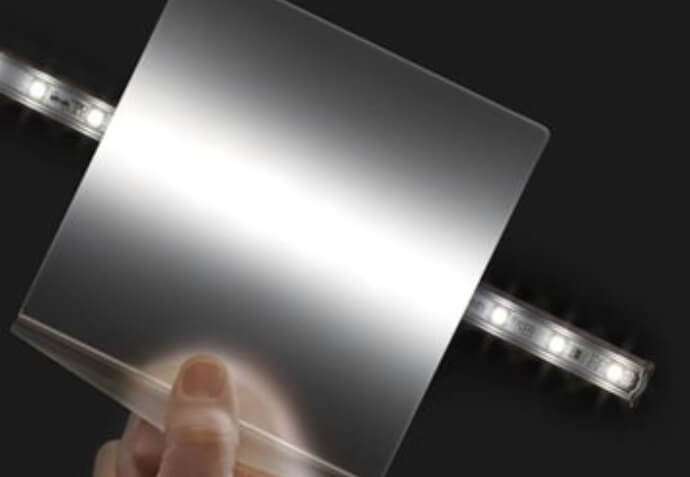
Light diffusion is the process of scattering light to reduce glare and distribute it more evenly across a surface. In lighting design, diffusion is achieved by using materials that spread the light from a source, creating a soft and uniform glow.
This technique is crucial for eliminating harsh shadows and bright spots, enhancing the visual comfort and aesthetic appeal of a space. Diffusers can be made from various materials, such as frosted glass, acrylic, or polycarbonate, and are often used in conjunction with LED lights to create a balanced and pleasant lighting environment.
The primary advantage of light diffusion is the ability to produce a soft, even light that reduces glare and eye strain. This is particularly important in areas where bright, direct light can be uncomfortable or distracting, such as in workspaces, kitchens, and living areas.
By diffusing light, the overall ambiance of a room is improved, creating a more inviting and comfortable atmosphere.
Additionally, diffused light can enhance the appearance of objects and surfaces by eliminating harsh shadows and highlighting details more naturally. This makes light diffusion an essential technique for both functional and decorative lighting applications.
Light Diffusion Challenges
Achieving perfect light diffusion can be challenging due to several factors:
- Hotspots and Shadows: Without proper diffusion, LED lights can produce hotspots (areas of intense brightness) and shadows, which can detract from the desired lighting effect.
- Inconsistent Light Distribution: Uneven light distribution can result from poorly designed diffusers or improper installation, leading to a less aesthetically pleasing outcome.
- Color Shifts: Some diffuser materials can alter the color temperature of the light, affecting the overall lighting ambiance.
Aluminum channels can help overcome these challenges by providing a stable structure for the LED strips and diffusers. They ensure that the diffusers are properly aligned and securely held in place, maintaining consistent light distribution.
Additionally, aluminum channels can improve heat dissipation, preventing the LED strips from overheating and ensuring long-term performance. By using high-quality diffusers and well-designed aluminum channels, you can achieve the perfect light diffusion for any lighting project.
Choosing the Right Aluminium Channels for Light Diffusion
Selecting the appropriate type of aluminum channel is essential for achieving optimal light diffusion.
Here are the main types of channels and their suitability for various applications:
- Recessed Channels: These channels are designed to be embedded into surfaces, creating a flush finish that integrates seamlessly with the surrounding architecture. Recessed channels are ideal for creating continuous lines of light without visible fixtures, making them perfect for under-cabinet lighting, ceiling coves, and wall niches. Their design helps ensure even light distribution and a sleek, modern look.
- Surface-Mounted Channels: These channels are installed directly onto surfaces using screws or adhesive backing. Surface-mounted channels are versatile and easy to install, making them suitable for a wide range of applications, including under cabinets, along walls, or as accent lighting. They provide good light diffusion when paired with appropriate diffusers and are ideal for retrofitting existing spaces without major modifications.
- Corner Channels: Specifically designed for 90-degree angles, corner channels are perfect for illuminating under-cabinet spaces, countertops, and the junctions between walls and ceilings. They help distribute light evenly along the corners and can create unique lighting effects in both residential and commercial settings.
- Pendant Channels: These channels hang from the ceiling and are often used in applications where overhead lighting is needed, such as over kitchen islands, dining tables, or workspaces. Pendant channels can provide direct and diffused lighting, depending on the choice of diffuser cover, and add an elegant, modern touch to the space.
Size and Compatibility
Choosing the right size of aluminum channel is crucial for ensuring a proper fit and optimal performance of your LED strips. Here are some guidelines:
- Width and Depth: The channel must be wide and deep enough to accommodate the LED strip and any diffuser or cover. Ensure there is enough space for proper air circulation to aid heat dissipation. Check the dimensions of your LED strips and compare them with the internal dimensions of the channels.
- LED Strip Type: Different LED strips have varying power ratings and physical sizes. Ensure the channel you choose is compatible with the type of LED strip you are using, whether it’s a standard single-color strip, RGB strip, or a high-power strip.
- Length: Aluminum channels are available in various lengths, typically ranging from 1 meter to 2.5 meters. Measure the installation area and choose the appropriate length. For longer runs, consider channels that can be seamlessly connected to avoid gaps in lighting.
Diffuser Materials
The choice of diffuser material significantly impacts the quality of light diffusion. Here are some common diffuser materials and their effects:
- Frosted Covers: Frosted diffusers are among the most popular choices for achieving smooth light diffusion. They scatter light effectively, reducing glare and eliminating hotspots. Frosted covers create a soft, uniform glow, making them ideal for both task and ambient lighting.
- Opal Covers: Opal diffusers offer a higher level of light diffusion compared to frosted covers. They produce a more diffused light, which is perfect for applications where an even softer light is desired. Opal covers are excellent for creating a gentle ambiance and reducing sharp shadows.
- Clear Covers: While clear diffusers do not offer significant light diffusion, they protect the LED strips and can be used in applications where direct, bright light is needed. Clear covers are suitable for areas where high visibility is required, such as workspaces or display lighting.
- Micro-Prismatic Covers: These diffusers use a prismatic pattern to scatter light, providing high-quality diffusion with minimal light loss. They are especially effective at reducing glare, making them ideal for offices and other spaces where visual comfort is critical.

By selecting the right type, size, and diffuser material for your aluminum channels, you can achieve perfect light diffusion tailored to your specific lighting needs.
Whether you aim for a soft, ambient glow or bright, focused illumination, the right combination of these elements will enhance the functionality and aesthetic appeal of your lighting setup.
Installation Guide for Achieving Perfect Light Diffusion
Achieving perfect light diffusion with aluminum channels begins with careful preparation. Follow these steps to ensure a smooth installation process:
- Measure the Area: Start by measuring the areas where you plan to install the aluminum channels. Use a tape measure to determine the exact lengths required. Mark these measurements on the channels using a pencil or marker.
- Mark the Installation Points: Use a level to ensure your markings are straight and even. Mark the locations on the surfaces where the channels will be mounted. These marks will guide you during the installation process.
- Prepare the Surfaces: Clean the surfaces where the channels will be installed. Remove any dust, grease, or debris to ensure a secure and lasting bond, whether using adhesive or screws. If you plan to use screws, also identify and mark the points where holes will be drilled.
- Gather Tools and Materials: Ensure you have all necessary tools and materials ready. This includes aluminum channels, LED strips, diffusers, measuring tape, a pencil, a level, screws, a drill, screwdrivers, adhesive (if needed), and a clean cloth.
Installing the Channels and Diffusers
With the preparation complete, you can proceed to install the aluminum channels and diffusers:
- Cut the Channels to Size: If needed, cut the aluminum channels to the required lengths. Use a hacksaw or miter saw for clean, precise cuts. After cutting, use a file to smooth any rough edges.
- Mount the Channels:
- Adhesive Mounting: Apply a strong adhesive to the back of the channels. Press the channels firmly onto the marked positions on the surfaces. Hold in place for a few seconds to ensure the adhesive bonds well.
- Screw Mounting: If using screws, drill pilot holes at the marked points. Align the channels with these holes and use screws to secure the channels firmly in place. Ensure the channels are straight and level.
- Attach Diffusers: Snap the diffuser covers onto the mounted channels. Ensure they fit snugly and evenly along the entire length of the channels. Diffusers help in spreading the light evenly and protecting the LED strips.
Placing and Securing the LED Strips
Proper positioning and securing of LED strips are crucial for achieving even light diffusion:
- Prepare the LED Strips: Measure the LED strips to match the lengths of the installed channels. If necessary, cut the strips at the designated cutting points to avoid damaging the LEDs.
- Peel and Stick: Most LED strips come with an adhesive backing. Peel off the protective layer and carefully place the LED strips inside the channels. Press them firmly to ensure they stick properly.
- Secure the Strips: If the LED strips don’t have adhesive backing or need extra security, use mounting clips or silicone adhesive to hold them in place within the channels.
- Check Alignment: Ensure the LED strips are aligned straight within the channels, with no bends or twists, to prevent uneven light distribution.
Wiring and Powering the LED Strips
Proper wiring and powering ensure consistent light diffusion and safe operation:
- Connect the LED Strips: Use connectors to join multiple LED strips if necessary. Ensure all connections are secure and correctly oriented, matching positive to positive and negative to negative terminals.
- Route the Wires: Neatly route the wires along the installation surfaces, using cable clips or adhesive cable holders to keep them organized and hidden. Avoid crossing wires over each other to prevent interference.
- Power Supply: Connect the LED strips to an appropriate power supply. Ensure the power supply matches the voltage and wattage requirements of the LED strips. Use a power adapter that fits snugly into the power outlet.
- Test the Installation: Before finalizing the setup, test the LED strips to ensure they light up correctly and evenly. Check for any sections that are dim or not working and troubleshoot as necessary.
- Finalize the Installation: Once the LED strips are functioning correctly, make any final adjustments to the placement of the channels and diffusers. Secure all connections and ensure everything is neatly arranged.
By following these detailed preparation and installation steps, you can achieve perfect light diffusion with aluminum channels, creating a beautifully illuminated and functional space.
Enhancing Light Diffusion
To create custom lighting effects and achieve perfect light diffusion with aluminum channels and diffusers, consider these advanced techniques:
- Directional Lighting: Position LED strips at different angles within the channels to direct light in specific patterns. This can create focal points or highlight architectural features.
- Layered Lighting: Combine direct and indirect lighting by placing aluminum channels in various locations. For example, install channels under cabinets for task lighting and along the ceiling for ambient lighting.
- Color Effects: Use RGB LED strips with clear diffusers to add vibrant color effects. Adjust the color to match the mood or theme of your space, enhancing the overall ambiance.
Combining Diffusers
Using multiple diffusers or layering materials can achieve unique light diffusion effects:
- Double Diffusion: Install two layers of diffusers in the channel. The first layer scatters the light, and the second layer further softens it, resulting in a very even and gentle glow.
- Mixed Materials: Combine different diffuser materials, such as frosted and prismatic, to balance diffusion and brightness. This technique can reduce glare while maintaining sufficient light output.
- Custom Shapes: Use diffusers with custom patterns or textures to create decorative lighting effects. These can add visual interest and make your lighting design stand out.
Smart Control Integration
Incorporate smart lighting systems to enhance light diffusion and control:
- Smart LED Controllers: Use smart controllers to adjust the brightness and color of your LED strips remotely. This allows you to fine-tune the light diffusion for different settings and activities.
- Voice Control: Integrate your LED lighting with voice assistants like Amazon Alexa or Google Assistant. This enables you to control the lighting with simple voice commands, adding convenience and flexibility.
- Automated Schedules: Set up schedules for your lighting system to automatically adjust throughout the day. This can optimize light diffusion based on natural light availability and your daily routine.


Routine Maintenance
Regular maintenance ensures your light diffusion setup remains effective and attractive:
- Cleaning: Dust and clean the aluminum channels and diffusers regularly to prevent dirt buildup that can affect light quality. Use a soft cloth and a mild cleaner.
- Inspecting Connections: Periodically check all electrical connections to ensure they are secure and free from corrosion. Tighten any loose connections to prevent flickering or intermittent lighting.
- Replacing Components: Replace any damaged or worn-out components, such as LED strips or diffusers, to maintain optimal performance and aesthetics.
Troubleshooting Light Diffusion Issues
Address common light diffusion problems with these solutions:
- Uneven Lighting: Ensure the LED strips are positioned correctly within the channels and that the diffusers are securely attached. Re-align any mispositioned components.
- Hotspots: Use thicker or double-layer diffusers to spread the light more evenly. Check for gaps or inconsistencies in the diffuser material that might cause concentrated light spots.
- Dim Areas: Verify that the power supply is adequate for the length and type of LED strips. Ensure all connections are secure and that the strips are not damaged or obstructed.
Conclusion
Achieving perfect light diffusion with aluminum channels enhances both the functionality and aesthetics of your lighting setup.
By implementing the tips and techniques discussed, you can create a beautifully illuminated space tailored to your needs.
Share your experiences and questions in the comments to foster a community of lighting enthusiasts and continue exploring innovative lighting solutions together.
