
1. What makes corner LED channel kits useful for DIY builds?
Corner LED channel kits are designed for 90-degree junctions, so they sit neatly where two surfaces meet. That could be under a kitchen wall cabinet, inside a retail display shelf, along a stair stringer, or behind a mirror frame. The aluminum body holds the strip, while corner LED channel accessories like diffusers and end caps soften the light and keep the assembly tidy.
Here’s the deal: bare LED tape is fast, but it often looks temporary. We often see installers struggle with adhesive failure on dusty MDF, heat buildup in narrow grooves, and visible LED dots on glossy surfaces. A channel kit gives the strip a stable base, and the benefits of LED strip corner profiles include reduced direct glare, better strip protection, and a cleaner finished look.
Three field examples make the value clear:
- A cabinet maker can add task lighting without visible tape edges.
- A display shelf supplier can ship pre-cut lit shelves with repeatable quality.
- An electrical contractor can reduce callbacks in hotel millwork projects.
| Corner LED Channel Part | Main Function | Business Benefit |
|---|---|---|
| Aluminum profile | Holds strip and transfers heat | Longer strip life |
| Milky diffuser | Softens LED points | Cleaner visual finish |
| End caps | Covers cut ends | Less rework on site |
| Mounting clips | Speeds installation | Lower labor cost |
| Pre-soldered cable | Reduces field wiring | Fewer wiring errors |
The video below gives a simple visual example of how concealed channel-based lighting can create a cleaner, more professional finish than exposed strip lighting.
Corner profiles also help with consistent beam shaping across multiple units. When you deliver many identical modules, the diffuser and profile selection ensure customers see the same appearance regardless of which strip bin or contractor completes the install. Specifying the exact profile and diffuser in your BOM reduces subjective decisions on site and limits non conformances.
2. How can you build under-cabinet corner lighting?
For projects that need LED strip corner channel under cabinet lighting, this is one of the most practical Creative DIY Projects with Corner LED Channel Kits because the profile hides neatly at the rear or front corner of the cabinet base. For task lighting, a 45-degree LED profile directs light toward the worktop instead of straight down, giving better coverage with less eye discomfort.
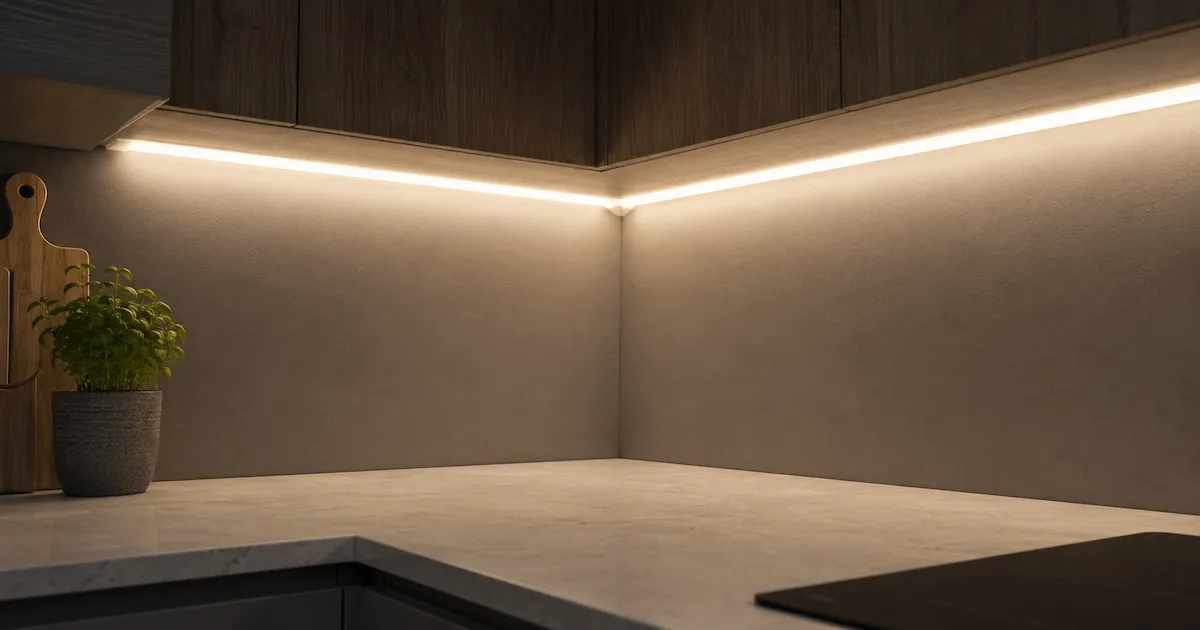
In a residential kitchen, use warm white 2700K or 3000K. In a clinic, lab counter, or food prep area, 4000K gives a cleaner working tone. For a hotel apartment project, 24V strips reduce voltage drop across longer runs.
A common field mistake is placing the strip too close to a glossy backsplash. The reflection shows dots even with a diffuser. Use a deeper channel or COB LED strip if the surface is reflective.
Basic build steps:
- Measure each cabinet segment separately.
- Cut the aluminum profile with a fine-tooth blade.
- Clean the mounting surface with alcohol.
- Feed cables through a hidden corner hole.
- Test polarity before fixing the diffuser.
| Under-Cabinet Option | Suggested Spec | Use Case |
|---|---|---|
| 2700K, 24V, CRI90 | Warm and premium | Hotel apartments |
| 3000K, 12V, CRI80 | Cost-friendly | Standard kitchens |
| 4000K, 24V, CRI90 | Neutral working light | Clinics and pantries |
| COB strip in channel | Dot-free effect | Glossy countertops |
Additions for quality control: label each run with length and strip batch, and include a simple commissioning checklist inside packing. If you preassemble modules, mark cable entry locations to match cabinet back panels. Also consider mechanical retention: a bead of silicone at end caps prevents them from rattling during transit.
3. How do display shelves benefit from corner LED channels?
Retail shelves need clean light without exposed hardware. Corner LED channel kits work well because they can sit at the rear vertical corner, the underside front corner, or the inside left and right sides of a shelf bay. The profile protects the strip from product contact, cleaning cloths, and vibration during transport.
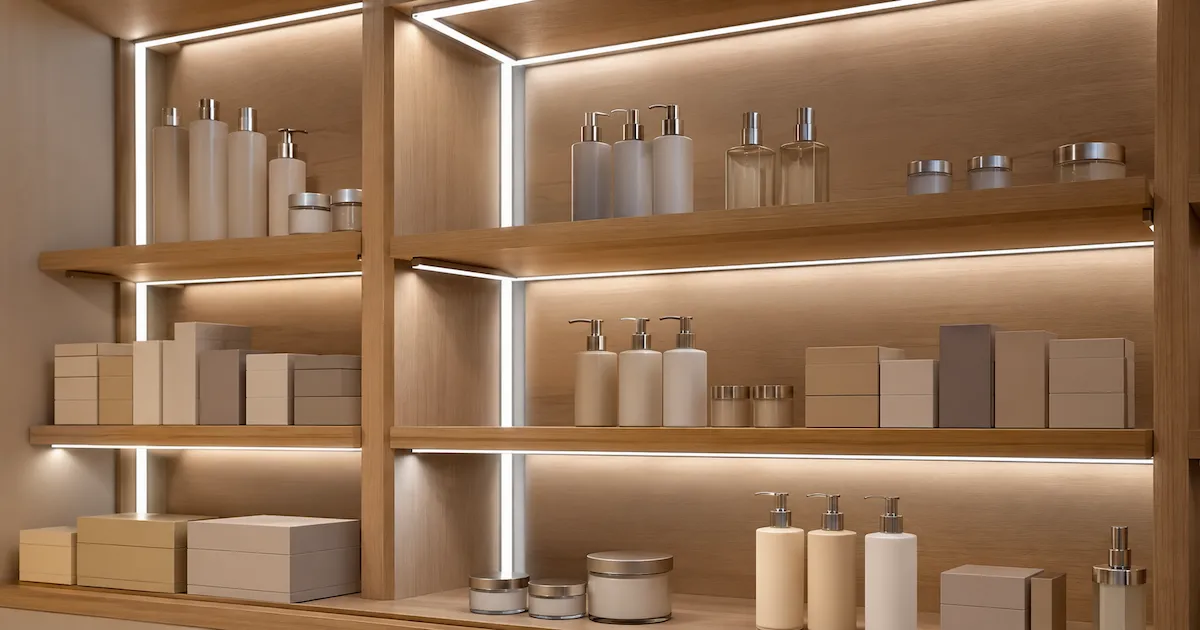
From our manufacturing floor perspective, shelf lighting projects often fail because the sample looks good, then mass production changes cable exit direction, LED bin, or profile depth. That causes inconsistent shelves. For furniture manufacturers and display suppliers, the best method is to define the kit as a repeatable module: same profile length, same cable length, same connector type, same CCT bin.
Good shelf project ideas include:
- Wine display shelves with 2700K CRI90 strips.
- Cosmetic display units with 4000K high color rendering.
- Tool wall displays with 5000K light for clear product edges.
Pro Tip from the VST Technical Team: “For display shelves, choose the diffuser after testing the product surface. Black packaging, glass bottles, and chrome tools all react differently to glare.”
| Display Type | Recommended CCT | Channel Position | Notes |
|---|---|---|---|
| Wine shelf | 2700K | Rear inside corner | Warm premium tone |
| Cosmetics | 4000K | Side vertical corner | High CRI helps color accuracy |
| Electronics | 5000K | Upper front corner | Crisp product outline |
| Jewelry | 3000K-3500K | Dual side corners | Use CRI90 or higher |
When designing for retail chains, include a fixture guide showing torque limits for clips, recommended driver models, and acceptable strip bins. That reduces field variation and makes in-store maintenance predictable.
4. How can you make stair and handrail lighting safer?
Stair lighting needs more than a nice glow. It helps people judge tread depth, see landings, and move safely at night. A LED stair profile can be fitted under stair nosing, along wall-to-step corners, or inside handrail grooves to guide movement more safely. The angled beam reduces direct glare while putting light where feet land.
But here’s the catch: stair systems face impact, cleaning, and long cable routes. Low-cost tape alone can peel or flicker after months. Use aluminum channels with firm clips, low-voltage drivers, and proper cable sizing.
When we tested this against a standard 12V strip on a long stair mock-up, the 24V version kept brightness more even from the start to the end of the run. Voltage drop matters because uneven stair brightness looks like a defect, even if the strip still works.
Practical stair ideas:
- Under-nosing lines for hotels and villas.
- Wall-corner guide lighting for cinemas.
- Handrail channel lighting for care homes or clubs.
| Stair Build Area | Risk If Done Poorly | Better Practice |
|---|---|---|
| Stair nosing | Direct impact damage | Recess profile or use firm clips |
| Wall corner | Uneven beam | Use 45-degree channel |
| Long stair run | Voltage drop | Use 24V and feed both ends if needed |
| Public space | Driver overload | Size driver with 20% headroom |
Add some user-safety tips: secure wiring away from foot traffic and provide a protective lip on exposed profiles. For public installations, use tamper-resistant screws and a documented maintenance schedule to check clips and drivers every 12 months.
5. How do mirror and vanity projects use corner channels?
Mirror lighting is a strong fit for Creative DIY Projects with Corner LED Channel Kits because a slim angle profile can be hidden behind the mirror edge or inside a frame corner. The goal is soft face lighting with no harsh dots. For hotel bathrooms, salons, and dressing rooms, color accuracy matters because people judge skin tone and fabric color under that light.
A reliable vanity build often uses 3000K or 4000K CRI90 LED strip, depending on the market. Warm white feels softer. Neutral white feels cleaner. If the mirror is close to water, select suitable sealing for the strip and place the driver in a dry, serviceable area.
Common Myth: Higher wattage always means better brightness.
Reality: Brightness depends on lumen efficiency, diffuser loss, channel depth, and heat control. A 10W/m strip with high efficiency can outperform a cheap 14W/m strip that runs hot and loses output quickly.
Three sample builds:
- Backlit mirror with corner channels around the rear frame.
- Side-lit dressing mirror with vertical 45-degree profiles.
- Salon station mirror with high CRI LED strips for accurate tones.
For bathroom applications, specify IP-rated strips and consider a moisture barrier between the mirror and wood frame. Also plan service access to the driver so the fixture can be serviced without removing the mirror.
6. What strip type, voltage, and driver should you choose?
The electrical choices decide whether a creative build stays reliable. For short projects under two meters, 12V may be fine. For cabinet rows, shelves, stairs, and commercial millwork, 24V is usually better because it reduces current and voltage drop. Pair the strip with a driver that matches total wattage, dimming method, and local safety rules.
Use the basic calculation: strip wattage per meter × total meters = load. Then choose a driver with spare capacity, usually around 20%. For example, five meters of 9.6W/m strip needs 48W. A 60W driver is a sensible choice.
COB strips are good for dot-free lines. SMD strips are cost-friendly and bright, but diode dots can show through shallow diffusers. High CRI strips cost more, yet they reduce complaints in retail, hospitality, and vanity projects.
| Specification Choice | 12V LED Strip | 24V LED Strip |
|---|---|---|
| Best run length | Short sections | Medium to long sections |
| Current level | Higher current | Lower current |
| Voltage drop risk | Higher | Lower |
| Driver availability | Very common | Common in projects |
| Best use | Small DIY modules | Cabinets, shelves, stairs |
Dimming compatibility: check PWM versus analog dimming for your chosen driver and controller. Some LED drivers produce audible noise when paired with incompatible dimmers. If you need smooth, flicker-free dimming for camera-heavy environments, spec constant current LED drivers that are rated for video use.
7. How should you cut, mount, and wire the kit?
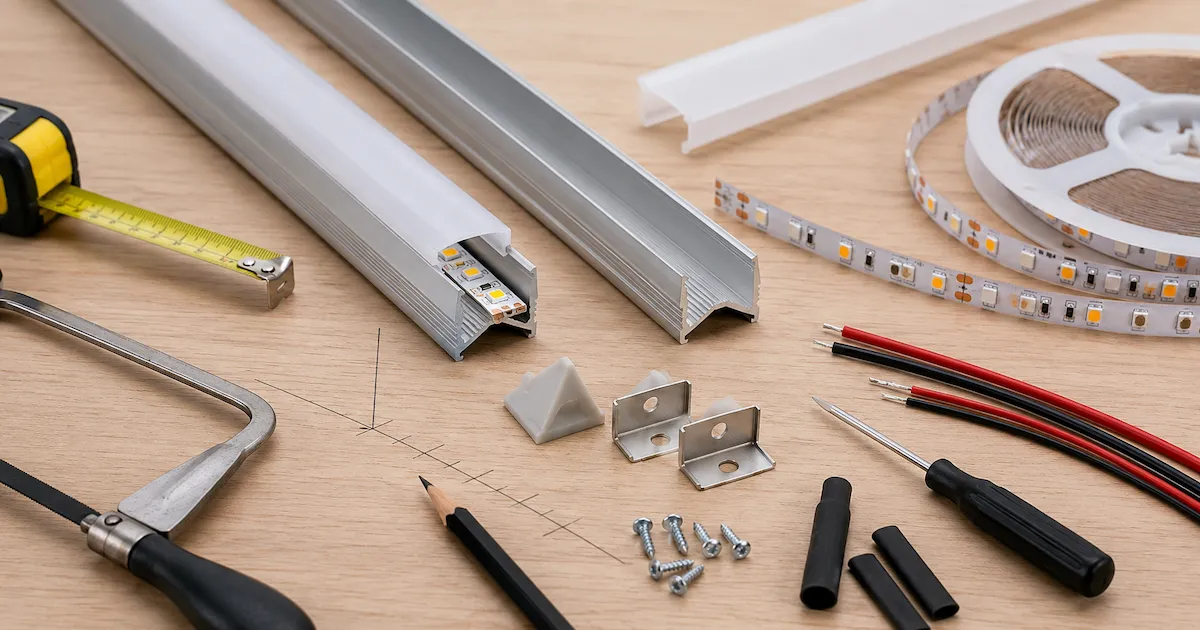
A clear corner LED channel installation guide matters because cutting and wiring are where many clean designs become messy. Start by marking channel length and strip cut points separately. Aluminum can be cut at any length, but LED strip must be cut only at marked copper pads. If those two points do not match, adjust the channel length or cable exit plan.
We once saw a project fail because an installer cut LED tape between copper pads, then tried to solder onto the damaged trace. The light flickered during handover, and the team had to remove the installed profile. That kind of rework costs far more than careful planning.
Use this practical checklist for Creative DIY Projects with Corner LED Channel Kits:
| Installation Step | What to Check | Why It Matters |
|---|---|---|
| Measure surfaces | Length, cable exit, obstacles | Prevents wrong cuts |
| Cut profile | Square ends, no burrs | Diffuser fits properly |
| Cut LED strip | Only at marked pads | Prevents dead sections |
| Solder or connect | Correct polarity | Avoids no-light faults |
| Test before mounting | Full run lit for 10 minutes | Finds faults early |
| Fit diffuser | No pinched cable | Keeps light line clean |
| Label wires | Zone and voltage | Helps later service |
Also consider strain relief at cable exits and protecting solder joints with heat-shrink tubing. When mounting to painted surfaces, test a small area with the adhesive first: some paints have low surface energy and need additional mechanical clips.
8. How do corner channels reduce heat and glare?
Heat and glare are the two silent enemies of LED strip projects. Aluminum profiles can work like LED heat sinks, pulling heat away from the LED PCB. Diffusers spread the light and protect the eye from direct diode points. The benefit is not only visual. Lower operating temperature supports longer LED life and more stable output.
In our lab tests using integrating spheres, thermal imaging cameras, and aging racks, a strip mounted in an aluminum channel generally runs cooler than the same strip stuck to painted wood. The exact difference depends on wattage, airflow, and profile size, but the pattern is consistent.
For glare control, depth matters. A shallow channel with a clear cover may show dots. A deeper profile with a corner LED diffuser softens the line but reduces lumen output. That trade-off must be tested with the actual surface.
Use these rules:
- Under 6W/m: slim channels can work.
- 9.6W/m to 14.4W/m: use stronger aluminum mass.
- Above 14.4W/m: check temperature under real mounting conditions.
| Profile Choice | Heat Control | Glare Control | Best Use |
|---|---|---|---|
| Slim corner channel | Basic | Medium | Decorative lines |
| Deep corner channel | Better | Better | Visible surfaces |
| Heavy aluminum profile | Strong | Depends on diffuser | High wattage strips |
| Clear diffuser | Lower loss | Low | Hidden task lighting |
| Milky diffuser | Some lumen loss | High | Visible light lines |
Practical note: when designing sealed semi-outdoor systems, allow for at least 10–15% extra thermal headroom because seals and silicone coatings reduce convective cooling.
9. What outdoor or semi-outdoor DIY projects can use these kits?
Corner LED channel kits can be used in semi-outdoor areas such as covered patios, balcony soffits, outdoor display boxes, and sheltered facade corners. The kit must match the exposure level. A normal indoor strip inside an aluminum profile is not a waterproof system. Moisture can still enter through end caps, cable exits, and joints. For covered outdoor projects, strips with a suitable Ingress Protection rating may be enough if the profile is protected from direct rain. For wet areas, use a fully sealed strip or a better housing design. Put the driver in a dry enclosure with proper ventilation and service access.
Creative semi-outdoor ideas include:
- Balcony corner glow lines for apartment projects.
- Covered bar counter lighting for hospitality spaces.
- Outdoor menu board side lighting.
- Facade recess lighting under canopies.
This is where it gets interesting: water protection often reduces heat transfer. A thick silicone sleeve can trap heat, so a lower wattage strip may last longer than a high-output sealed strip in a tight channel.
| Exposure Area | Suggested Strip Rating | Channel Note |
|---|---|---|
| Indoor dry | IP20 | Standard corner profile |
| Kitchen splash zone | IP54-IP65 | Seal cable exit carefully |
| Covered patio | IP65 | Avoid standing water |
| Direct rain | IP67-rated system | Use sealed housing plan |
| Coastal area | Higher corrosion care | Check screws and clips |
When installing near the coast, choose stainless or coated fasteners and consider sacrificial anodes or corrosion-resistant alloys for long life. Also plan maintenance intervals to check seal integrity and reseal joints if necessary.
10. How do you test, troubleshoot, and scale the project?
Testing should happen before the diffuser is snapped in and before the profile is fixed permanently. Power the full run, check brightness at both ends, inspect solder points, and let it run for at least 10 to 15 minutes. Touch the profile carefully to judge heat. If it becomes too hot to hold, reduce wattage, use a larger channel, or add airflow.
For small teams selling finished products, scaling means turning a DIY idea into a repeatable kit. Define the bill of materials, cable length, connector, CCT, voltage, driver model, packing method, and quality test steps. That protects your margin because each installer does not need to solve the same problem on site.
Use this troubleshooting guide:
| Problem | Likely Cause | Field Fix |
|---|---|---|
| One section dead | Wrong cut point or bad solder | Recut at pad and resolder |
| End looks dim | Voltage drop | Use 24V or feed both ends |
| LED dots visible | Shallow profile or clear cover | Use COB strip or milky diffuser |
| Strip peels off | Dust, heat, weak adhesive | Use channel clips and clean base |
| Driver buzzes | Wrong dimmer or overload | Match driver and dimming protocol |
| Color mismatch | Mixed LED batches | Use same bin for each project |
Scaling tip: include a one-page QC sheet with every kit that includes an on-off test, color sample, and measured length tolerance. This short document helps installers pass simple quality gates and reduces returns.
Conclusion
Creative DIY Projects with Corner LED Channel Kits can turn simple strip lighting into durable, repeatable, and professional linear lighting. The best results come from matching the channel depth, strip voltage, diffuser, driver, and mounting plan to the real site conditions. Good planning reduces glare, heat, wiring faults, and callbacks. If you are unsure about voltage drop, strip wattage, or profile size for a specific build, send your drawings to our engineering team. We’ll calculate it with you manually.
FAQ
Q1: What is a corner LED channel kit?
A corner LED channel kit is an angled aluminum profile system for LED strips. It usually includes the aluminum channel, diffuser, end caps, and mounting clips. It fits into 90-degree corners and helps create a clean, protected light line.
Q2: Are corner LED channel kits better than bare LED strips?
Yes, for most finished projects. Bare LED strips are faster to install, but channels improve heat transfer, protect the strip, hide wiring, reduce glare, and give a more professional appearance.
Q3: Should I use 12V or 24V strips in corner channels?
Use 12V for short runs and small modules. Use 24V for longer cabinets, shelves, stairs, and commercial millwork because it lowers current and reduces voltage drop.
Q4: Can corner LED channels be used outdoors?
They can be used in covered or protected outdoor areas if the strip, driver, cable exits, and housing match the moisture level. A channel alone does not make an indoor strip waterproof.
Q5: How do I avoid visible LED dots?
Use a deeper profile, a milky diffuser, or a COB LED strip. Also test the light against the final surface because glossy stone, glass, and metal can reflect dots more strongly.
