
Are you dealing with frustratingly dim LED strip lights that no longer deliver the bright, vibrant illumination you expect? This common issue affects many lighting professionals and can compromise the visual impact of carefully designed installations. LED strip brightness problems often appear gradually or suddenly after installation, leaving clients dissatisfied and contractors searching for solutions.
But here’s what many don’t realize – most dim LED strip problems stem from identifiable causes that professionals can diagnose and fix without complete replacement. This comprehensive guide explains the various reasons LED strips lose brightness and provides systematic approaches to restore them to optimal performance.
Whether you’re troubleshooting voltage drop issues in long runs, correcting power supply problems, resolving connection inefficiencies, or addressing heat dissipation challenges, we’ll cover all aspects of diagnosing and fixing dim LED strip lights for professional applications.
1. What Causes LED Strip Lights to Become Dim?
Before attempting repairs, understanding why LED strip lights become dim helps identify the correct solution approach. The surprising reality is that multiple factors can cause LED strip dimming, and proper diagnosis determines your repair strategy.
Common causes of dim LED strip lights:
- Insufficient power supply capacity
- Voltage drop across long LED strip runs
- Poor or loose connection points
- Heat accumulation and inadequate dissipation
- Controller or dimmer compatibility issues
- LED strip quality degradation over time
- Incorrect wiring configuration
- Physical damage to LED components
Different dimming patterns provide important diagnostic clues. For example, if your entire strip appears consistently dim, power supply issues are likely the culprit. If brightness gradually decreases along the strip’s length, voltage drop is the probable cause. When some sections are dim and others stay bright, it’s usually due to connection issues, learn how to fix dim LED strip light for consistent illumination.
| Dimming Pattern | Most Likely Cause | First Troubleshooting Step |
| Uniform dimness across entire strip | Insufficient power supply | Check power supply wattage rating |
| Gradual dimming from start to end | Voltage drop | Measure voltage at different points |
| Specific sections dim or flickering | Connection problems | Inspect connection points |
| Dimming after period of operation | Heat buildup issues | Check mounting surface and ventilation |
| Only works at certain brightness levels | Controller/dimmer compatibility | Test with different controller |
Accurate diagnosis requires systematic testing and observation. Professional lighting technicians should follow a methodical approach to identify the specific cause before attempting repairs.
2. How Do You Diagnose Power Supply Issues Causing Dim LED Strips?
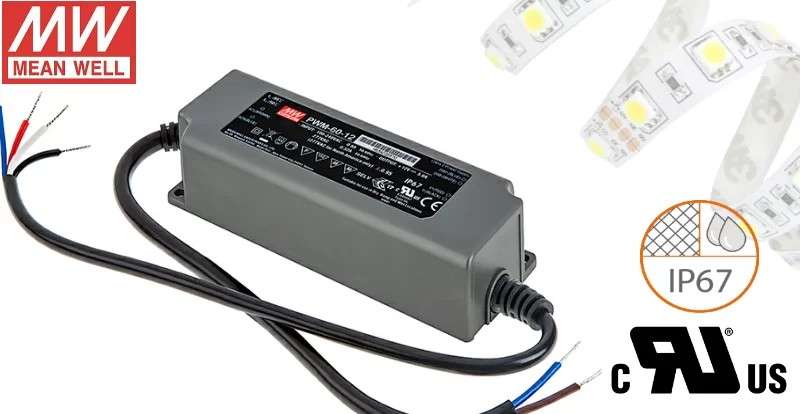
Power supply problems represent the most common cause of dim LED strip lights. What many installers overlook is that even slightly undersized power supplies can cause significant brightness reduction.
Essential power supply diagnostic steps:
- Calculate your LED strip’s total power requirements
- Verify your power supply’s wattage rating
- Measure actual voltage output from the power supply
- Check for power supply temperature issues
- Test with a known good replacement power supply
Start by calculating your LED strip’s actual power consumption. Most LED strips specify wattage per meter or foot (typically 4.4W to 18W per meter depending on density and type). Multiply this by your total installed length to determine total power requirements. For reliable operation, your power supply should provide at least 20% more wattage than this calculation.
Using a digital multimeter, measure the voltage output directly from your power supply terminals. For 12V systems, readings below 11.5V indicate problems; for 24V systems, readings below 23V suggest insufficient power. Remember that voltage should be measured under load conditions with the LED strips connected and powered on.
Common power supply issues and solutions:
| Power Supply Issue | Symptoms | Solution |
| Undersized wattage | Consistent dimness across entire installation | Replace with higher-wattage power supply |
| Voltage output too low | LEDs operate but with reduced brightness | Replace or adjust power supply voltage |
| Thermal shutdown | Dims after operating for a period | Improve power supply ventilation |
| Power supply degradation | Gradual brightness decrease over weeks/months | Replace aging power supply |
| AC input voltage fluctuation | Inconsistent brightness levels | Add voltage stabilizer or regulator |
When selecting a replacement power supply, always choose high-quality models from reputable manufacturers. Cheap, unbranded power supplies often deliver less power than their stated ratings and can fail prematurely, causing recurring dimness issues.
3. How Can You Fix Voltage Drop Issues in LED Strip Installations?

Voltage drop is particularly common in longer LED strip installations, causing the characteristic pattern of bright sections near the power source and progressively dimmer sections further away. Here’s a critical fact – every foot of LED strip and connecting wire creates resistance that reduces voltage along the circuit.
Identifying voltage drop symptoms:
- Gradual dimming from start to end of LED strip
- Color shifting (particularly in RGB strips)
- Last sections appearing significantly dimmer
- Uneven brightness across installation
- Problem worsens with longer strip lengths
To confirm voltage drop, use a multimeter to measure voltage at the beginning and end of your LED strip installation. A difference of more than 0.5V indicates significant voltage drop that requires remediation.
Effective voltage drop solutions:
- Implement parallel power injection: Connect additional power wires at multiple points along the strip rather than powering only from one end.
- Increase wire gauge: Use thicker wires (lower AWG number) to reduce resistance in power connections.
- Shorten LED strip runs: Divide long strips into shorter segments, each with direct power connections.
- Switch to higher voltage: Use 24V LED strips instead of 12V when possible, as they experience less voltage drop.
- Add power amplifiers: Install LED power repeaters or amplifiers for very long installations.
Parallel power injection represents the most effective solution for existing installations. This technique involves connecting additional power wires at strategic points along the strip length, typically every 5 meters for 12V strips or every 10 meters for 24V strips.
| Strip Voltage | Maximum Run Length | Recommended Power Injection Points | Minimum Wire Gauge |
| 12V Standard Density | 5 meters (16 ft) | Every 5m or less | 18 AWG |
| 12V High Density | 3 meters (10 ft) | Every 3m or less | 16 AWG |
| 24V Standard Density | 10 meters (33 ft) | Every 10m or less | 20 AWG |
| 24V High Density | 7 meters (23 ft) | Every 7m or less | 18 AWG |
| 5V Addressable | 3 meters (10 ft) | Every 3m or less | 14 AWG |
For new installations, consider using a centralized power distribution approach where the power supply connects to the middle of the LED strip rather than at one end. This immediately halves the maximum distance current must travel and significantly reduces voltage drop.
4. What Connection Problems Lead to Dim LED Strips and How Can You Fix Them?

Connection issues frequently cause LED strip dimming problems, particularly at joints between strips or where strips connect to power sources. The surprising truth is poor connections create resistance that reduces voltage and current flow, directly impacting brightness.
Common connection problems:
- Loose clip-on connectors
- Oxidized or corroded contact points
- Cold or poor solder joints
- Damaged connection pads on LED strips
- Incorrect polarity connections
- Incompatible connectors for strip type
Inspect all connection points visually first, looking for signs of damage, corrosion, or loose fitment. Pay particular attention to soldered joints that appear dull or grainy rather than smooth and shiny, which indicates a “cold solder joint” with high resistance.
Connection repair techniques:
- Replace clip-on connectors: Discard and replace any connectors showing signs of damage or poor contact.
- Re-solder problematic joints: Remove old solder, clean contact surfaces, and reapply fresh solder using proper technique.
- Clean connection points: Use isopropyl alcohol on a cotton swab to remove oxidation from copper pads.
- Apply contact enhancer: Use electronic contact enhancer on clip-type connections to improve conductivity.
- Secure loose connections: Add silicone adhesive to reinforce connections after electrical issues are resolved.
For critical installations, soldered connections generally provide better reliability than clip-on connectors. When soldering LED strip connections, use rosin-core solder specifically designed for electronics (60/40 or 63/37 tin/lead alloys work well) and limit soldering iron contact to 2-3 seconds to prevent heat damage to the strip.
| Connection Type | Advantages | Disadvantages | Best For |
| Soldered Joints | Highest reliability, lowest resistance | Requires technical skill and equipment | Permanent installations, critical applications |
| Clip-on Connectors | Quick installation, no tools required | Higher failure rate, looser connection | Temporary setups, frequent changes |
| Screw Terminal Blocks | Secure connection, easy maintenance | Bulkier appearance, more visible | Power distribution points, hidden locations |
| Press-fit Wire Connectors | Fast installation, moderate reliability | Limited current capacity, single-use | Simple home installations, budget projects |
For outdoor installations, apply heat-shrink tubing or silicone sealant over all connection points after repairs to prevent future corrosion from moisture exposure. This prophylactic step significantly extends connection lifespan in humid environments.
5. How Does Heat Affect LED Strip Brightness and How Can You Improve Heat Dissipation?

Heat accumulation represents a frequently overlooked cause of dim LED strip lights. Here’s what many professionals miss – LEDs produce less light output as their operating temperature increases, and excessive heat accelerates long-term degradation.
- Strips gradually dim after operating for 30+ minutes
- Brightness fluctuates with ambient temperature
- LED strip backing feels unusually hot to touch
- Strips in enclosed spaces appear dimmer
- Premature aging and failure of LED components
Heat-related dimming occurs when LED junction temperatures exceed optimal operating ranges. While LED strips can operate at various ambient temperatures, their internal components function best below 60°C (140°F). When this threshold is exceeded, brightness decreases and lifespan shortens dramatically.
Effective heat management solutions:
- Install aluminum channels/profiles: These metal housings act as heat sinks, drawing heat away from LED components.
- Apply thermal adhesive: Use thermally conductive mounting tape to transfer heat to mounting surfaces.
- Ensure proper ventilation: Avoid enclosed spaces without airflow for LED strip installations.
- Reduce power density: Run strips at less than 100% brightness when full output isn’t required.
- Add active cooling: For high-power installations, incorporate small fans in strategic locations.
Aluminum LED profiles provide the most effective passive cooling solution for most installations. These metal channels not only dissipate heat but also offer diffusion options to eliminate LED hotspots, creating more uniform illumination while extending strip lifespan.
| Heat Management Method | Cooling Effectiveness | Installation Complexity | Visual Impact |
| Standard Aluminum Channel | Good | Low | Clean, professional finish |
| Deep Aluminum Profile | Excellent | Medium | Slightly larger footprint |
| Thermal Adhesive Mounting | Moderate | Low | Invisible solution |
| Active Cooling (Fans) | Excellent | High | Visible components, potential noise |
| Reduced Power Operation | Good | None | Slightly lower brightness |
When selecting mounting surfaces, remember that thermal conductivity varies significantly. Metal surfaces provide superior heat dissipation compared to wood, plastic, or drywall. For installations on poor thermal conductors, aluminum channels become even more important for maintaining brightness and extending LED lifespan.
6. How Do You Address Controller and Dimmer Issues That Cause Dim LED Strips?
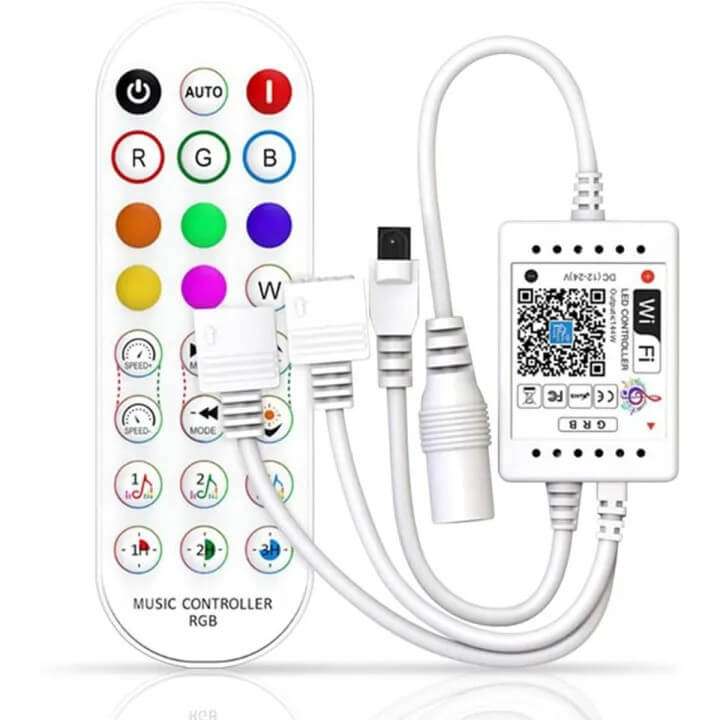
Controller and dimmer compatibility problems frequently cause LED strip dimming issues that technicians mistakenly attribute to the strips themselves. What most people don’t realize is that incompatible controllers can restrict current flow even at “maximum” settings.
- LEDs never reach full brightness regardless of settings
- Uneven dimming response across brightness range
- Flickering at certain brightness levels
- Different behavior with different controllers
- Dimming issues after controller/dimmer replacement
Modern LED controllers use various methods to regulate brightness, including pulse-width modulation (PWM), constant current reduction (CCR), and sine wave dimming. Not all methods work optimally with every LED strip type, creating compatibility issues that manifest as dimming problems.
Controller troubleshooting steps:
- Bypass the controller: Connect LED strips directly to power supply to determine if the controller is limiting brightness.
- Check controller specifications: Verify current and voltage ratings match your LED strip requirements.
- Test with alternative controller: Compare brightness using a different compatible controller.
- Update controller firmware: For smart controllers, ensure firmware is current to address known issues.
- Check for EMI interference: Move controllers away from potential interference sources like transformers or motors.
For wall-mounted dimmers, verify compatibility with LED loads specifically. Many older dimmers designed for incandescent lighting require minimum loads that exceed typical LED consumption, causing erratic behavior or dimness. Look for dimmers rated explicitly for LED compatibility with no minimum load requirement.
With RGB and RGBW strips, controller issues can cause specific color channels to appear dim while others function normally. In these cases, try isolating each color channel to identify if specific controllers or pathways are causing problems.
For professional integrators working with smart home systems:
Ensure your chosen controller supports the communication protocol used by your home automation system. Some integration issues can cause brightness limitations even when all components appear compatible on paper. Test standalone functionality before assuming hardware issues when troubleshooting within complex systems.
7. When Should You Replace LED Strip Components Rather Than Repair Them?

While many dimming issues can be resolved through repairs, certain situations warrant component replacement for optimal results. The key insight many miss is that determining whether to repair or replace requires evaluating both technical feasibility and economic practicality.
Indicators that replacement may be necessary:
- Physical damage to LED strip PCB or components
- Significant age-related degradation (2+ years of continuous use)
- Water damage from moisture intrusion
- Burnt components from electrical surges
- Multiple repair attempts without improvement
LED strips experience natural light output degradation over time, known as lumen depreciation. Quality strips maintain approximately 70% of their original brightness after 50,000 hours of operation (LM-70 rating). If your strips have exceeded this lifespan, replacement often proves more cost-effective than repeated repair attempts.
Cost-benefit analysis for repair vs. replacement:
- Consider labor costs: Complex repairs requiring extensive disassembly may cost more than replacement components.
- Evaluate performance expectations: Critical applications requiring consistent brightness may warrant replacement over repair.
- Assess technological improvements: Newer LED strips often offer better efficiency and features than older models.
- Factor in reliability needs: High-reliability applications may justify new components rather than repaired ones.
- Consider warranty implications: Repairs may void remaining warranties on integrated systems.
When replacing components, take the opportunity to upgrade critical aspects of your installation. Consider moving to higher voltage systems (24V instead of 12V), installing better heat management solutions, or implementing power redundancy for critical applications.
| Component | Typical Lifespan | Replace When | Upgrade Consideration |
| LED Strip | 30,000-50,000 hours | Below 70% original brightness | Higher CRI, better efficacy |
| Power Supply | 3-5 years | Unstable voltage output | Higher wattage, better regulation |
| Controller | 2-4 years | Unreliable operation | Smart integration, better dimming |
| Connectors | 1-3 years | Visible corrosion or damage | Higher quality, better strain relief |
| Wiring | 5-10 years | Brittle insulation, oxidation | Larger gauge, silicone insulation |
For partial replacements within existing installations, carefully match new components with remaining ones. LED strips can vary significantly in color temperature and brightness between manufacturing batches, even from the same supplier. When appearance consistency matters, consider complete replacement rather than sectional repairs.
8. What Tools and Equipment Do You Need for LED Strip Repair?

Properly equipping yourself for LED strip repairs ensures more successful outcomes and prevents additional damage during the repair process. Here’s what professionals understand – having specialized tools for LED work saves time and improves repair quality.
Essential diagnostic tools:
- Digital multimeter with DC voltage and resistance measurement
- Non-contact voltage detector for safely checking live circuits
- LED tester tool for checking individual components
- Infrared thermometer for identifying hot spots
- Magnifying glass or loupe for inspecting small components
For connection repairs, a quality soldering station with temperature control provides the foundation for reliable work. Choose a station with adjustable temperature between 300-350°C (570-660°F) and multiple tip options for different connection sizes. Cold heat soldering tools should be avoided for LED work as they frequently create unreliable connections.
Connection repair toolkit:
- Temperature-controlled soldering iron (30-40 watts recommended)
- Fine-tip tweezers for holding small components
- Precision wire cutters and strippers for 20-24 AWG wire
- Assortment of heat shrink tubing in various diameters
- Rosin-core solder (60/40 or 63/37 alloy, 0.5-0.8mm diameter)
- Flux pen for improving solder flow
- Solder wick for removing excess solder
- Isopropyl alcohol (91%+) for cleaning connections
- Anti-static work mat to prevent ESD damage
Additionally, maintaining a stock of common replacement components speeds repair work and reduces downtime. Consider creating a kit with various connectors, wire gauges, power distribution blocks, and small sections of compatible LED strips for patch repairs.
Safety equipment:
Never overlook safety when working with electrical components. At minimum, keep these safety items readily available:
- Safety glasses to protect against solder splatter
- Small fire extinguisher rated for electrical fires
- Silicone work mat for heat resistance
- First aid kit for minor burns or cuts
- Proper ventilation equipment when soldering
For consistent professional results, invest in a work area with proper lighting, preferably with adjustable position and color temperature. Neutral white lighting (4000K-5000K) provides the most accurate color rendering for detecting subtle issues with LED components.
9. How Can You Prevent LED Strip Dimming Issues in Future Installations?

Implementing preventative practices during installation significantly reduces future dimming problems and extends LED strip lifespan. The industry secret is that proper planning and component selection eliminates most problems before they begin.
Prevention strategies for new installations:
- Oversize power supplies by at least 20% beyond calculated requirements
- Select appropriate wire gauge for current requirements
- Install aluminum profiles or channels for heat dissipation
- Use parallel power injection for runs exceeding 5 meters
- Select quality components from reputable manufacturers
- Implement power redundancy for critical installations
When designing new installations, segmenting LED strips into manageable zones not only prevents dimming issues but also simplifies future maintenance and troubleshooting. Consider creating multiple parallel circuits rather than one long series when covering large areas.
Design considerations for optimal brightness:
- Voltage selection: Choose 24V systems over 12V for runs exceeding 5 meters.
- Power distribution: Place power supplies centrally rather than at ends of long runs.
- Circuit segmentation: Create multiple independent circuits with separate power supplies.
- Loading margins: Keep power supplies below 80% of rated capacity for longevity.
- Environmental factors: Account for ambient temperature in installation environment.
Documentation proves invaluable for maintenance and troubleshooting. Create detailed wiring diagrams showing power injection points, controller locations, and connection types. Include component specifications and supplier information for future reference or replacement needs.
| Installation Aspect | Best Practice | Common Mistake | Long-term Benefit |
| Power Supply Selection | 30% capacity buffer above requirements | Sizing exactly to calculated load | Prevents heat buildup and voltage sag |
| Wire Gauge | Size for <3% voltage drop | Using thin wire for convenience | Maintains consistent voltage delivery |
| Mounting Surface | Aluminum channel or heat-conductive surface | Direct attachment to insulating materials | Extends LED lifespan through heat management |
| Connection Method | Soldered connections or quality connectors | Cheapest available clip connectors | Prevents resistance buildup and connection failure |
| Circuit Design | Multiple parallel circuits with direct power | Single long series-connected installation | Isolates potential failures and simplifies maintenance |
Regular maintenance schedules extend installation lifespan and maintain optimal brightness. Establish quarterly inspection protocols to check connection integrity, power supply performance, and heat management effectiveness before brightness issues develop.
10. What Advanced Troubleshooting Techniques Help Diagnose Persistent Dimming Problems?

When standard troubleshooting doesn’t resolve dim LED strip issues, advanced diagnostic techniques can identify complex or intermittent problems. Few people recognize that systematic isolation testing often reveals issues that visual inspection misses.
Advanced diagnostic approaches:
- Segmented power testing
- Signal path tracing
- Thermal imaging analysis
- Oscilloscope testing for PWM signal integrity
- Load simulation testing
- Extended duration monitoring
Segmented power testing helps isolate whether dimming occurs due to the LED strip itself or its power delivery system. Disconnect the original power source and test small strip segments with a laboratory power supply set to the exact operating voltage. This eliminates variables related to power supply quality or wire resistance.
For complex integrated systems:
- Isolate subsystems: Test each section independently to locate problem areas.
- Monitor voltage at multiple points: Record readings under various load conditions.
- Check for ground loops: These can cause subtle brightness issues in complex installations.
- Test for EMI interference: Use EMI meters to detect sources affecting control signals.
- Verify signal integrity: Ensure digital control signals maintain proper voltage levels.
For installations with dimming controllers, an oscilloscope provides valuable insights into PWM signal quality. Improper PWM frequencies or inconsistent duty cycles can cause perceived dimming even when components otherwise function correctly. Most quality LED strips operate best with PWM frequencies above 300Hz to avoid visible flickering.
Environmental factors occasionally cause intermittent dimming issues. Monitor and log temperatures, humidity levels, and operating times alongside brightness measurements to identify patterns. Some installations may experience dimming only under specific environmental conditions or after specific operating durations.
For installations with remote power supplies, voltage drop across long supply lines frequently causes dimming. Measure voltage at both the power supply output and at the LED strip input under full load conditions to identify transmission losses requiring correction.
FAQ
Q1: Why do my LED strips appear dim at the end of long runs?
This common issue results from voltage drop, where resistance in the strip and wires causes decreasing voltage along the run. As LEDs receive less voltage than required, they produce less light. Fix this by implementing parallel power injection, where you connect power wires at multiple points along the strip rather than just at one end. For 12V strips, add power connections every 5 meters; for 24V strips, every 10 meters. Alternatively, consider using higher-gauge wires or switching to 24V LED systems for longer runs.
Q2: Why did my LED strips suddenly become dim after working fine for months?
Sudden dimming after extended reliable operation typically indicates power supply degradation or connection problems. First, test your power supply’s output voltage under load to ensure it still delivers proper voltage. Next, inspect all connection points for signs of oxidation, corrosion, or loosening that increases resistance. Heat accumulation can also damage components over time, particularly in enclosed spaces without ventilation. In some cases, the LED chips themselves may have degraded from extended operation beyond their rated lifespan, especially in high-temperature environments.
Q3: Can using the wrong dimmer cause permanent damage to LED strips?
Yes, incompatible dimmers can cause permanent damage to LED strips. Traditional TRIAC dimmers designed for incandescent lights may cause flickering, inconsistent brightness, premature failure, or even immediate damage to LED drivers and strips. Always use dimmers specifically rated for LED compatibility, ideally from the same manufacturer as your LED controller or driver. For best results, choose constant voltage PWM dimmers designed for the specific voltage of your LED system (12V or 24V). If uncertain, consult with a lighting professional before installing dimming systems.
Yes, premium LED strips typically maintain brightness longer than budget options due to several quality factors. Higher-grade LEDs feature better binning (selection process), more precise manufacturing tolerances, superior phosphor application, and better thermal management characteristics. Premium strips often use higher-grade PCB materials with thicker copper traces that reduce resistance and heat buildup. While budget strips might advertise similar initial brightness, premium options typically maintain 70% of original brightness (L70 rating) for 50,000+ hours versus 20,000-30,000 hours for budget alternatives. For professional installations where reliability and consistent performance matter, the investment in quality strips typically pays dividends through reduced maintenance and replacement costs.
Q5: How can I test if my power supply is causing LED strip dimming?
To determine if your power supply causes dimming, perform this systematic test: First, use a digital multimeter to measure voltage output directly at the power supply terminals under load (with LEDs connected and on). For 12V systems, readings should be 11.5-12.6V; for 24V systems, 23-25.2V. Next, measure voltage at the LED strip’s connection point—significant difference between these readings indicates wire resistance issues. Finally, temporarily replace the suspect power supply with a known good one of equal or higher wattage. If brightness improves with the replacement, your original power supply requires service or replacement. For conclusive testing, ensure you’re using a power supply with at least 20% more capacity than your LED strip’s total power requirement.
Conclusion
Fixing dim LED strip lights requires systematic diagnosis and targeted solutions based on specific causes. By carefully evaluating power supply issues, voltage drop, connection problems, heat management, and controller compatibility, most dimming problems can be successfully resolved without complete system replacement.
For professional installers and lighting technicians, understanding these diagnostic principles and repair techniques allows for more efficient troubleshooting and higher customer satisfaction. Remember that preventative measures during initial installation provide the most cost-effective approach to maintaining optimal LED strip brightness throughout the system’s lifespan.
If troubleshooting fails or you face complex dimming issues, seek help from technical support specialists who provide professional diagnostics for commercial LED lighting systems.
