
Many buyers and installers run into the same problem. A strip looks simple, but poor product matching leads to dim ends, color mismatch, adhesive failure, overheating, and callbacks. If you want to avoid these issues, understanding led light strips how to use them properly makes all the difference. That means wasted labor, project delays, and unhappy clients.
The fix is not complicated, but it does require a method. In our lab tests using integrating spheres and thermal checks, we see that correct planning matters more than fancy features.
This article explains how to use LED light strips in a way that supports lighting quality, installation efficiency, and long-term reliability.
1. What should you decide before using LED light strips?
You should define the purpose before opening the reel. That sounds basic, yet we often see installers struggle with strips chosen for the wrong task. Accent lighting under cabinets needs different brightness than shelf lighting in retail displays.
Cove lighting in a hotel corridor has different diffusion needs than task lighting in a workshop. Outdoor signage needs weather resistance that an indoor dry-location strip cannot provide.
Start with five decisions:
- What is the lighting goal: accent, task, decorative, or signage?
- What environment will it face: dry, humid, dusty, or outdoor?
- What length is required per run?
- Will dimming or color change be needed?
- What mounting method is planned: direct stick, profile, or recessed channel?

Here is where it gets interesting.
A strip that works perfectly in a 2-meter display case can fail badly in a 15-meter architectural run because of voltage drop and heat buildup. From our manufacturing floor perspective, many problems begin at specification stage, not installation stage.
| Planning Item | What to Check | Why It Matters |
|---|---|---|
| Application | Accent, task, display, facade | Determines brightness and beam effect |
| Environment | Indoor, bathroom, outdoor | Affects IP rating and material choice |
| Run Length | Short or long continuous run | Impacts voltage drop and power feed design |
| Control | On/off, dimming, RGB, smart control | Determines controller and driver selection |
| Mounting | Surface, aluminum profile, recessed | Impacts heat dissipation and finish |
A clear use case reduces rework. That directly protects margin and schedule.
2. How do you choose between 12V and 24V LED strip lights?
Voltage selection changes the whole installation plan.
Common Myth: higher voltage always means brighter light.
Reality: brightness depends on LED density, chip efficiency, power design, and optical setup. Voltage mainly affects current flow, cut length, and how long a run can stay uniform.
When we tested this against a standard 12V strip, the 24V version kept more stable brightness over longer distances. That makes 24V a practical choice for longer architectural runs, retail shelving, and cove lighting.
Yet 12V still makes sense for short sections, compact products, vehicles, and tight cutting intervals.
Three field examples make this clear:
- A jewelry display needed short, exact cuts. 12V was easier.
- A hotel corridor cove used 24V to reduce visible dimming at the far end.
- A furniture maker used 12V inside compact cabinets where driver space was limited.
| Feature | 12V Strip | 24V Strip |
|---|---|---|
| Best Use | Short runs, tight cut points | Longer runs, better uniformity |
| Voltage Drop Risk | Higher on long runs | Lower on long runs |
| Cut Length | Usually shorter | Usually longer |
| Current | Higher for same power | Lower for same power |
| Typical Projects | Cabinets, displays, vehicles | Commercial linear lighting, coves |

Our Chief Engineer notes that many avoid 24V because they assume it is harder to use. It is not. It simply needs the right power supply and control setup.
3. How much brightness and color should a strip have?
This is where many projects go wrong. People ask for watts, but the better question is lumens per meter and color quality. A 14.4W/m strip is not automatically better than a 9.6W/m strip if the LED efficacy and thermal performance are poor.
What’s the real story? The user sees light output, consistency, and comfort, not just input power.
For practical use, think in layers:
- Accent lighting often works in lower lumen ranges.
- Task lighting needs stronger, more even output.
- Display lighting may need high CRI for true product color.
- Hospitality projects often prefer warm white for comfort.
- Offices and utility zones often choose neutral white.
In our lab tests using integrating spheres, CRI and color consistency often separate acceptable products from reliable ones. We explain this because ignoring binning and color tolerance can lead to visible mismatch across hotel corridors or retail shelves.
| Application | Suggested Output | Common CCT | Recommended CRI |
|---|---|---|---|
| Cabinet accent | 300–600 lm/m | 2700K–3000K | 80+ |
| Under-shelf retail | 700–1200 lm/m | 3000K–4000K | 90+ |
| Task lighting | 1000–1600 lm/m | 4000K–5000K | 80+ |
| Hospitality cove | 600–1000 lm/m | 2700K–3000K | 90+ |
| Signage/backlighting | Project dependent | 6500K or RGB | 80+ |
Three examples: bakery shelves need warm high-CRI light, apparel displays need faithful color, and workshop benches need stronger neutral white output. Use purpose, not guesswork.

4. Where can LED light strips be used effectively?
LED strip lights are flexible, but they are not universal. Good results come from placing them where linear light solves a real problem. We once saw a project fail because a low-density strip was used in a visible cove without diffusion.
The dots were obvious, and the client rejected the finish.
Practical usage scenarios include:
- Kitchen under-cabinet lighting for task visibility
- Retail shelf lighting to highlight products evenly
- Hotel cove lighting for soft ambient effect
- Mirror backlighting in bathrooms with proper IP protection
- Signage, furniture, display cases, and exhibition booths
But there’s a catch. Surface reflectivity, viewing angle, and distance to diffuser all change the visual result. In a luxury hotel lobby, a COB strip or high-density SMD strip inside an aluminum profile often gives better continuous light.
In a warehouse workstation, a more utilitarian strip focused on lumen output may be enough. For outdoor facade lighting, UV resistance, ingress protection, and stable mounting become much more serious concerns.
| Use Case | Best Strip Type | Key Note |
|---|---|---|
| Cabinet lighting | 12V/24V single color | Good for short focused runs |
| Cove lighting | 24V high-density or COB | Better uniformity |
| Retail display | High CRI strip in profile | Product colors matter |
| Bathroom mirror | Moisture-resistant strip | Match IP rating to zone |
| Outdoor signage | IP65/IP67 strip | Check connectors and sealing |
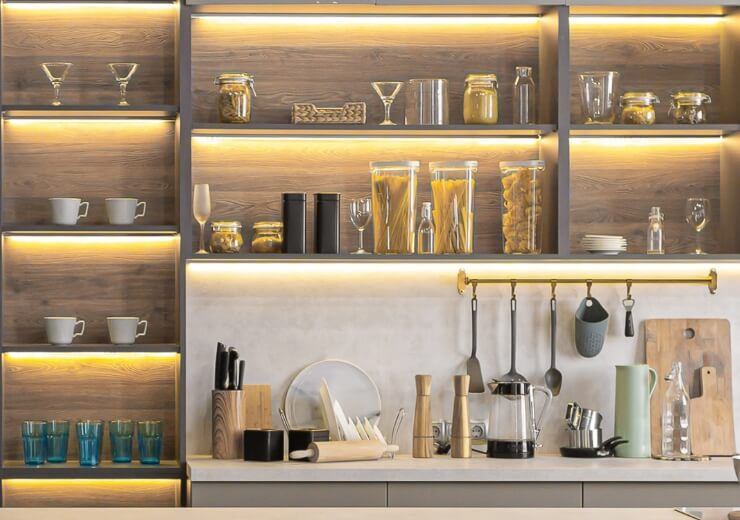
Use the strip where linear light is an advantage, not just because it is easy to buy.
5. How should you install LED light strips for reliable results?
Installation quality decides service life. We often see installers struggle with two basics: dirty mounting surfaces and weak power planning. Even a good strip can peel off, run hot, or show uneven brightness if these details are ignored.
A reliable installation sequence looks like this:
- Clean and dry the surface thoroughly
- Confirm voltage and polarity before energizing
- Dry-fit the strip and profile before removing adhesive liner
- Cut only at marked cutting points
- Use soldered or rated connectors correctly
- Test the full run before final closing or sealing
- Add aluminum profile where heat or appearance matters
This is where it gets expensive if mistakes happen. Reopening joinery, ceiling coves, or sign cabinets costs far more than doing one careful pre-test. From our manufacturing floor perspective, heat dissipation is one of the most ignored issues in strip applications.
| Installation Step | Good Practice | Risk if Ignored |
|---|---|---|
| Surface prep | Remove dust, oil, moisture | Adhesive failure |
| Power check | Match driver voltage and load | Flicker or damage |
| Cutting | Cut on marked lines only | Dead sections |
| Connection | Use proper connectors/soldering | Loose contact, heating |
| Heat management | Use aluminum profile | Reduced lifespan |
| Final test | Run full section before closure | Costly rework |
Pro Tip from the VST Technical Team: if the strip is above 10W/m and in a confined channel, treat heat control as part of the electrical design, not an afterthought.
6. How do controllers, dimmers, and drivers fit into the system?
A strip alone does nothing. It needs the right power and, if required, the right control path. Many failures blamed on strips are actually driver or controller mismatches. For example, a constant-voltage strip paired with a poor-quality dimmer may flicker at low output.
An overloaded driver may run hot and shut down. An RGB strip with the wrong controller may show color instability.
The practical system chain is simple:
- Mains input
- Power supply or LED driver
- Optional dimmer or controller
- LED strip load
For white strips, common control methods include simple PWM dimming and smart control interfaces. For RGB, RGBW, or tunable white, channel compatibility matters. We once saw a retail installation where the driver capacity looked acceptable on paper, but no headroom was added. The driver ran at near full load all day and failed early.
| Component | What It Does | Common Error |
|---|---|---|
| Power supply | Converts mains to low voltage DC | Wrong voltage |
| Dimmer | Adjusts brightness | Incompatible dimming method |
| RGB controller | Manages color channels | Wrong channel count |
| Amplifier | Extends control for longer loads | Omitted on large systems |
| Sensor/smart module | Automation or app control | Signal mismatch |
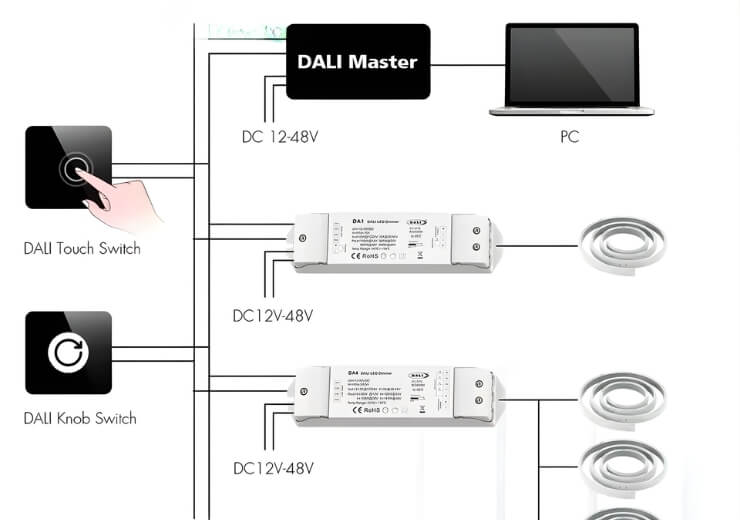
A good rule is to keep at least 20% power headroom. That improves thermal stability and reduces nuisance failures.
7. How do you handle run length, voltage drop, and power injection?
Long runs are the classic trap. A strip may light up from one end, but that does not mean the installation is correct. If the far end is dimmer or warmer in color, voltage drop is already affecting performance. That matters because visible inconsistency damages the finished look and can trigger site complaints.
We often see three scenarios:
- A 5-meter under-cabinet run works from one feed.
- A 12-meter cove looks uneven unless fed from both ends.
- A 20-meter display line needs segmented feeds and careful cable sizing.
When we tested this against a standard 12V strip, the longer run showed obvious brightness loss much earlier than the comparable 24V design. That is why 24V is usually preferred for extended linear lighting.
| Run Condition | Typical Symptom | Recommended Fix |
|---|---|---|
| Long single-end feed | Dim far end | Feed both ends or shorten run |
| Thin supply cable | Heat and loss | Increase cable cross-section |
| High wattage strip | Voltage sag | Add power injection points |
| Very long project run | Uneven light | Split into separate circuits |
| Controller overload | Erratic control | Use amplifier or separate zones |

Why does this matter to the bottom line? Because voltage drop problems are often hidden until final commissioning. At that point, labor costs rise fast. If you are unsure, calculate current, cable loss, and injection points before purchase.
8. What IP rating and material choices do you need for indoor and outdoor use?
Not every strip belongs outdoors, and not every silicone-coated strip belongs in a sealed profile. IP selection must match the real environment. A dry indoor shelf usually needs no heavy waterproofing. A bathroom vanity may need splash resistance. A facade or signage application may need stronger protection against water, dust, and UV exposure.
We once saw an outdoor decorative project use an indoor adhesive-backed strip under a canopy. It survived the first week, then failed after moisture ingress and adhesive weakening. The product was blamed, but the real issue was mismatch between strip construction and site conditions.
| Rating | Typical Use | Notes |
|---|---|---|
| IP20 | Dry indoor areas | Best heat release, easy installation |
| IP54 | Light dust or occasional splash | Limited protection |
| IP65 | Splash-prone zones | Often silicone coated |
| IP67 | Temporary immersion or harsh outdoor use | Better sealing, more care on heat |
| IP68 | Continuous water-related applications | Specialized selection |
Ready for the good part?
 The connector and cable entry must match the strip rating. A strip rated IP67 can still fail if the end caps, joints, or field wiring are not sealed correctly. From our manufacturing floor perspective, system sealing matters more than label claims alone.
9. How do you avoid the most common LED strip mistakes?
Most strip problems are predictable. That is good news because predictable problems can be prevented. We explain this specific process because ignoring simple checks leads to callbacks, replacement costs, and reputation damage.
Common mistakes include:
- Using too small a power supply
- Running long lengths from one end only
- Mounting high-power strips on poor heat surfaces
- Choosing low CRI for product display work
- Using visible-dot strips where dot-free effect is expected
- Trusting adhesive alone on rough or hot surfaces
Here is a quick troubleshooting table.
| Problem | Likely Cause | Practical Fix |
|---|---|---|
| Far end dimmer | Voltage drop | Add power injection |
| Flicker | Driver or dimmer mismatch | Replace with compatible unit |
| Color mismatch | Mixed batches or poor binning | Use controlled batch supply |
| Adhesive peeling | Dirty or hot surface | Clean surface, add clips/profile |
| Early lumen loss | Overheating | Improve heat dissipation |
| Water damage | Wrong IP selection or sealing | Upgrade strip and seal joints |
Three field examples stand out. A restaurant cove had visible spots because the diffuser depth was too shallow. A retail shelf had poor product appearance due to low CRI. A sign box failed because connectors were not sealed. None of these were random. All were preventable.
10. How do you select the right strip setup for different projects?
The best way to use LED light strips is to match the system to the application, not to force one strip into every job. Let’s be real. A cabinet maker, signage assembler, and electrical contractor may all buy strip lights, but they should not buy the same configuration.
Use this practical selection logic:
- Furniture and cabinetry: short runs, neat cuts, warm or neutral white, compact driver space
- Retail and display: high CRI, good diffusion, stable color across batches
- Hospitality coves: 24V, long-run planning, profile use, smooth dimming
- Outdoor signage: correct IP rating, sealing method, UV-aware materials
- Industrial utility areas: adequate output, simpler controls, durable mounting
| Project Type | Recommended Setup | Main Priority |
|---|---|---|
| Cabinet/furniture | 12V or 24V, short modules, profile optional | Cut flexibility |
| Retail shelf | High CRI 24V strip in aluminum profile | Product presentation |
| Hotel cove | 24V high-density strip, dimmable driver | Uniform ambient light |
| Signage | Waterproof strip with sealed wiring | Weather resistance |
| Workshop/task area | Higher output white strip | Visibility |
In our lab tests using integrating spheres, the biggest performance gap often appears not between brands, but between correctly matched systems and poorly matched ones.
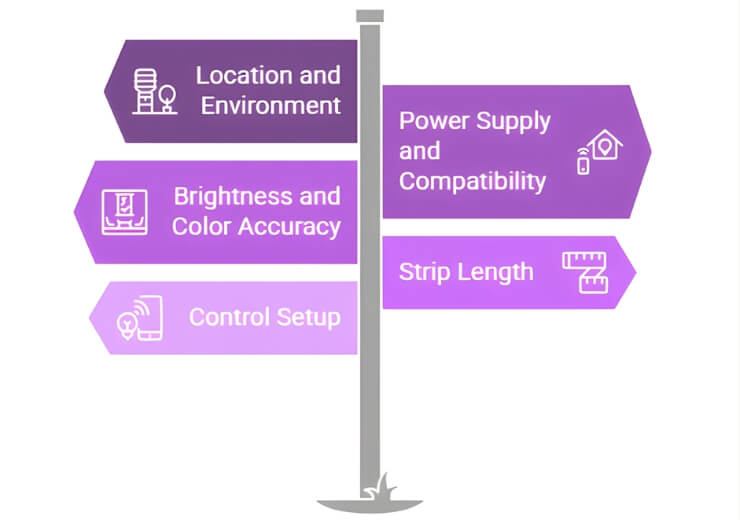
That is the takeaway. If the project drawings, run lengths, and control expectations are clear, strip lighting can be efficient, clean, and highly reliable.
Conclusion
Using LED strip lights well comes down to planning, matching, and testing. Define the application, choose the right voltage, brightness, color quality, controls, IP rating, and mounting method, then verify run length and heat management before final installation.
That approach reduces failures and protects project quality. If you are unsure about run length, power injection, or profile selection for a real job, send your layout to our engineering team and we will review the setup manually.
FAQ
Q1: What is the best way to use LED light strips?
Use them by matching strip type, voltage, lumen output, IP rating, and controls to the application, then install with proper power sizing, heat management, and testing.
Q2: How does voltage affect LED strip performance?
Voltage affects current, cut length, and run distance. In general, 24V handles longer runs better, while 12V is useful where short cut intervals are needed.
Q3: Can LED strip lights be used outdoors?
Yes, but only if the strip, connectors, cable joints, and end caps are rated and sealed for the real outdoor environment. The full system must match the IP requirement.
Q4: Why do LED strip lights get dim at the far end?
This usually happens because of voltage drop on long runs, undersized cable, or high load from a single feed point. Power injection often solves it.
Q5: Do LED strips need aluminum profiles?
Not always, but profiles help with heat dissipation, cleaner appearance, diffuser support, and more secure mounting. They are strongly recommended for many professional installations.
