
The U.S. Department of Energy’s LED basics resource provides useful background on LED efficiency, optical control, light output, and the compact form factors that make LEDs suitable for confined applications. From our manufacturing floor perspective, small locker lighting projects often succeed or fail on details that never appear in a simple product photo.
1. What are led strip lights for school locker projects?
led strip lights for school locker applications use flexible LED circuits mounted inside the locker body, usually along the side wall, top panel, or front vertical edge. The purpose is simple: make books, sports gear, tools, or personal items easier to see without using a bulky fixture.
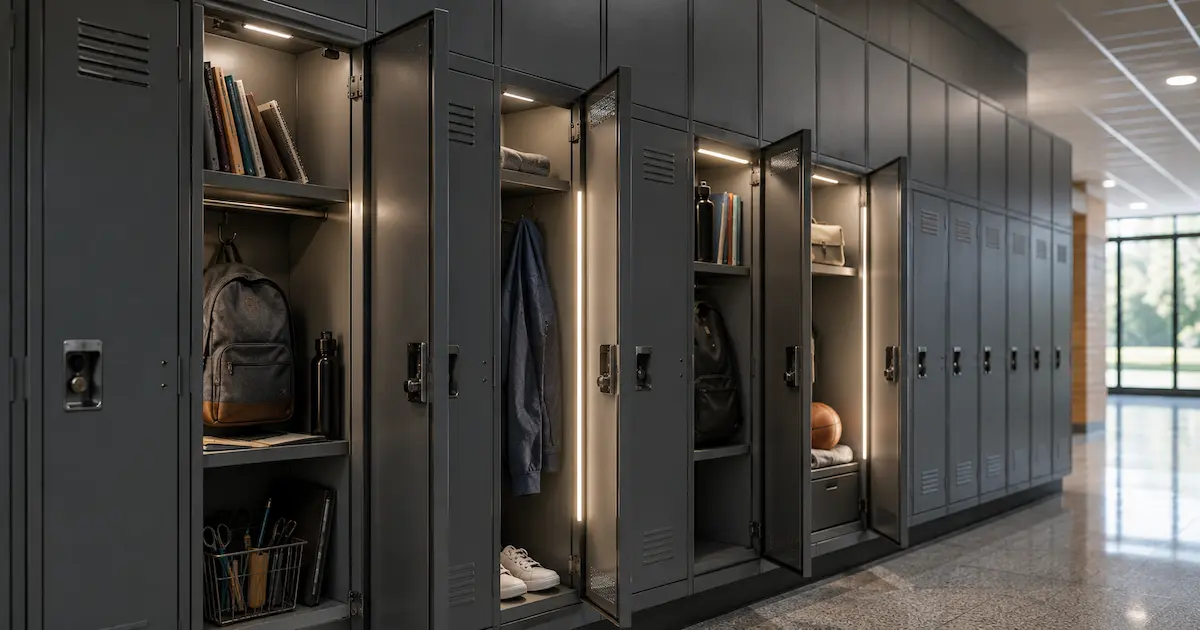
For commercial supply, these lights are not the same as casual decorative strips. A school locker project may involve hundreds or thousands of small compartments. That means every strip length, solder joint, connector, and adhesive pad affects labor cost. We often see installers struggle with strips that were bought as retail kits. They look fine on a desk, but the lead wires are too short, the tape fails on powder-coated steel, and the controller is too large for the locker interior.
A practical locker strip is usually 200 mm to 600 mm long, pre-cut, pre-wired, and powered by a safe low-voltage source. It may include a door switch, PIR sensor, magnetic reed switch, or simple push button.
| Parameter for School Locker LED Strips | Typical Range | Why It Matters |
|---|---|---|
| Strip length | 200–600 mm | Fits narrow locker spaces |
| Voltage | 5V, 12V, or 24V DC | Keeps touch voltage low |
| Power | 1.5–6W per locker | Controls heat and energy use |
| Color temperature | 3000K–5000K | Affects comfort and visibility |
| Mounting | 3M tape, clips, profile | Reduces falling strip risk |
2. Why do schools and facility teams use locker lighting?
School locker lighting is mainly about visibility, safety, and user experience. Students often open lockers in dim corridors, gyms, workshops, dormitories, or staff storage rooms. A small LED strip helps users find items faster and reduces the chance of dropping sharp tools, glass bottles, or sports equipment.
For facility managers, the business case is also practical. A clean lighting kit can raise the perceived value of a locker product line. For contractors, a pre-wired system can reduce installation time. For locker manufacturers, led strip lights for school locker products can become a value-added option instead of a low-margin accessory.
Here’s the deal: the fixture must survive daily door slams, dust, vibration, and student handling. A normal adhesive strip may work for a home cabinet, but school furniture faces harder use. In one field example, a contractor used a high-output strip inside lockers near a sports hall. After two months, heat softened the tape, strips sagged, and the school requested rework during term time. That turned a small upgrade into a margin loss.
A good locker lighting plan prevents that. It uses modest brightness, protected wiring, and mounting hardware that fits the locker surface.
3. Which voltage is best for school locker LED strips?
Most led strip lights for school locker designs use 5V, 12V, or 24V DC. The right choice depends on power architecture, cable distance, and whether the system is battery-powered or connected to a central driver.
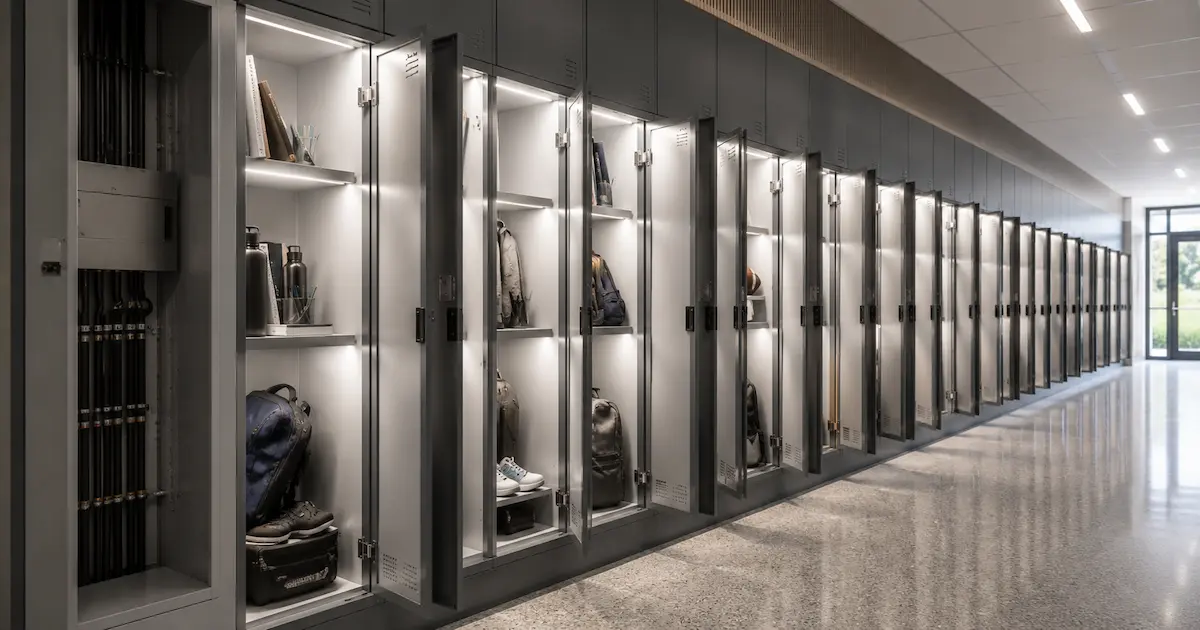
5V works well for USB power banks, small rechargeable modules, or very short strips. It is simple, but voltage drop appears quickly when cable runs get longer. 12V is common and easy to source. It fits short to medium locker runs and has many sensor options. 24V is better for grouped lockers or row-based wiring because current is lower for the same wattage. Lower current means less voltage drop and thinner cable may be possible.
When we tested this against a standard 12V strip, the same power level on 24V produced lower current and more stable brightness across a row simulation. That matters when one driver feeds multiple lockers.
| Power Option | Best Use | Strength | Limitation |
|---|---|---|---|
| 5V DC | Single locker, USB module | Easy small power source | Poor for longer wiring |
| 12V DC | Short rows, basic kits | Wide accessory choice | More voltage drop than 24V |
| 24V DC | Multi-locker rows | Lower current, stable output | Needs matched controls |
| Battery pack | Retrofit lockers | No hardwiring | Battery service schedule needed |
For most new school furniture or row installations, a 24V LED strip is often the cleaner engineering choice because it reduces current and helps maintain stable brightness across grouped lockers.
4. How bright should locker strip lighting be?
Locker lighting should be useful, not harsh. A locker is a confined reflective space. A carefully selected high-density LED strip can improve light uniformity inside reflective metal lockers without requiring excessive wattage or producing obvious bright spots. In our lab tests using integrating spheres, we measure lumen output, power draw, and color data before recommending strip density for small compartments.
For a normal student locker, 80–200 lumens per locker is often enough. For tool lockers or staff storage, 200–400 lumens may be better. If the locker has a dark painted interior, the strip may need higher output than a white or galvanized interior. The safest path is to test a sample in the real locker body, not only on an open bench.
Color temperature also matters. 3000K feels warm but may look too residential. 4000K gives a neutral school corridor look. 5000K can help in workshop or lab lockers where users identify labels and small parts.
| Locker Use Case | Suggested Lumens | Suggested CCT | Notes |
|---|---|---|---|
| Standard student locker | 80–200 lm | 3500K–4000K | Balanced comfort |
| Sports locker | 120–250 lm | 4000K | Handles darker interiors |
| Staff storage | 150–300 lm | 4000K | Better item recognition |
| Workshop/tool locker | 200–400 lm | 4000K–5000K | More task visibility |
Common Myth: Higher wattage always means better brightness. Reality: lumen efficiency, LED binning, surface reflection, and placement matter more than wattage alone.
5. Which LED strip type fits lockers: SMD, COB, or rigid bar?
SMD strips are the standard choice for led strip lights for school locker projects because they are cost-effective, flexible, and easy to cut. Common packages include 2835, 3528, and 5050 LEDs. For lockers, 2835 is often preferred because it offers good efficiency at low to medium power.
A COB LED strip creates a smoother, more continuous light line with fewer visible LED dots, which can improve the appearance of premium lockers. That looks better if the strip is visible near the locker opening. However, COB may cost more and can need careful thermal management in enclosed spaces. Rigid LED bars are less flexible, but they mount neatly and resist peeling better. They suit OEM locker production where screw holes or clips can be added during manufacturing.
But there’s a catch: the best visual choice is not always the best service choice. A school maintenance team may prefer a replaceable rigid bar with plug connectors, while a distributor may prefer cuttable rolls and custom leads for stock flexibility.
| LED Type | Visual Effect | Mounting Style | Best Fit |
|---|---|---|---|
| SMD 2835 strip | Visible dots if uncovered | Tape, clips, profile | Cost-sensitive locker rows |
| COB strip | Smooth light line | Tape, profile | Premium lockers |
| Rigid LED bar | Clean and firm | Screws or clips | OEM locker production |
| Silicone-covered strip | Diffused and protected | Tape, clips | Dusty or damp zones |
Pro Tip from VST Technical Team: “If the strip is mounted at eye level near the locker edge, use a diffuser or side placement. Glare complaints usually come from placement, not raw lumen output.”
6. How should power supplies and controls be specified?
Power control is where many locker lighting projects get messy. A single locker can use a battery switch. A full school corridor needs a planned electrical layout. Contractors should calculate total wattage, driver loading, cable length, voltage drop, and service access before ordering.

A good rule is to load a constant-voltage driver at 70–85% of its rated power. For example, if one locker uses 3W and a row has 30 lockers, the load is 90W. A 120W driver may be suitable, depending on wire distance and control method. If sensors are used in each locker, check standby current. Small standby draw across hundreds of lockers can affect energy planning.
The Department of Energy’s guidance on wireless occupancy sensors for lighting controls also provides useful background on sensor-based operation and potential energy savings when lights are activated only as needed.
| Control Method | User Experience | Maintenance Level | Typical Use |
|---|---|---|---|
| Magnetic reed switch | Automatic door response | Low | Student lockers |
| PIR sensor | Motion-based | Medium | Larger storage units |
| Push button | Manual | Low | Budget retrofits |
| Timer module | Auto shutoff | Medium | Battery systems |
| Central driver + local switch | Stable row wiring | Low to medium | New installations |
We explain driver loading because overloaded adapters cause heat, early failure, and warranty disputes.
7. What materials and protection ratings matter inside lockers?
A locker may seem dry and safe, but real school use says otherwise. Students bring wet sportswear, dusty shoes, food containers, and metal objects into lockers. Cleaning staff may spray nearby surfaces. For that reason, strip protection and cable routing deserve attention.
IP20 open strips are acceptable for dry, controlled lockers when the LED strip sits inside an aluminum profile or away from contact. An IP65 LED strip provides better resistance to dust, damp sports equipment, light splashes, and nearby cleaning activity in more demanding locker environments. IP67 sealed strips are usually more than needed inside normal school lockers, but they can suit pool changing rooms or outdoor campus storage.
Adhesive selection matters too. Powder-coated steel is not always tape-friendly. Oil, dust, and coating texture reduce bond strength. We once saw a project fail because installers skipped surface cleaning. The tape was blamed, but the root cause was residue and cold installation temperature.
| Environment | Suggested Protection | Mounting Advice | Risk if Ignored |
|---|---|---|---|
| Dry indoor corridor | IP20 with profile | Clean surface, add clips | Peeling, exposed LEDs |
| Sports changing room | IP65 | Use clips near wire exits | Moisture damage |
| Pool locker area | IP65/IP67 | Seal wire entry points | Corrosion |
| Workshop locker | IP65 or profile cover | Protect from tools | Impact damage |
The IEC explanation of ingress protection ratings can help buyers interpret how enclosure ratings describe resistance to dust, liquids, and access to potentially hazardous internal parts. An aluminum profile for LED strip lighting helps spread heat, protects the LEDs from direct contact, and provides a more secure mounting surface than adhesive tape alone. That can extend service life in daily-use environments.
8. How can installation reduce callbacks and labor cost?
Installation quality has a direct effect on profit. The product may be correct, but poor routing or weak mounting still creates service calls. We often see installers struggle with tight corners, short leads, and connector bodies that block the locker door.
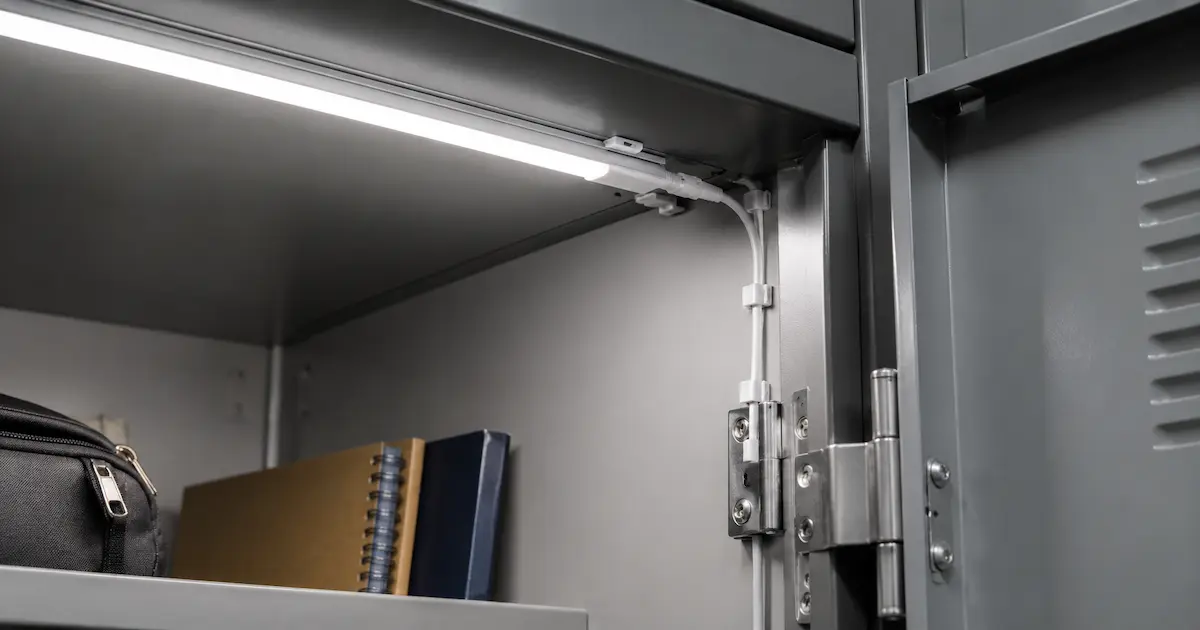
For school locker projects, pre-soldered leads save time. Pre-cut lengths reduce waste. Polarity labels reduce wiring mistakes. If the locker manufacturer can add cable channels or small holes during production, the installation becomes faster and cleaner. Following professional LED strip light wiring practices also helps installers protect polarity, connector integrity, cable routing, and strain relief across large locker rows.
Here is a practical checklist for contractors and project managers.
| Installation Checkpoint | Action | Pass Criteria |
|---|---|---|
| Surface prep | Clean with alcohol, dry fully | No dust or oil residue |
| Test before mounting | Power each strip briefly | Correct CCT and polarity |
| Cable routing | Keep wire away from hinges | No pinch points |
| Mounting support | Use tape plus clips where needed | Strip stays firm after pull test |
| Driver loading | Keep load under rated margin | No driver overheating |
| Labeling | Mark driver, circuit, locker row | Faster service later |
| Final burn-in | Run system 30–60 minutes | Stable light, no flicker |
From our manufacturing floor perspective, the lowest-cost change is often custom wire length. A 150 mm longer lead can remove a connector, cut install time, and reduce one failure point per locker.
9. What compliance and procurement details should buyers request?
Contractors should also consider applicable electrical safety requirements when planning power supplies, wiring protection, connectors, service access, and installation procedures for large locker projects. It protects the contractor, distributor, facility owner, and end user. Buyers should request CE, RoHS, and, where required, UL or ETL data for the relevant parts. If the system includes a power supply, the driver certification often carries more safety weight than the strip itself.
Procurement teams should ask for a basic technical file: rated voltage, wattage per meter or per unit, CCT tolerance, CRI, LED type, PCB width, cut length, wire gauge, connector type, adhesive model, and test records. For larger orders, request sample approval before mass production.
Color consistency deserves extra attention. A school may expand a locker block later. If the next batch has a different CCT or tint, the new row may look mismatched. Specify CCT tolerance and bin control in the purchase order.
| Procurement Item | Recommended Requirement | Reason |
|---|---|---|
| Voltage and wattage | Listed per locker unit | Supports driver sizing |
| CCT tolerance | ±200K or tighter | Reduces visible mismatch |
| CRI | 80+ for general use | Better color recognition |
| Certifications | CE/RoHS, UL where needed | Supports local compliance |
| Sample approval | Signed before production | Reduces batch disputes |
| Aging test | 2–24 hours per batch | Finds early failures |
This information matters to your bottom line because unclear specifications lead to rework, claims, and project delays.
10. What failures happen most often, and how do you prevent them?
The most common failures in led strip lights for school locker projects are peeling strips, flicker, uneven brightness, sensor faults, and broken wires near hinges. Most are preventable with better specification and testing.
Proper LED strip flickering troubleshooting should begin with the driver load, connector contact, supply stability, and voltage drop across long locker-row cable runs. Uneven brightness usually points to a wiring layout problem rather than a strip defect. Sensor faults may come from poor switch alignment or a door gap that changes after locker adjustment. Broken wires happen when cable routing crosses a hinge path without strain relief.
What’s the real story? Many failures are system failures, not component failures. A strip, driver, sensor, and locker body must work as one small electrical product.
| Failure Mode | Likely Cause | Field Fix | Prevention |
|---|---|---|---|
| Strip falls down | Dirty surface, weak tape, heat | Clean, remount, add clips | Test tape on real locker coating |
| Flicker | Driver overload or loose contact | Replace driver, tighten connector | Size driver with margin |
| Dim far-end lockers | Voltage drop | Thicker cable or parallel feed | Use 24V for long rows |
| Sensor not switching | Misalignment | Adjust magnet or sensor | Use jig during installation |
| Wire break | Hinge pinch point | Reroute cable | Add strain relief and protection |
A short pilot installation is worth the time. Test ten lockers for one school week before full rollout. Door slams, cleaning cycles, and student behavior reveal issues a bench test can miss.
Closing Thoughts
led strip lights for school locker projects look simple, but reliable results need the right voltage, brightness, control method, mounting plan, and documentation. Keep power low, manage heat, protect wiring, and test samples inside the real locker body. That is how you reduce callbacks and protect project margin. If you are unsure about voltage drop, sensor placement, or custom lead length, send our engineering team your layout. We’ll calculate it manually and suggest a practical wiring plan.
Conclusion
Specify locker lighting as a complete small-system: correct voltage, driver sizing, connector type, mounting method, protection rating, and control logic. Prioritize sample testing in an actual locker, require batch control for CCT, and plan wiring routes to avoid hinge pinch points. These steps reduce onsite rework and extend service life for busy school environments.
FAQ
Q1: What are led strip lights for school locker installations?
They are low-voltage LED strips or light bars installed inside lockers to improve visibility. They can be powered by battery packs, USB modules, or centralized DC drivers. Professional versions are usually pre-cut, pre-wired, and matched with switches or sensors.
Q2: Are LED strip lights safe inside school lockers?
Yes, if they use certified low-voltage power, proper insulation, protected wiring, and controlled heat output. Avoid high-power strips in tight metal lockers unless thermal testing confirms safe operation.
Q3: Should I choose 12V or 24V for locker rows?
Use 12V for short, simple layouts. Use 24V for longer rows or multiple lockers fed from one driver because current is lower and brightness stays more stable across the run.
Q4: What color temperature is best for school lockers?
4000K is the safest general choice. It looks neutral, supports clear visibility, and fits most school interiors. Use 5000K for workshops or storage areas where task visibility matters more.
Q5: How can contractors reduce installation callbacks?
Use pre-cut strips, pre-soldered leads, proper surface cleaning, clips near cable exits, labeled wiring, and driver loading under the rated limit. A small pilot test before full installation can catch fit and durability problems early.
