
The easiest way to install flexible LED profiles is to plan the bend path, cut the profile to length, mount it with clips or 3M VHB tape, insert the LED strip, connect a matching driver, then test the run before closing the diffuser.
The better route is a repeatable process. From our manufacturing floor perspective, flexible profiles are easy only when the strip, driver, mounting method, and heat path are matched before installation starts.
1. What makes flexible LED profiles easier than rigid channels?
Understanding what flexible LED profiles are and how they transform lighting design helps installers use them effectively on curves, shallow arcs, cabinet edges, display shelves, signage shapes, and decorative grooves without needing multiple miter cuts. A rigid aluminum channel works well on straight runs, but it becomes slow around arches or rounded furniture.
The profile must bend without squeezing the LED strip. If the strip twists inside the channel, solder pads can crack or LEDs can sit at uneven angles. That creates visible dots, dark spots, or unstable connections.
Flexible profiles suit these common projects:
- ● Curved retail shelving
- ● Rounded kitchen cabinets
- ● Backlit mirrors
- ● Stair handrails
- ● Exhibition booths
- ● Furniture prototypes
- ● Decorative wall lines
In our lab tests using integrating spheres, we see that diffuser material and profile depth affect visible brightness more than many buyers expect. A shallow flexible profile may look sleek, but if the LED pitch is wide, dotting can appear.
| Profile Type | Best Use | Main Benefit | Watch Point |
|---|---|---|---|
| Flexible silicone profile | Curves, wet zones, decorative lines | Smooth bending | Lower heat transfer than aluminum |
| Flexible PVC profile | Indoor furniture and displays | Low cost and simple cutting | Check yellowing resistance |
| Rigid aluminum profile | Straight commercial runs | Better heat dissipation | Needs cutting at corners |
| Bendable aluminum profile | Mild curves with stronger heat path | Better thermal control | Needs careful forming |
For the easiest way to install flexible LED profiles, use flexible profiles where shape matters and aluminum where heat is the main risk.
2. Which tools and materials do you need before installation?
A clean flexible LED profile installation starts before any cutting, with the correct strip width, diffuser, mounting accessories, driver, and cable-exit components prepared in advance. We often see installers struggle with flexible LED profiles because they bring the strip and driver, but forget end caps, mounting clips, alcohol wipes, cable exit parts, or solder-free connectors.
The tool list is short. The discipline matters more.
You need:
- Flexible LED profile and diffuser
- LED strip with suitable width
- Constant voltage LED driver
- Mounting clips, screws, or VHB tape
- End caps and cable exits
- Wire, connectors, or soldering tools
- Measuring tape and marker
- Fine-tooth saw, cutter, or profile shears
- Multimeter
- Isopropyl alcohol wipes
For a display shelf project, a missing cable exit can force the installer to cut the end cap on site. That looks rough. For a hotel sample room, a wrong driver size can create flicker during dimming. For a furniture line, a weak adhesive choice can cause failures after shipment.
| Item | Recommended Spec | Why It Matters |
|---|---|---|
| LED strip width | 5 mm, 8 mm, 10 mm, or 12 mm matched to channel | Prevents pinching and lifting |
| Driver capacity | 20–30% spare capacity | Reduces heat stress |
| Adhesive tape | 3M VHB or equivalent | Better bond on clean surfaces |
| Wire size | Based on load and distance | Reduces voltage drop |
| Multimeter | DC voltage reading | Confirms output before closing profile |
Pro Tip from the VST Technical Team: “Do not treat mounting tape as a fix for a dirty surface. Clean metal, wood, acrylic, or paint before bonding. Following proper surface preparation for 3M VHB tape applications helps remove dust, oil, and other contaminants that commonly weaken the bond between a flexible profile and its mounting surface.
3. How do you plan the layout, voltage, and bend radius?
Planning is the fastest labor saver. Sketch the route, mark power injection points, choose voltage, and confirm bend radius before you cut. This is where it gets interesting: a flexible profile can bend, but the LED strip inside still has mechanical limits.
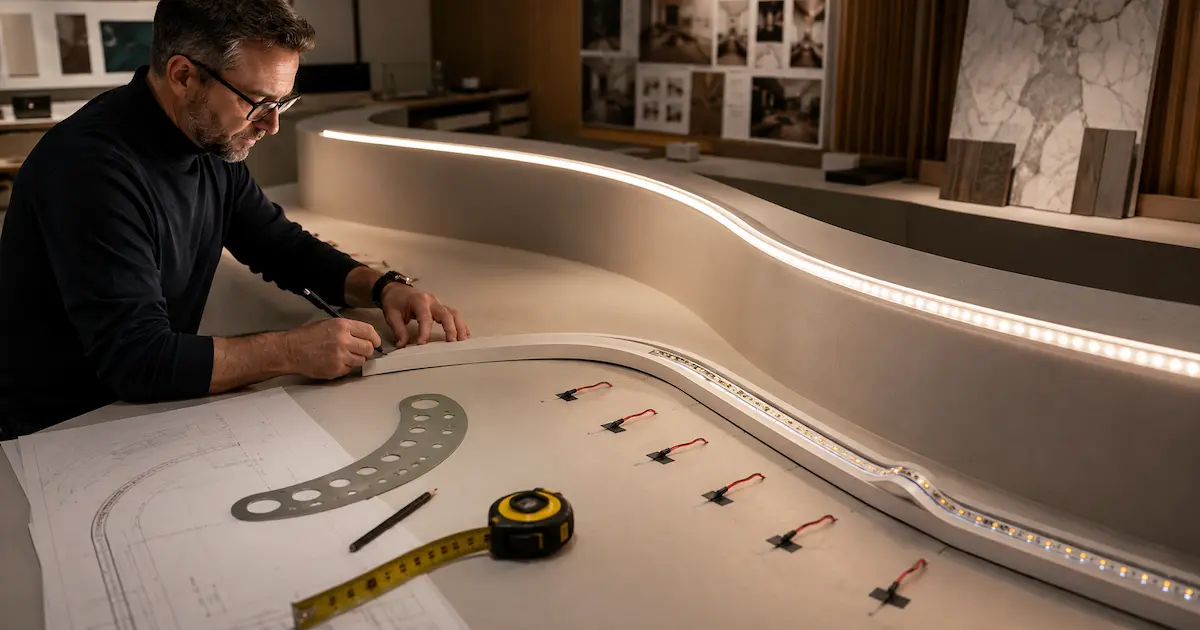
A tight bend across the strip width can damage copper traces. Bending along the length is safer. For sharp corners, use a corner connector, a small loop, or a separate strip section.
Voltage choice matters for length, and accurate LED profile driver calculations help determine the total load, suitable driver capacity, operating margin, and required power-injection points. When we tested this against a standard 12V strip, a comparable 24V strip showed less voltage drop on longer runs. For DIY furniture and room accent lighting, 12V can work. For longer cabinets, coves, and display walls, a properly specified 24V LED strip light usually reduces current, dim ends, and the amount of power-injection work required.
| Voltage | Typical Run Length Before Power Injection | Best For | Risk If Misused |
|---|---|---|---|
| 12V | 3–5 meters, depending on wattage | Short shelves, small signs | Visible dimming on long runs |
| 24V | 5–10 meters, depending on wattage | Cabinets, counters, coves | Needs matching driver and controller |
Common Myth: higher wattage always means better brightness.
Reality: lumen efficiency, diffuser loss, heat control, and LED density decide the visible result. A high-watt strip trapped in a low-ventilation flexible profile can run hot, lose output faster, and shorten service life.
Plan the installation around light quality, not just watts per meter.
4. What is the fastest mounting method: clips, adhesive, or screws?
The fastest method depends on the surface and the project risk. Adhesive tape is quickest on smooth, clean surfaces. Clips are better for service access. Screws work well on wood, MDF, and metal frames where vibration or heat may weaken tape.
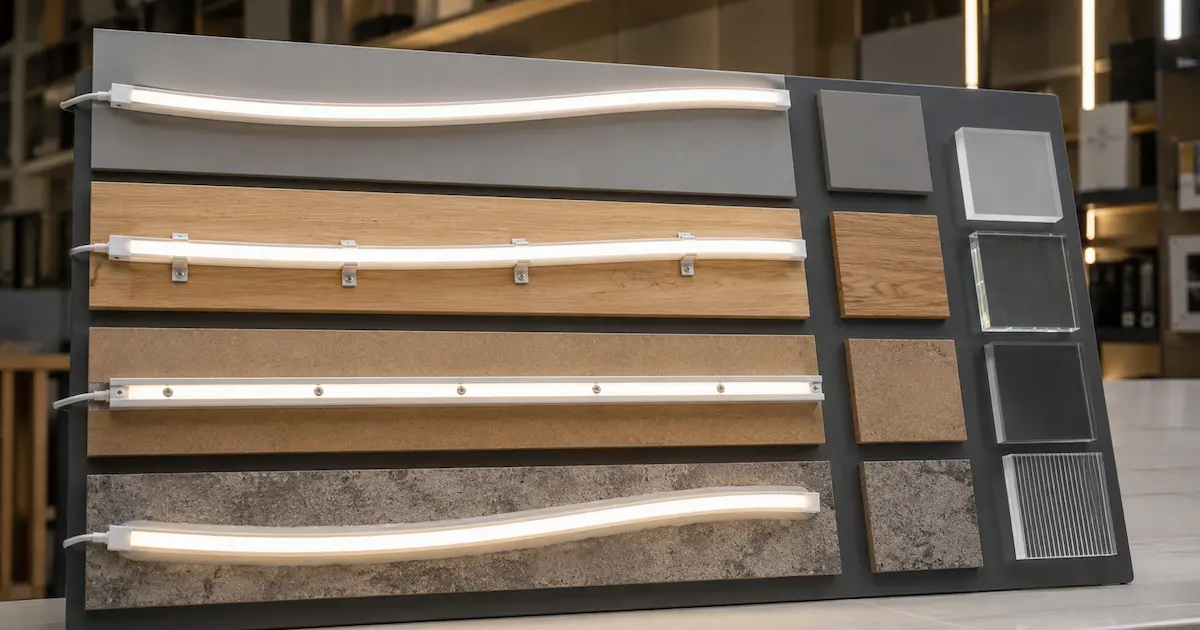
But here’s the catch: “fast” is not the same as “reliable.” If a kitchen cabinet underside has cooking oil residue, tape may fail. If a display shelf uses thin acrylic, screws may crack it. If a profile is mounted inside a curved groove, clips may create visible bumps.
Use the mounting method based on the surface.
| Mounting Method | Speed | Service Access | Best Surface | Main Risk |
|---|---|---|---|---|
| 3M VHB tape | Very fast | Low | Painted metal, acrylic, sealed wood | Poor bond on dusty or oily surfaces |
| Mounting clips | Medium | High | Wood, aluminum, shopfitting frames | Clip spacing affects straightness |
| Screws through profile flange | Medium | Medium | MDF, timber, metal | Over-tightening can deform profile |
| Silicone adhesive | Slow | Low | Damp zones or irregular surfaces | Curing time slows handover |
For DIY projects with business value, such as retail displays or prototype furniture, I prefer clips where future replacement matters.
Field example: we once saw a curved mirror project fail because tape was applied to dusty powder-coated metal. The lighting worked, but the profile dropped after two days. Cleaning would have taken five minutes.
5. How do you cut and prepare flexible LED profiles cleanly?
Cutting flexible profiles is simple, but careless cuts make the job look cheap. Measure twice, mark with a fine pen, and cut square. For silicone profiles, use sharp shears or a craft knife with a guide. For flexible PVC or bendable aluminum, use a fine-tooth saw and support the profile during the cut.
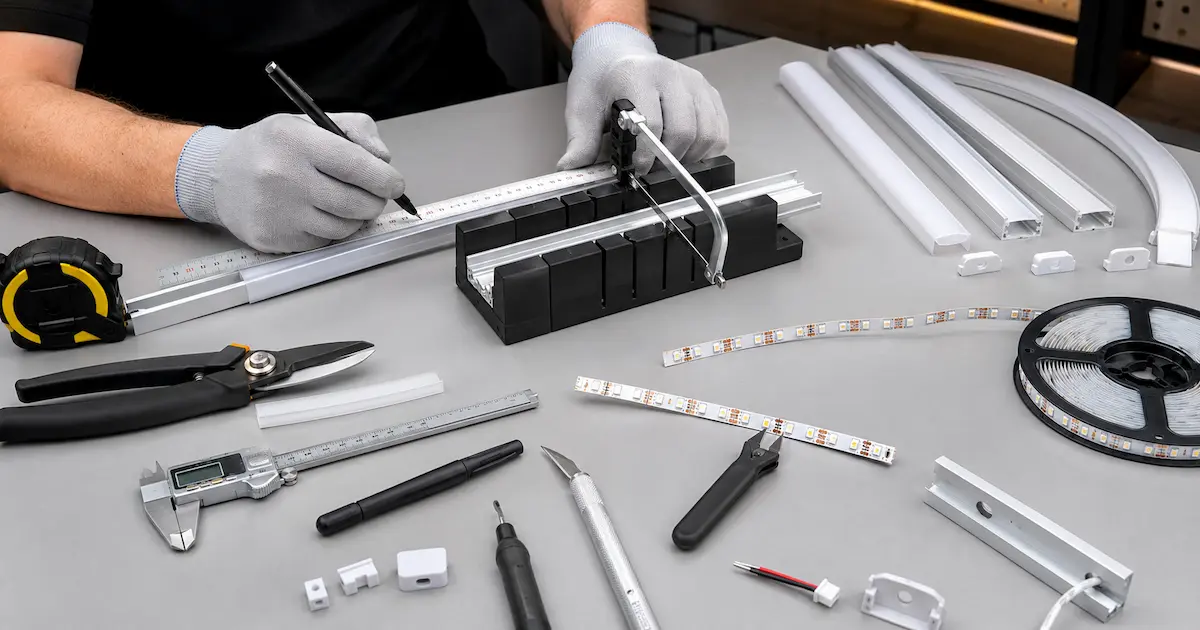
The diffuser should be cut to the same length or slightly shorter if the end cap needs space. Do not crush the diffuser while cutting. A squeezed diffuser can leave a white stress mark that becomes visible once the strip turns on.
Preparation steps:
- Confirm profile length against the actual installation path
- Follow a professional process for cutting LED light strips and cut only across the clearly printed copper-pad marks to avoid damaging the circuit or losing usable sections.
- Dry-fit the profile before peeling adhesive backing
- Create cable exits before final mounting
- Remove burrs and dust from the channel
- Test the diffuser fit before inserting the strip
| Cutting Task | Recommended Tool | Quality Check |
|---|---|---|
| Silicone profile | Sharp shears or knife with guide | No jagged edge |
| PVC profile | Fine-tooth saw | No melted edge from friction |
| Bendable aluminum | Fine-tooth saw or miter box | No burrs touching strip |
| Diffuser | Shears or saw, depending on material | No cracks or stress marks |
From our manufacturing floor perspective, clean end treatment affects perceived product quality. In a retail display, customers may never see the driver, but they will see a rough profile end.
6. How do you install the LED strip inside the profile?
To install flexible LED profiles neatly, insert the LED strip after the profile path is mounted and cleaned, unless the profile design requires pre-loading. Peel the strip backing slowly, press it into the channel with light pressure, and keep the strip centered.
Do not stretch the strip. Do not press directly on LED chips or resistors. Use a plastic tool or gloved finger along the copper-free zones. If the profile bends, guide the strip through the curve without twisting.
This step affects heat. Even in flexible profiles, the strip backing should touch the channel base as much as possible. Air gaps act like insulation. The strip gets hotter, adhesive softens, and lumen output drops over time.
For example:
- ● In a furniture groove, center the strip so the diffuser locks evenly.
- ● In a backlit mirror, keep the strip flat to avoid bright and dark patches.
- ● In a curved shelf, feed the strip gently around the curve rather than pushing it from one end.
In our lab tests using integrating spheres, we measure output before and after diffuser installation. Some diffusers reduce output by 10–35%, depending on opacity and profile depth. That is why strip density and diffuser choice must be matched.
If a smooth, dot-free light line is required, choose a COB LED strip light or a high-density SMD strip inside a sufficiently deep profile with a milky diffuser.
7. How do you wire, test, and control the system safely?
Follow established practices for installing LED strips and power supplies safely, and verify the wiring, polarity, voltage, driver load, and dimming compatibility before closing the diffuser. Match LED strip voltage to driver voltage. Confirm polarity. Size the driver with spare capacity. Use proper wire gauge for the run length. For dimming, match the controller to the driver type and strip voltage.
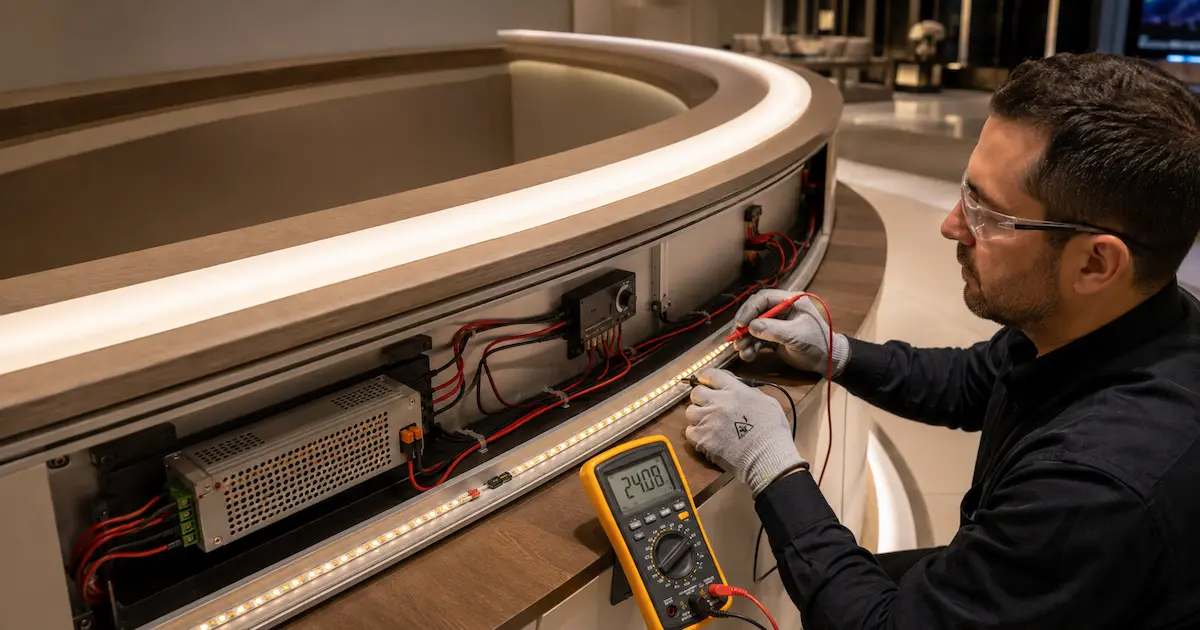
Basic wiring design and protection principles require installers to verify the circuit arrangement, connection polarity, voltage compatibility, and conductor suitability before energizing the LED strip. The strip may flash bright, overheat, and fail within seconds. Another mistake is using a driver at 100% load in a closed cabinet. Heat builds up, and the driver life drops.
| Checkpoint | Correct Practice | Failure If Ignored |
|---|---|---|
| Voltage match | 12V strip with 12V driver, 24V with 24V | Burned LEDs or no light |
| Polarity | Positive to positive, negative to negative | No operation or controller damage |
| Driver load | Use about 70–80% of rated output | Overheating and early failure |
| Wire gauge | Select by current and distance | Voltage drop and dim ends |
| Dimming | Match PWM, TRIAC, DALI, 0–10V, or RF system | Flicker or control failure |
We often see installers struggle with long runs on display walls. The strip near the driver looks bright, while the far end looks warm and dim. This is usually voltage drop. Power injection at both ends or at intervals solves the problem.
Test every segment with a multimeter before closing the diffuser. This small step protects your margin. The following professional installer guide demonstrates how LED strip lighting should be designed, prepared, connected, tested, and installed for a reliable finished result.
8. Which profile, strip, and diffuser choices work best?
A detailed LED strip light buying guide can help compare voltage, LED density, wattage, PCB width, color temperature, and diffuser compatibility before selecting the final profile-and-strip combination.For simple accent lighting, a low-watt strip in a flexible silicone profile may be enough. For a commercial shelf, a higher-density strip with a stable diffuser gives a cleaner result.
Here is a practical comparison.
| Option | Best Visual Result | Heat Control | Cost Level | Good Fit |
|---|---|---|---|---|
| SMD strip + clear diffuser | Bright but visible dots | Medium | Low | Hidden indirect lighting |
| SMD strip + milky diffuser | Softer line | Medium | Medium | Cabinets and shelves |
| COB strip + milky diffuser | Dot-free line | Medium | Higher | Mirrors, signage, decorative lines |
| High-watt strip + aluminum-backed profile | Strong output | Better | Higher | Task lighting and retail displays |
Mandatory Vs. comparison: COB vs SMD for flexible LED profiles.
| Feature | COB LED Strip | SMD LED Strip |
|---|---|---|
| Dot visibility | Very low | Depends on LED density |
| Bending behavior | Smooth if PCB quality is good | Good, but LED spacing may show |
| Brightness options | Medium to high | Wide range |
| Cost | Usually higher | Usually lower |
| Best use | Visible light lines | Hidden or budget-sensitive runs |
Our Chief Engineer notes that heat dissipation is often ignored in flexible profile projects. A beautiful dot-free line is not enough if the strip runs too hot inside a sealed groove. Check wattage per meter and ventilation space before approval.
For many DIY projects, 24V COB strip inside a milky flexible profile gives the best balance of clean light, simple wiring, and controlled voltage drop.
9. What mistakes cause callbacks, overheating, or weak light?
Most failures come from a few repeat mistakes. The profile is blamed, but the real cause is often surface preparation, wrong strip selection, driver overload, or weak wiring.
Use this troubleshooting table during installation and after handover.
| Symptom | Likely Cause | Fast Fix | Prevention |
|---|---|---|---|
| Strip lifts inside profile | Dust, heat, weak adhesive | Clean and re-bond with better tape | Clean channel before fitting strip |
| Far end is dim | Voltage drop | Add power injection | Use 24V or shorter segments |
| Visible dots | Low LED density or shallow profile | Use COB or deeper diffuser | Check sample before bulk install |
| Diffuser pops out | Profile twisted or cut unevenly | Re-seat or recut | Dry-fit before mounting |
| Flicker | Driver or dimmer mismatch | Replace compatible part | Test control system before closing |
| Hot profile | Wattage too high or poor ventilation | Reduce load or change profile | Calculate watts per meter |
Common Myth: flexible profiles do not need heat planning because they are low power.
Reality: many LED strips used in DIY and display work run from 9.6W/m to 18W/m. In a closed groove, heat can build fast. Understanding LED basics, including thermal management and gradual lumen depreciation, helps explain why excessive heat can reduce light output, weaken adhesive bonds, and shorten the useful life of an installation.
A luxury hotel lobby cove, a retail jewelry shelf, and a kitchen cabinet all have different heat conditions. Treat each one as a small lighting system, not just a strip inside a sleeve.
10. How can you finish, inspect, and maintain the installation?
Finishing decides whether the job looks professional. After wiring and testing, close the diffuser evenly from one end to the other. Do not hammer it. If resistance is high, check whether the strip is off-center or the profile is twisted.
Run the system for at least 20–30 minutes before handover. Touch the profile surface carefully. Warm is normal. Too hot to hold suggests a thermal problem. Check dimming at low, medium, and full levels. Inspect the cable exits, end caps, and curves.
Use this installation checklist.
| Step | Pass Standard | Notes |
|---|---|---|
| Surface cleaned | No dust, oil, loose paint | Needed for tape and strip bond |
| Profile aligned | Smooth curve, no twist | Check before final pressure |
| Strip centered | No pinching, no lifted sections | Prevents diffuser issues |
| Voltage tested | Correct DC output | Test before closing |
| Driver ventilated | Air space around driver | Reduces heat stress |
| Dimming tested | No flicker or buzzing | Check full range |
| End caps fitted | Clean cable exit | Protects finish |
Maintenance is simple. Keep diffusers clean with a soft cloth. Avoid strong solvents on PVC or silicone. If a section fails, remove the diffuser, test voltage, then replace only the affected strip section if the profile allows access.
The easiest way to install flexible LED profiles is to make service access part of the design.
Final Notes
Flexible LED profiles make curved and compact lighting projects faster, cleaner, and more practical. The best results come from planning the route, using the right voltage, preparing the surface, matching strip and diffuser, and testing before closing the profile.
Conclusion
Follow a simple checklist for reliable results: plan the route and voltage, clean and prepare the mounting surface, choose matching strip/profile/diffuser, provide service access, and test wiring and dimming before closing the diffuser. For commercial or high-heat applications, prefer aluminum-backed profiles and clip-based mounting to extend service life.
FAQ
Q1: What is the easiest way to install flexible LED profiles?
The easiest method is to plan the route, clean the mounting surface, fix the profile with tape or clips, insert the LED strip, connect the correct driver, test voltage and dimming, then close the diffuser.
Q2: Can I bend flexible LED profiles around tight corners?
Yes, but stay within the profile and strip bend limits. Avoid bending across the LED strip width. For sharp corners, use separate sections, small cable loops, or corner connectors.
Q3: Should I use 12V or 24V LED strips in flexible profiles?
Use 12V for short runs and small decorative projects. Use 24V for longer cabinets, shelves, coves, and display projects because it reduces voltage drop and power injection work.
Q4: Do flexible LED profiles help with heat dissipation?
They help protect and position the strip, but silicone and PVC profiles do not transfer heat like aluminum. For high-watt strips, check temperature, ventilation, and service life targets.
Q5: Why does my LED strip look dim at the far end?
The likely cause is voltage drop. Use a shorter run, thicker wire, 24V strip, or power injection from both ends or from multiple points along the run.
