

In this comprehensive guide, we will walk you through everything you need to know about installing aluminium profiles for LED tape, ensuring a professional and sleek finish that will elevate your space.
Installing aluminium profiles for LED tape involves several key steps that are essential for achieving a high-quality lighting setup. These steps include planning the layout, preparing the profiles, securing the profiles to the installation surface, and connecting the wiring.
Aluminium profiles offer numerous advantages, such as durability, ease of installation, and versatility, making them a preferred choice for both DIY enthusiasts and professionals. By following this guide, you can ensure that your LED tape lighting installation is both functional and visually appealing.
Interested in discovering how to effectively install aluminium profiles for LED tape? Continue reading for a detailed, step-by-step guide that will help you achieve stunning lighting results.
Understanding Aluminium Profiles and Their Importance for LED Tape
Aluminium profiles are channels or housings made from high-quality aluminium designed to hold and protect LED tape lights. These profiles enhance the performance and aesthetics of LED tape lighting by providing secure mounting, better light diffusion, and efficient heat management.
How Do They Improve Light Diffusion, Manage Heat, and Protect LED Strips?
- Light Diffusion: Aluminium profiles come with diffusers that spread light evenly, eliminating hotspots and creating a smooth, uniform glow.
- Heat Management: Aluminium’s excellent thermal conductivity helps dissipate heat generated by LED strips, preventing overheating and extending their lifespan.
- Protection: Profiles protect LED strips from dust, moisture, and physical damage, ensuring they remain in good condition for longer.

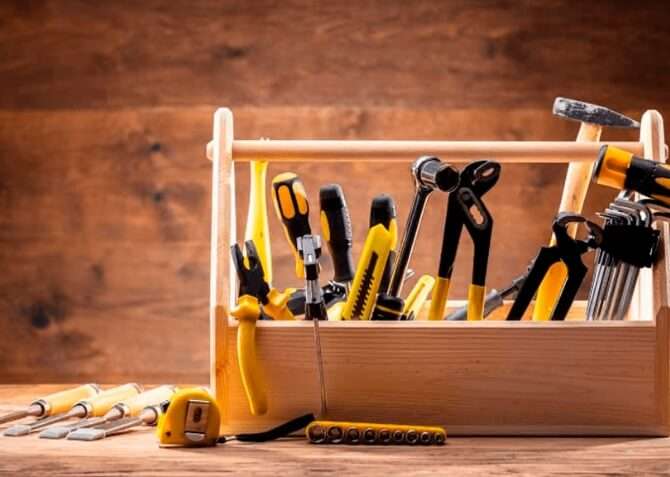
Tools and Materials Needed for Installation
Before starting your installation, gather all the necessary tools and materials to ensure a smooth process.
Here’s what you’ll need:
- Measuring tape: For accurate measurements of profiles and installation areas.
- Pencil or marker: To mark placement points on the profiles and installation surface.
- Straight edge: To ensure straight cuts and marks.
- Clamps: To hold profiles in place during cutting.
- Fine-tooth hacksaw or miter saw: For precise cutting of aluminium profiles.
- Drill and appropriate bits: For pre-drilling holes and securing profiles.
- Mounting clips or brackets: To secure the profiles to the installation surface.
- Thermal adhesive or double-sided tape: For securing LED tape inside the profiles.
- LED tape and power supply: The light source for your indirect lighting.
- Aluminium profiles and diffusers: The channels that will house and diffuse the LED light.
Planning Your LED Tape Installation
Proper planning is essential for a successful installation of aluminium profiles for LED tape.
Follow these steps to plan your project effectively:
- Identifying the Installation Location: Determine where you will install the aluminium profiles. Common locations for LED tape lighting include ceilings, walls, and furniture. Ensure the chosen location can accommodate the profiles and provides adequate space for wiring and ventilation.
- Measuring and Marking the Placement: Use a measuring tape to measure the length of the areas where the profiles will be installed. Mark the placement points on the surface with a pencil or marker. Ensure the marks are level and evenly spaced for a uniform appearance.
- Considering the Power Source and Wiring Path: Plan the path for the power source and wiring. Ensure that the wiring can be concealed or integrated into the design without affecting the aesthetics. Consider the proximity to power outlets and the need for extensions or connectors.
- Ensuring Adequate Ventilation: Adequate ventilation is crucial for heat dissipation. Ensure there is enough space around the profiles to allow for airflow, which will help manage the heat generated by the LED strips.

Preparing Aluminium Profiles for Installation
Once you have planned your installation, it’s time to prepare the aluminium profiles.
- Measuring and Cutting Aluminium Profiles
- Measure the Length: Use a measuring tape to measure the length needed for each aluminium profile. Mark the cutting points clearly with a pencil or marker.
- Cut the Profiles: Use a fine-tooth hacksaw or a miter saw with a metal-cutting blade to cut the profiles at the marked points. Ensure the cuts are straight and clean.
- Smoothing Rough Edges: After cutting the profiles, smooth any rough edges using a file or sandpaper. This will prevent any damage to the LED strips or diffusers when they are installed.
- Installing End Caps and Diffusers: Attach end caps to the cut ends of the aluminium profiles to give them a finished look and protect the LED strips. Slide the diffusers into the profiles to cover the LED strips and diffuse the light evenly.
Step-by-Step Guide to Installing Aluminium Profiles for LED Tape
- Marking the Placement on the Installation Surface: Transfer the placement marks from the planning stage to the installation surface. Use a level to ensure the marks are straight and even.
- Pre-Drilling Holes for Screws: If using screws to secure the profiles, pre-drill holes at the marked points on the profiles and the installation surface. This will make it easier to insert the screws and secure the profiles.
Securing the Profiles with Mounting Clips or Brackets
- Attach Mounting Clips or Brackets: Attach the mounting clips or brackets to the installation surface at the pre-drilled holes.
- Secure the Profiles: Place the aluminium profiles into the mounting clips or brackets and ensure they are firmly fixed. Use a drill to tighten any screws and secure the profiles in place.

Wiring and Connecting LED Tape
- Cut LED Tape to Fit: Measure and cut the LED tape to fit the length of the aluminium profiles.
- Attach Connectors and Wiring: Connect the appropriate connectors to the cut ends of the LED tape and secure the wiring.
- Place LED Tape Inside Profiles: Carefully place the LED tape inside the aluminium profiles, ensuring they are evenly aligned. Use thermal adhesive or double-sided tape to secure the LED strips within the profiles.
- Secure Wiring: Organize and secure the wiring with cable ties or clips to prevent any movement or damage.
Final Adjustments and Testing
- Adjust Profile Position: If necessary, adjust the position of the profiles to ensure they are straight and evenly aligned.
- Check Light Distribution: Turn on the LED tape and check for uniform light distribution, ensuring there are no dark spots or areas of uneven brightness.
- Test Entire Setup: Test the entire lighting setup to ensure all components are functioning correctly. Check the power supply, connectors, and LED strips for any issues.
Tips for Achieving Professional Results
- Ensuring Straight and Even Placement of Profiles: Use a level and measuring tape to ensure that the profiles are placed straight and evenly. This will give your installation a professional and polished look.
- Using Diffusers to Achieve Desired Light Diffusion: Choose the right type of diffuser (clear, frosted, opal) to achieve the desired lighting effect. Ensure the diffuser is properly installed within the profile to provide smooth and even light distribution.
- Concealing Wiring for a Clean Look: Organize and secure the wiring with cable ties or clips to keep it concealed and tidy. This will enhance the overall appearance of your installation.
- Regular Maintenance for Long-Lasting Performance: Regularly clean the profiles and diffusers to remove dust and debris. Inspect the connections and wiring periodically to ensure they remain secure and functional.
Frequently Asked Questions (FAQs)
1. Can I Install Aluminium Profiles Myself?
Yes, you can install aluminium profiles for LED tape lighting yourself with the right tools and a bit of patience. This guide provides detailed steps to help you achieve a professional-quality installation. However, for complex projects or if you lack confidence in your DIY skills, consider hiring a professional.
2. How Do I Ensure Proper Heat Dissipation?
To ensure proper heat dissipation:
- Use High-Quality Aluminium Profiles: Aluminium is an excellent conductor of heat and helps dissipate it efficiently.
- Allow for Adequate Ventilation: Ensure there is enough space around the profiles for air circulation.
- Use Thermal Adhesives: Attach LED tape to profiles using thermal adhesives to enhance heat transfer.
3. What Are the Best Diffusers for LED Tape?
The best type of diffuser depends on the desired lighting effect:
- Clear Diffusers: Provide maximum brightness but may result in visible LED dots.
- Frosted Diffusers: Soften the light and reduce glare while maintaining adequate brightness.
- Opal Diffusers: Offer the smoothest light diffusion, creating a uniform glow without visible hotspots.
4. Are These Profiles Suitable for Outdoor Use?
Yes, some aluminium profiles are designed for outdoor use. Look for profiles with an IP65 or higher rating to ensure they are water-resistant and can withstand outdoor conditions. Additionally, ensure that the LED tape and connectors used are also rated for outdoor use.
5. How Do I Choose the Right Profile for My Project?
To choose the right aluminium profile for your project, consider the following factors:
- Installation Environment: Determine whether the profile will be installed indoors or outdoors. For outdoor installations, ensure the profile and LED tape have appropriate weather resistance ratings.
- Desired Lighting Effect: Decide on the type of light diffusion you need. Clear diffusers provide maximum brightness, frosted diffusers soften the light, and opal diffusers create the most uniform light distribution.
- Profile Shape and Size: Select a profile shape (e.g., U-shaped, V-shaped, recessed) and size that matches your installation needs and the dimensions of your LED tape.
- Compatibility: Verify that the profile is compatible with your LED tape in terms of width, height, and power requirements.
- Mounting Options: Choose profiles that come with the necessary mounting accessories, such as clips, brackets, and end caps, to ensure easy and secure installation.

Conclusion
In short, installing aluminium profiles for LED tape is essential to achieve professional and polished look in your lighting projects. These profiles offer numerous benefits, including improved light diffusion, effective heat dissipation, and enhanced protection for your LED strips.
By using high-quality aluminium profiles, you can create stunning and functional lighting setups that stand the test of time.
Choosing the right aluminium profiles involves considering factors such as material quality, diffuser type, profile shape and size, mounting options, and compatibility with your LED tape. Proper installation and regular maintenance ensure your lighting setup performs optimally and lasts for many years.
