
Replacing an emergency light battery might seem simple, but common mistakes Replace emergency light battery processes can compromise the system’s effectiveness. Emergency lights are crucial for safety, guiding people to exits during power outages or emergencies.
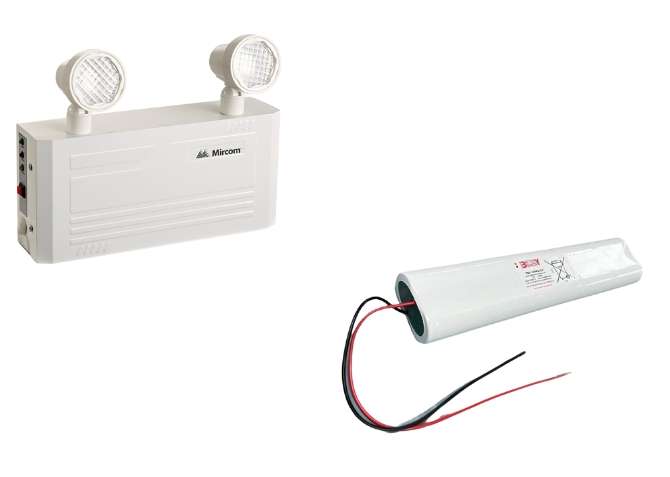
Ensuring the battery is replaced correctly is essential for system reliability. However, errors during replacement can lead to failures when the lights are needed most. This guide highlights common mistakes Replace emergency light battery processes and offers tips to avoid them, ensuring your system remains fully operational.
One frequent mistake is failing to disconnect the power supply before starting. Skipping this step risks electric shocks or short circuits, potentially damaging the unit or causing injury. Always turn off the power by switching off the circuit breaker or unplugging the unit.
Using the wrong battery type is another error to avoid. Incorrect batteries can lead to inadequate power supply or reduced battery life. Always match the new battery’s specifications with the old one’s voltage and capacity.
Neglecting to check battery terminals for corrosion is another common issue. Corrosion interferes with performance, so clean the terminals before installing the new battery. Skipping the testing phase after replacement is also problematic. Testing ensures the battery is installed correctly and the emergency light functions properly.
By addressing these common mistakes Replace emergency light battery processes, you can perform a smooth replacement that keeps your emergency lighting system reliable and effective.
Understanding the Importance of Proper Battery Replacement
Proper battery replacement is essential for maintaining the reliability and effectiveness of your emergency lighting system. Emergency lights provide critical illumination during power outages, guiding occupants to exits and reducing accident risks.
These lights depend on batteries to function during power disruptions, and any errors during replacement can compromise the system. Avoiding common mistakes Replace emergency light battery ensures the system operates as intended in emergencies.
Incorrect battery replacement can cause issues such as insufficient power supply, reduced battery life, or damage to the emergency light unit.
Using a battery with the wrong voltage or capacity often results in lights dimming prematurely, failing to turn on, or malfunctioning. Improper installation, including loose connections or unclean terminals, can lead to rapid battery drain or failure to deliver power during emergencies.
These failures can have severe consequences. Non-functioning emergency lights during an emergency create confusion, panic, and potentially life-threatening situations as occupants struggle to find exits.
Additionally, improper maintenance risks non-compliance with safety regulations, leading to fines, legal liabilities, and increased insurance costs. Avoiding common mistakes Replace emergency light battery is not just routine maintenance; it is a vital safety measure that protects people and property.
Common Mistakes When Replacing Emergency Light Batteries
Replacing the battery in an emergency light may seem like a simple task, but it’s surprisingly easy to make mistakes that can compromise the entire system. These errors can lead to malfunctioning lights, reduced battery life, and even dangerous situations during emergencies.
Below, we discuss the most common mistakes people make when replacing emergency light batteries and how to avoid them to ensure your lighting system remains reliable and effective.
Mistake 1: Failing to Disconnect the Power Supply
One of the most dangerous mistakes you can make when replacing an emergency light battery is failing to disconnect the power supply before starting the process. Working with live electrical components poses a significant risk of electric shock, which can cause serious injury or even be fatal.
Additionally, it can result in short circuits that may damage the emergency light unit or other connected systems.

To avoid issues, always disconnect the power to the emergency light before starting any maintenance. For hardwired lights, locate the circuit breaker and switch it off. If the light is battery-operated or plugged in, unplug the unit.
After disconnecting, test the light to confirm no electricity runs through the system by pressing the test button or ensuring the light does not turn on. Avoiding common mistakes Replace emergency light battery involves taking this crucial step to ensure safety and prevent accidental damage during the replacement process.
Mistake 2: Using the Wrong Battery Type
Another common mistake is using the wrong type of battery when replacing an emergency light. Not all batteries are created equal, and using one that doesn’t match the specifications of the original can lead to several issues.
Installing an incorrect battery can result in insufficient power output, which may cause the light to dim prematurely, fail to illuminate properly, or not work at all during an emergency.
Additionally, using a battery with the wrong voltage or capacity can shorten the lifespan of both the battery and the emergency light unit.
To avoid these problems, always check the specifications of the original battery before purchasing a replacement. Look for details such as voltage, capacity (measured in ampere-hours, Ah), and size. This information is usually printed on the battery or included in the light’s user manual.
If you’re unsure which battery to use, consult the manufacturer’s website or customer service for guidance. By choosing the correct battery, you ensure that your emergency light will function effectively and provide reliable illumination when needed.
Mistake 3: Poor Connection of Battery Terminals
Improper connection of the battery terminals is another frequent issue that can lead to emergency light failures. If the terminals are not securely connected, the battery may not deliver the necessary power to the light, causing it to flicker, dim, or fail to turn on altogether.
Loose connections can also lead to increased resistance in the circuit, which can cause the battery to drain more quickly and reduce its overall lifespan.
To ensure a secure connection, start by inspecting the battery terminals for any signs of wear or damage. When attaching the battery, make sure the terminals are clean and free of corrosion (more on this in the next section).
Use the appropriate tools, such as a screwdriver or pliers, to tighten the terminal connections firmly without overtightening, which could damage the terminals or the battery. Once connected, give the wires a gentle tug to make sure they are firmly attached and won’t come loose.
Properly connected terminals help maintain a stable flow of electricity and ensure the emergency light functions reliably.
Mistake 4: Ignoring Signs of Corrosion
Corrosion is a common issue in battery compartments, especially in older emergency lights or those exposed to humid environments.
Corrosion typically appears as a white, powdery residue on the battery terminals and can interfere with the battery’s ability to deliver power effectively. Ignoring or neglecting to clean corrosion can lead to poor electrical contact, resulting in a malfunctioning or unreliable emergency light.
Before installing a new battery, always inspect the battery compartment for any signs of corrosion.
If you notice corrosion, it’s important to clean it thoroughly before proceeding with the battery replacement. You can use a small wire brush, an old toothbrush, or even a cotton swab dipped in a mixture of baking soda and water to scrub away the corrosion. Be sure to wear gloves to protect your skin from any harmful chemicals.
After cleaning, wipe the terminals with a dry cloth to remove any remaining moisture. This simple step helps ensure a good electrical connection and extends the life of both the battery and the emergency light.
Mistake 5: Skipping the Testing Phase
Skipping the testing phase after replacing the battery is a critical mistake that can leave your emergency light in a non-functional state without you even realizing it. Test the light immediately after replacing the battery to confirm proper installation and ensure it works when needed most.
Without testing, you may not discover issues such as loose connections, a faulty battery, or other installation errors until it’s too late.
To properly test the emergency light, restore power to the unit and press the test button, which is typically located on the light’s housing. The light should illuminate, indicating that the battery is functioning properly. If the light does not turn on or flickers, recheck the battery connections and confirm the battery sits properly in its compartment.
It’s also a good idea to perform a longer test to ensure the light can stay illuminated for the required duration (usually 90 minutes, as per safety regulations). This thorough testing phase confirms that your emergency light is ready to perform its critical function in an emergency.
Mistake 6: Rushing the Reassembly Process
After replacing the battery and testing the light, the final step is to reassemble the unit. Rushing this process is a common mistake that can lead to improperly secured compartments, loose connections, and potential damage to the light.
Failing to fasten the battery compartment cover securely can cause it to come loose over time, exposing the battery to dust and moisture or leading to disconnection during operation.
To avoid these issues, take your time when reassembling the emergency light. Ensure that the battery is seated correctly and that all connections are secure before closing the compartment. Carefully align the cover with the housing and use the appropriate tools to tighten any screws or fasteners evenly, ensuring the cover is flush with the rest of the unit.
Double-check that the cover is secure and that there are no gaps where dust or moisture could enter. By taking care during the reassembly process, you ensure the long-term reliability and durability of your emergency light, giving you peace of mind that it will be ready to function during an emergency.
Avoiding these common mistakes during the battery replacement process is crucial for maintaining the functionality and reliability of your emergency lighting system.
By disconnecting the power supply, using the correct battery type, ensuring secure connections, addressing corrosion, thoroughly testing the light, and carefully reassembling the unit, you can ensure that your emergency lights will perform their critical role in keeping your building safe during power outages or emergencies.
Preparing for Battery Replacement
Proper preparation is key to avoiding common mistakes when replacing an emergency light battery. Start by gathering all the necessary tools and materials, including a screwdriver, wire strippers, electrical tape, a voltage tester, and the correct replacement battery.
Having everything ready before you begin will streamline the process and reduce the likelihood of errors. Additionally, take a few minutes to review the replacement process, either by consulting the manufacturer’s manual or a reliable online guide.
This will help you understand each step and identify any potential challenges before you start, ensuring that you approach the task with confidence and clarity.
Step-by-Step Guide for Proper Replacement
Following a step-by-step approach is essential for ensuring a smooth and error-free battery replacement. Begin by safely disconnecting the power supply to avoid any risk of electric shock.
Next, access the battery compartment by carefully removing any screws or panels. Once the old battery is removed, inspect the compartment for corrosion and clean it if necessary. Install the new battery, making sure the terminals are securely connected. After reassembling the unit, restore power and test the light to ensure everything is functioning correctly.
 Throughout the process, prioritize safety and accuracy—double-check connections, and don’t rush any steps. By adhering to this methodical approach, you can avoid common pitfalls and ensure your emergency light battery replacement is successful.
Troubleshooting Common Issues After Replacement
Even with careful preparation, issues may arise due to common mistakes Replace emergency light battery processes. One frequent problem occurs when the light fails to turn on, often caused by loose connections or an improperly seated battery. Check all connections to ensure they are secure and verify that the battery is correctly positioned in its compartment.
Another issue involves the light flickering or dimming, which can signal a faulty battery or poor terminal contact. Clean the terminals thoroughly and ensure they are tightly connected to resolve this issue. Addressing common mistakes, such as replacing the emergency light battery, ensures reliable performance and proper functionality.
If you encounter more complex issues, such as the light turning on but not staying lit for the required duration, it might indicate a deeper problem with the light’s internal circuitry or power supply.
In such cases, it’s wise to consult the manufacturer’s troubleshooting guide or seek professional assistance. A licensed electrician or technician can diagnose and fix issues that may be beyond basic troubleshooting. Knowing when to call for help ensures that your emergency lighting system remains reliable and compliant with safety regulations.
Tools and Resources for a Successful Battery Replacement
To ensure a successful and mistake-free battery replacement, it’s important to have the right tools at hand. Use essential tools such as a magnetic screwdriver to remove and reattach screws easily, wire strippers to handle necessary wire adjustments, and a voltage tester to confirm full power disconnection before starting.
Additionally, insulated gloves provide an extra layer of safety when handling electrical components.
For further guidance, consider consulting the manufacturer’s manual or reliable online resources like the National Fire Protection Association (NFPA) website, which offers detailed information on emergency lighting maintenance.
Online tutorials and videos can also be valuable for visual learners, offering step-by-step demonstrations of the replacement process.
Conclusion
In this guide, we’ve covered how to avoid common mistakes Replace emergency light battery tasks effectively. Disconnect the power supply, use the correct battery type, secure all connections, and thoroughly test the light to ensure reliability and effectiveness.

Following these steps is crucial for maintaining a functional emergency lighting system.
Prepare adequately, use the right tools, and follow a structured replacement process to avoid pitfalls. If you encounter difficulties or have doubts, contact a professional for assistance. Proper maintenance of emergency lights ensures safety and compliance.
Avoid common mistakes Replace emergency light battery tasks by seeking professional support when needed to keep your system in top condition.
