
If you source or specify led strip lights for furniture, you already know the problem. A strip that looks fine on a sample board can fail inside real joinery. You may face color inconsistency, dark ends, poor diffusion, or rework after installation. That hurts margin and delays handover. The practical fix is to choose strips by application, not by price tag alone. In our lab tests using integrating spheres, thermal cameras, and aging racks, we see the same pattern again and again: furniture lighting performs well only when optical quality, heat control, driver sizing, and installation method are considered together.
1. Why are LED strip lights a strong fit for furniture?
LED strip lighting fits furniture because it is low profile, cuttable, efficient, and easy to hide in millwork. That matters in wardrobes, kitchen cabinets, bookcases, retail shelving, hotel headboards, and vanity mirrors. You need light exactly where the user interacts with the furniture, not broad room lighting that leaves shadows.

We often see installers struggle with bulky luminaires inside narrow cabinets. A 10 mm or 12 mm strip inside an aluminum profile for LED strip lighting solves that. In a wardrobe rail, it gives vertical light on clothing. Under a shelf, it highlights products without stealing space. In a kitchen, it improves task visibility on the countertop. In a reception desk, it adds a clean accent line that supports the design intent.
From our manufacturing floor perspective, furniture lighting projects also benefit from customization. Pre-soldered leads, side-entry cables, and custom cut lengths reduce field labor. That can save real time across repeated cabinet modules.
| Furniture Application | Lighting Goal | Recommended Strip Style | Typical Note |
|---|---|---|---|
| Wardrobes | Vertical visibility | High CRI strip in profile | Add door sensor if needed |
| Kitchen cabinets | Task lighting | 24V high-density strip | Use diffuser to reduce dots |
| Display shelves | Product highlight | COB or high-density SMD | Keep color consistent |
| Headboards | Ambient accent | Warm white strip | Use low-glare profile |
| Vanity mirrors | Face illumination | High CRI, neutral white | Focus on color accuracy |
2. What should you define before selecting a strip?
Start with the furniture type, mounting space, viewing distance, target brightness, and control method. Here is the deal. Many strip issues begin before the order is placed. The buyer asks for “bright warm white LED tape,” but no one defines lumen target, profile depth, cable exit, dimming method, or whether the light source will be directly visible.
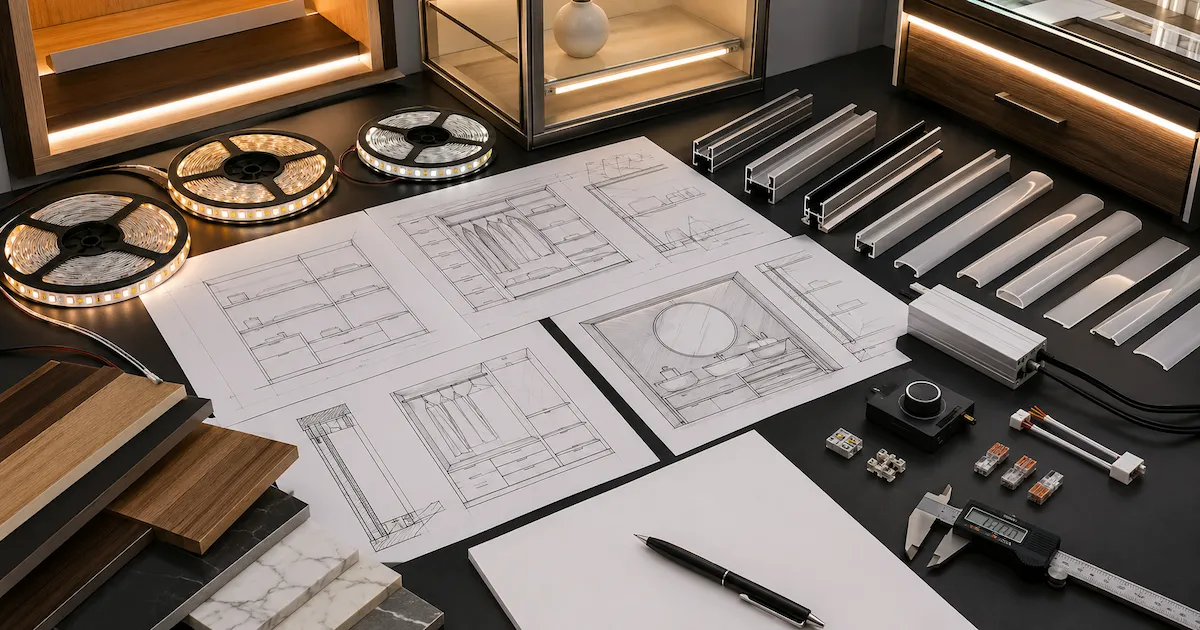
For example, a glass display shelf needs stronger vertical illumination and tighter color control than a bedroom headboard. A jewelry cabinet may need CRI 90 or above to show metal and stones correctly. A shoe rack may need only moderate output but wide beam spread. In a luxury hotel minibar, a low-glare warm white line matters more than raw wattage.
We once saw a project fail because the joinery team left only 8 mm recess depth but selected a strip and diffuser that needed 13 mm. The result was a visible lens edge and delayed installation. Another case involved cabinet doors blocking the sensor angle. A third involved underpowered drivers packed in sealed cavities.
Define these points early:
- Furniture material and finish
- Recessed or surface mounting
- Direct or indirect light effect
- White, tunable white, or RGB
- Dimming protocol and switching logic
- Service access for driver replacement
3. How do 12V and 24V options compare in furniture projects?
For most furniture layouts, a 24V LED strip is the safer and more stable choice.. It reduces current, helps with voltage drop, and supports longer continuous runs. But there is a catch. 12V LED strip lights still have a place in short modules, battery systems, and very compact assemblies where driver compatibility is fixed.
When we tested this against a standard 12V strip, the 24V version kept more even brightness across longer cabinet runs. That matters in wall-to-wall wardrobes, retail gondolas, and continuous kitchen lines. Lower current also reduces stress on connectors and solder joints. In field use, that can mean fewer intermittent failures.
Common Myth: higher wattage always means better brightness. Reality: brightness depends on lumens per meter, LED density, optical losses in the diffuser, and how well the strip handles voltage over the run. A 14.4 W/m strip with poor voltage stability can look worse than a more efficient 9.6 W/m strip in a well-designed 24V system.
| Parameter | 12V Strip | 24V Strip |
|---|---|---|
| Best use case | Short sections, compact systems | Longer runs, modular furniture lines |
| Voltage drop risk | Higher | Lower |
| Cut length flexibility | Often shorter cut interval | Slightly longer cut interval |
| Current at same power | Higher | Lower |
| Connector stress | Higher | Lower |
| Recommendation | Small isolated furniture units | Most commercial furniture layouts |
4. Which light quality specs matter most for furniture lighting?
Light quality affects how furniture looks and how users feel around it. The three core items are color temperature, CRI, and consistency. For wood cabinets, warm white around 2700K to 3000K often suits residential and hospitality work. For retail shelving and dressing areas, 2835 LED strips in 3500K to 4000K are common because they look cleaner and support visibility.
Color rendering index (CRI) matters more than many buyers expect. In our lab tests using integrating spheres, we compare strips that claim similar output but render materials very differently. Walnut veneer, white lacquer, fabrics, cosmetics, and packaged products all react to poor color rendering. Low CRI can flatten texture and distort tone.
Consistency between batches also matters. If one wardrobe extension is installed six weeks later and the new reel shifts color, the mismatch is visible. That can trigger rejection on premium interiors.
Our Chief Engineer notes that heat dissipation is often ignored in furniture lighting, yet excess heat shifts color over time and shortens life. That is why the profile and substrate quality matter just as much as the diode specification.
| Spec | Good Baseline | Better Choice for Premium Work | Why It Matters |
|---|---|---|---|
| CCT | 3000K or 4000K | Project matched | Supports design intent |
| CRI | 80+ | 90+ | Better material appearance |
| Binning | Standard commercial | Tight binning | Reduces visible mismatch |
| LED density | 120 LEDs/m | COB or high density | Fewer visible dots |
5. Do you need aluminum profiles and diffusers for furniture?
In many cases, yes. Profiles are not just cosmetic; the main advantages of aluminum profiles include better heat control, cleaner diffusion, strip protection, and a more premium installation finishIn furniture lighting, aluminum profiles are used for heat management, strip protection, straighter installation, and cleaner light diffusion. Ready for the good part? A simple profile decision often separates a premium result from a budget-looking installation.
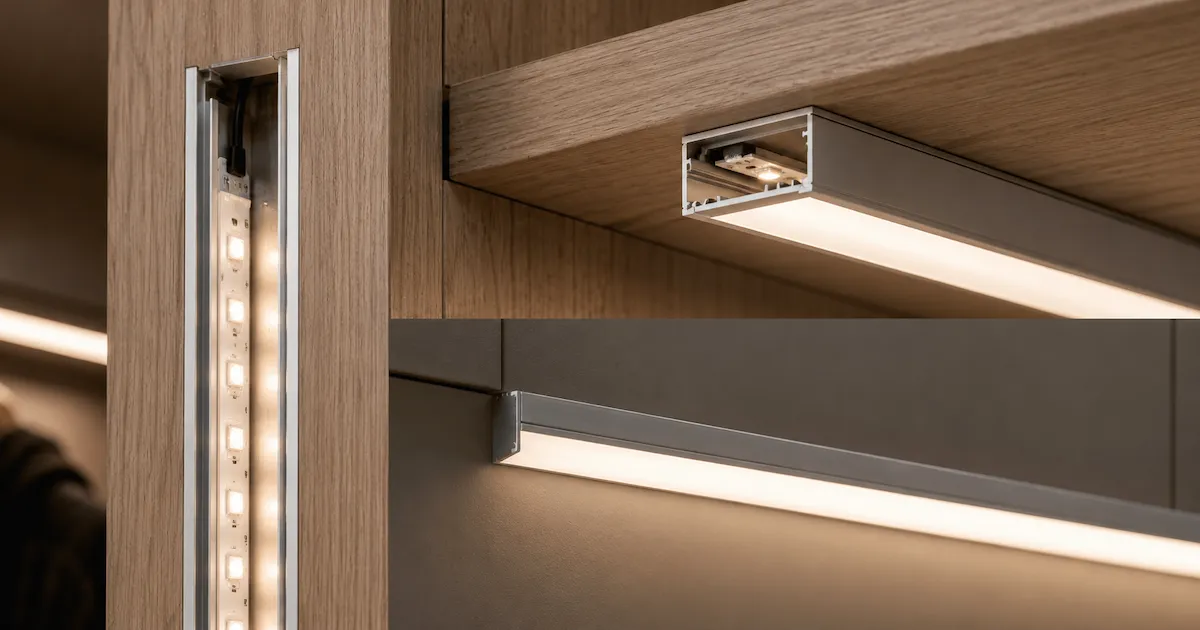
For under-cabinet kitchen lighting, an aluminum LED channel and diffuser usually works well.. For wardrobe side panels, recessed profiles create a built-in appearance. For glass shelving, slim profiles with frosted covers can soften the source and reduce glare. For curved furniture details, flexible LED profiles or silicone neon-style solutions may work better than rigid channels.
We often see adhesive-only installations fail on textured laminate, dusty wood, or oily painted surfaces. A profile with clips or screws gives mechanical security. It also simplifies replacement. In a hotel joinery package, that matters because service teams need predictable access.
From our manufacturing floor perspective, profile depth must match LED density. A low-density strip in a shallow profile often produces visible spotting.A deeper channel or 12V COB LED strip reduces that issue, especially in short furniture modules that need smooth dot-free light.
| Profile Type | Best Application | Main Benefit | Watch Point |
|---|---|---|---|
| Surface profile | Under shelves, cabinet bottoms | Easy retrofit | More visible body |
| Recessed profile | Wardrobes, premium joinery | Clean finish | Needs machining tolerance |
| Corner profile | Cabinet corners | Angled beam | Can create glare if exposed |
| Mini profile | Display cabinets | Tight spaces | Limited thermal mass |
6. How do you size power supplies and wiring correctly?
A well-chosen strip can still fail if the driver and cable are wrong. This is where it gets interesting. Many furniture lighting complaints come from undervalued drivers, inaccessible installation, or wiring that was selected only by habit.
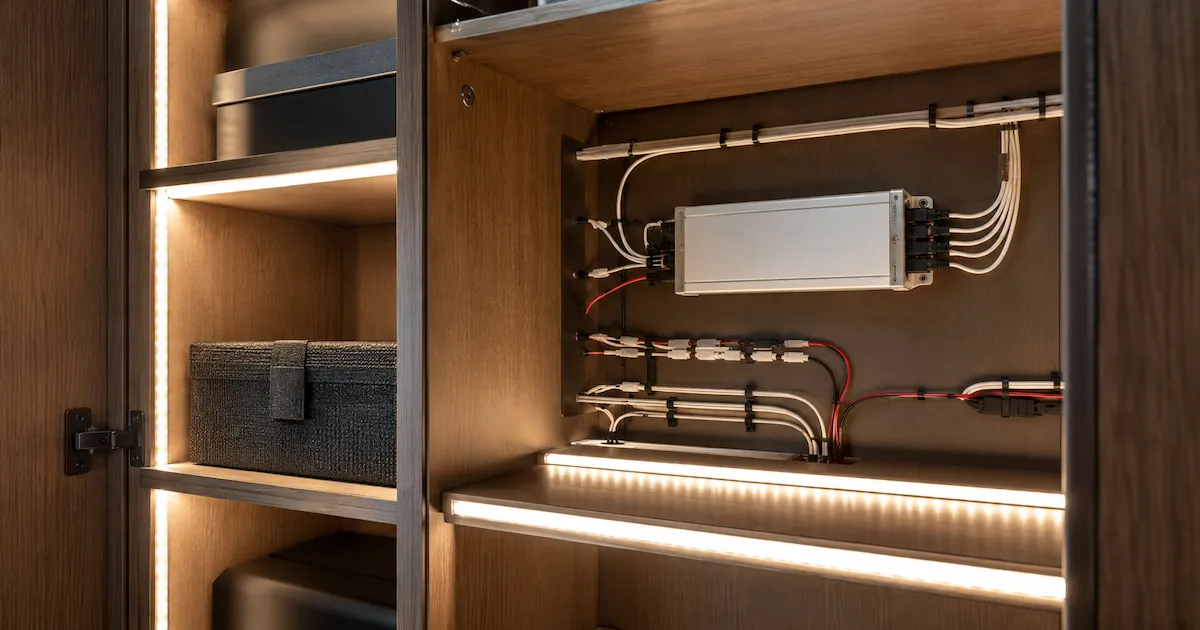
Start with total wattage. Add the wattage of each strip section, then leave headroom, often 20% to 30%, so the power supply does not run at its limit all day. In a bank of ten illuminated shelves, each using 8 W, the total is 80 W. A 100 W or 120 W rated driver is usually more sensible than an 80 W unit running flat out.
Cable length matters too because long low-voltage runs can create measurable voltage drop, especially at 12V. Long low-voltage runs can create measurable drop, especially at 12V.We once saw a wardrobe island with bright ends and a dull center because feeds were daisy-chained through small-gauge wire, which is why selecting the correct wire gauge matters in longer furniture lighting runs.Feeding from both ends solved it.
Also think about ventilation and service access. Hidden drivers in sealed cavities run hot. Hot drivers fail early.
| Design Item | Rule of Thumb | Risk If Ignored |
|---|---|---|
| Driver sizing | Add 20% to 30% headroom | Overheating, short life |
| Wire gauge | Match current and distance | Voltage drop, dim sections |
| Feed method | Use parallel feeds for long layouts | Uneven brightness |
| Driver access | Keep serviceable location | Costly maintenance |
7. What installation details prevent callbacks and early failure?
Good installation is about repeatability. Clean substrate preparation, correct cutting points, proper soldering, strain relief, and temperature-aware mounting all matter. Small shortcuts become service problems later.
We often see installers struggle with fast cabinet production schedules. The temptation is to peel and stick, press by hand, and move on. That works for a short demo unit. It is risky for production furniture. Dust, wax, paint residue, and uneven finishes weaken adhesive bond. On vertical wardrobe panels, strips can sag after seasonal heat changes.
Use a checklist. Verify substrate cleaning, dry fit the profile, test polarity before final closure, and keep bend radius within limits. In mirrored cabinets, avoid cable pinch points near hinges. In retail fixtures, protect solder joints from repeated movement during merchandising.
A generic field example stands out. A display shelf project used quick connectors inside a high-vibration environment. After several weeks, intermittent flicker appeared. Replacing those joins with soldered connections fixed the issue.
| Installation Checkpoint | What to Verify | Result |
|---|---|---|
| Surface prep | Clean, dry, dust-free | Better adhesive bond |
| Cutting | Only at marked intervals | Prevents circuit damage |
| Polarity test | Before final fixing | Avoids rework |
| Strain relief | At cable exits and joins | Less stress on pads |
| Thermal path | Strip seated in profile | Lower operating temperature |
8. How do IP rating, safety, and certifications apply indoors?
Not every furniture project needs waterproof strip lighting. In fact, silicone-covered strips can trap more heat and reduce thermal performance in dry indoor joinery. The right IP rating choice depends on exposure, cleaning method, and compliance needs.
For wardrobes, bookcases, reception desks, and most dry display furniture, IP20 is often enough if the strip is protected in a profile. For kitchen areas near splashes, IP54 or a protected profile approach may make more sense. Vanity zones and wet-adjacent millwork need closer review of local electrical rules, driver placement, and low-voltage safety practices.
Certifications also matter because they reduce project risk. CE, RoHS, UL, or CB marking may be required by market, project type, or customer policy. This is not just paperwork. A compliant system helps with inspection, liability control, and documentation for procurement teams.
We explain this because ignoring safety details can create hidden cost. One rejected inspection can delay opening dates for a retail fit-out or hospitality project.
| Environment | Suggested Protection | Notes |
|---|---|---|
| Dry wardrobes and shelves | IP20 in aluminum profile | Common indoor setup |
| Kitchen cabinet task areas | IP20 with protective profile or IP54 | Review splash exposure |
| Vanity joinery | Project dependent | Check local code |
| Retail fixtures | IP20 with robust wiring protection | Focus on serviceability |
9. How can you customize furniture strips for faster assembly?
Standard reels work, but custom preparation often saves more money than buyers expect. Think about repeated cabinet modules, chain retail rollouts, or OEM furniture lines, where the right strip light profiles for modular furniture lighting help keep assembly faster and the final light effect more consistent. If every installer must cut, tin, solder, test, and label in the field, labor cost rises and quality variation follows.
Useful custom options include pre-cut lengths, pre-soldered leads, plug-and-play connectors, custom cable exit direction, private label packaging, and matched profile kits. For mirrored cabinets, side-exit cables can avoid hinge conflict. For modular wardrobes, same-length harnesses reduce wiring mistakes. For shelf systems shipped flat-pack, connectorized assemblies speed final build.
From our manufacturing floor perspective, these details often remove hidden friction. One project with sixty display cabinets reduced site assembly time simply by using numbered leads and pretested harnesses. Another project avoided left-right installation errors by color-coding cable exits. A third reduced waste because every strip was supplied to finished length.
| Custom Feature | Best For | Main Gain |
|---|---|---|
| Pre-cut lengths | Repeated furniture modules | Less waste |
| Pre-soldered leads | Fast installation | Lower labor time |
| Side-exit cable | Tight joinery spaces | Easier routing |
| Plug connectors | OEM assembly lines | Faster connection |
| Kit packaging | Multi-site rollout | Better consistency |
10. How do you troubleshoot common problems with furniture strip lighting?
Most failures fall into a few patterns: dark end, flicker, color mismatch, visible dots, adhesive lift, and premature lumen loss. What’s the real story? These are usually system issues, not just strip issues.
Dark ends often point to voltage drop, weak connectors, or overlong runs from one feed point. Flicker may come from dimmer-driver mismatch, loose connection, or overloaded power supply. Color mismatch can come from mixed batches or different LED bins. Visible dots usually mean low density in a shallow profile. Adhesive failure often traces back to poor surface prep or excess heat.
In our lab tests using integrating spheres and thermal imaging, we compare suspect units against reference samples. That helps separate optical complaints from electrical ones. We once saw a contractor replace multiple strips for “low brightness,” but the real issue was driver derating inside an unventilated compartment.
| Problem | Likely Cause | Fast Check | Typical Fix |
|---|---|---|---|
| Dark end of run | Voltage drop | Measure voltage at far end | Shorten run or add feed |
| Flicker | Driver or dimmer mismatch | Test with stable supply | Replace compatible control |
| Color difference | Mixed batches | Compare reel labels | Use matched batch |
| Visible dots | Low density or shallow profile | View at normal angle | Use COB or deeper diffuser |
| Adhesive lifting | Dirty surface or heat | Inspect substrate and temp | Clean, re-mount in profile |
Closing Thoughts
The best led strip lights for furniture are chosen as a system, not as a reel. Voltage, CRI, profile depth, driver sizing, cable routing, and service access all shape the final result. If you specify these points early, you reduce callbacks and protect margins. If you are unsure about diffuser depth, voltage drop, or custom lead layout for a furniture project, send the drawings to an engineering team for review before production. That small step can prevent expensive rework later.
Conclusion
LED strip lighting in furniture succeeds when every component is specified as part of a single, integrated system. Choose voltage by run length, prioritize high CRI and tight binning for consistent color, and pair strips with aluminum profiles and suitable diffusers to manage heat and glare. Right-size drivers with headroom, plan parallel feeds on longer layouts, and keep drivers serviceable. Match IP ratings to real exposure instead of assumptions, and consider pre-cut lengths or pre-soldered leads to speed repetitive builds. Mock up a short section to verify brightness, color, and diffusion before committing. With these steps, you’ll deliver clean, durable, and uniform furniture lighting with fewer callbacks.
FAQ
Q1: What are led strip lights for furniture?
They are low-profile flexible LED light sources used in cabinets, wardrobes, shelves, displays, and other joinery to provide task, accent, or ambient lighting.
Q2: How does a furniture LED strip system work?
The strip runs on low voltage from a compatible driver, usually inside or near the furniture, and may include profiles, diffusers, sensors, and dimming controls.
Q3: Which voltage is better for furniture lighting, 12V or 24V?
For most commercial furniture layouts, 24V is preferred because it reduces voltage drop and supports longer, more even runs. Short isolated modules may still use 12V.
Q4: Do I need an aluminum profile for LED strips in furniture?
In many cases, yes. A profile improves heat dissipation, protects the strip, creates a straighter installation, and helps reduce visible LED dots.
Q5: What causes LED strip lights in furniture to fail early?
Common causes include poor heat management, undersized drivers, weak adhesive bonding, long cable runs, incompatible dimming parts, and inconsistent installation practice.
