
A sports bar is tough on lighting. You need atmosphere, but you also need safety, service visibility, and low maintenance. If the strips flicker on camera, fade after six months, or show mixed colors across batches, the owner sees callbacks and lost margin. The fix is not simply buying brighter tape. You need a specification that fits each zone, from beer shelves to wet counters to exterior fascia. From our manufacturing floor perspective, the best results come from matching the strip, profile, driver, control system, and installation method before production starts.
1. Why do led strip lights for sports bar projects need a different spec?
Sports bars run longer hours than many retail spaces. They also mix heat, grease, cleaning chemicals, vibration from audio systems, and high visual demand from TVs. A strip that works in a home cabinet may fail quickly behind a busy bar.
Here’s the deal: the lighting is part of the guest experience and part of the workflow. Staff need enough light to read labels and clean surfaces. Guests need glare control, rich color, and a clear view of screens. The owner needs fewer failures after opening night.
We often see installers struggle with three field conditions. Long back-bar runs create voltage drop. Tight coves trap heat. Wet zones near sinks get strips that only have dry-location protection. Each one can lead to dim ends, yellowing silicone, or dead segments.
Use the table below as a starting map for project planning.
| Sports Bar Area | Typical Lighting Goal | Suggested Strip Type | Main Risk |
|---|---|---|---|
| Bottle shelves | Product visibility and depth | High CRI 24V strip in aluminum profile | Color mismatch |
| TV wall | Soft bias light without glare | COB or high-density SMD | Reflections on screens |
| Bar counter | Mood and task balance | Tunable white or RGBW | Liquid exposure |
| Ceiling cove | Ambient wash | 24V or 48V constant voltage | Voltage drop |
| Exterior sign | Brand visibility | IP67/IP68 rated strip | UV and water ingress |
The following neutral technical overview explains the main factors to consider when selecting LED strip lighting for a professional commercial project.
2. What voltage is best for long bar runs and ceiling coves?
Voltage decides how far you can run before brightness drops. In sports bars, long shelves and ceiling coves are common, so 24V is usually the practical baseline. For extra-long runs, 48V may reduce the number of power-injection points, but installers still need to understand how to power multiple LED strips properly using compatible drivers, controllers, cable sizes, and feed locations.

When we tested this against a standard 12V strip, the 24V version showed less end-to-end brightness loss over the same length at comparable wattage. Use 12V only for short runs, small signs, or product-integrated lighting
Use 12V only for short runs, small signs, or product-integrated lighting. A 24V LED strip is normally the practical choice for bottle shelves, ceiling coves, under-counter lines, and most other commercial sports-bar applications. Use 48V for long architectural lines where driver location is limited.
| Voltage Vs. Use Case | Best Fit | Typical Run Advantage | Watch Point |
|---|---|---|---|
| 12V vs short accents | Small displays, logos, short shelves | Easy to source and cut | More voltage drop on long runs |
| 24V vs bar interiors | Back bars, coves, counters | Balanced run length and product choice | Needs correct driver sizing |
| 48V vs long coves | Large venues, long ceiling lines | Fewer feed points | Less common control compatibility |
Pro tip from VST Technical Team: “For bar projects, calculate voltage drop before ordering the strip. Fixing feed points after the ceiling closes is far more expensive than adding proper wiring during planning.”
3. How much brightness should a sports bar LED strip provide?
Brightness should fit the surface and the guest’s eye level. A bottle shelf may need 600 to 1,000 lumens per meter for strong product display. A ceiling cove may need less if it only creates background glow. A direct-view counter edge needs properly selected LED strip diffusers, not raw output, to soften glare, hide individual LED dots, and produce a cleaner line of light.
Common Myth: Higher wattage always means better brightness. Reality: brightness depends on lumen efficiency, LED density, optical losses, and thermal design. A 14.4W/m strip with poor efficiency may look weaker than a 10W/m strip using better LEDs and a proper aluminum profile.
In our lab tests using integrating spheres, we compare lumen output, CCT, CRI, and efficiency after warm-up. This matters because some strips look strong in the catalog but drop output after they reach working temperature.
A good rule is to specify brightness by task, not by emotion. Ask where people need to see labels, menus, steps, or glassware. Then set wattage and diffusion around that need.
| Application | Recommended Output | Typical Wattage | Best Mounting Method |
|---|---|---|---|
| Bottle backlight | 600–1000 lm/m | 9.6–14.4W/m | Profile with opal diffuser |
| Ceiling cove | 300–700 lm/m | 6–12W/m | Hidden aluminum channel |
| Under counter | 400–800 lm/m | 8–12W/m | Recessed profile |
| Sign accent | 500–1200 lm/m | 10–18W/m | Outdoor-rated channel |
4. Which color temperature and CRI work best in a sports bar?n
Understanding LED basics such as color temperature and color rendering helps explain how lighting changes the mood and how bottles, food, finishes, and other products appear. Warm white around 2700K to 3000K feels relaxed and premium. Neutral white around 3500K to 4000K supports cleaning and service zones. RGBW works well for theme nights, but white quality should not be sacrificed.
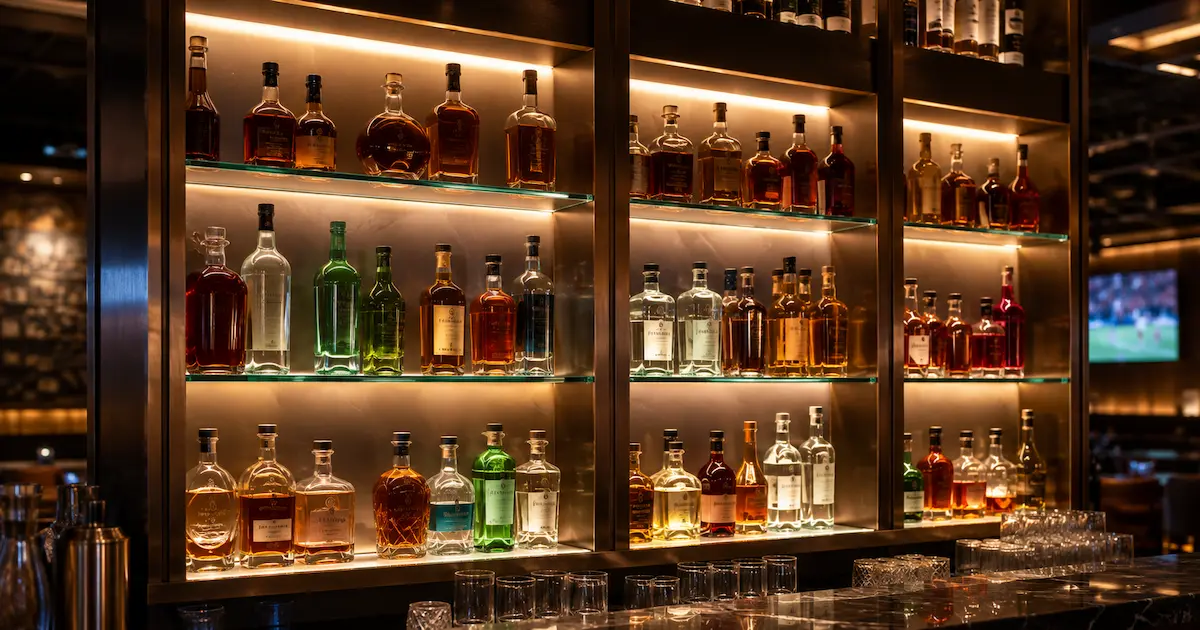
For bottles, food, and wood finishes, CRI matters. A CRI 90 strip can make labels and spirits look richer than a CRI 80 strip. The difference is clear on copper, amber, red, and green tones. We explain this binning process because ignoring it leads to visible color mismatch across shelves.
Ask for MacAdam ellipse data if the project uses many meters from more than one batch. A 3-step bin gives tighter visual consistency than wider bins. For national chains, batch control protects brand appearance from site to site.
| Lighting Zone | Suggested CCT | Suggested CRI | Reason |
|---|---|---|---|
| Premium bottle shelf | 2700K–3000K | CRI 90+ | Rich warm product color |
| Service prep area | 3500K–4000K | CRI 80–90 | Cleaner working visibility |
| TV wall bias light | 3000K–4000K | CRI 80+ | Lower eye strain |
| Event lighting | RGBW or RGB+CCT | White channel preferred | Flexible scenes with usable white |
5. Should you use RGB, RGBW, tunable white, or single-color strips?
The answer depends on revenue use. If the sports bar hosts game nights, private events, team colors, or live music, RGBW or RGB+CCT can pay back through better scene control. If the venue wants a classic pub look, single warm white may be simpler and more reliable.
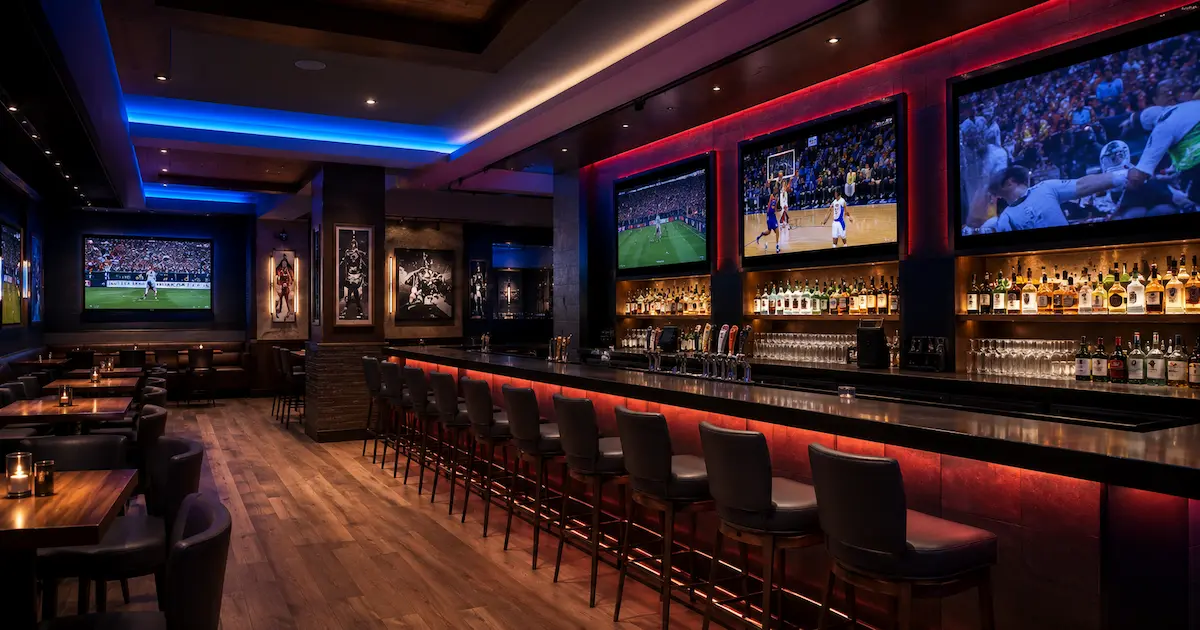
But there’s a catch. RGB strips without a dedicated white chip often produce weak white with color shadowing. That can look cheap on premium interiors. An RGBW LED strip adds a dedicated white channel, allowing staff to switch from team colors and event scenes to clean, practical service lighting after closing.
Tunable white is useful where the venue changes atmosphere through the day. Lunch service may use 3500K. Late-night service may shift to 2700K. For chains, programmable scenes help keep every location consistent.
Control compatibility is the hidden cost. DMX suits larger venues and scene control. DALI is common in commercial building systems because it provides a standardized digital method for creating scalable, addressable, and configurable lighting-control networks. Simple PWM dimming works for basic zones.
| Strip Type | Best Use | Strength | Limitation |
|---|---|---|---|
| Single-color white | Classic interiors, shelves | Simple and stable | No scene color |
| Tunable white | Day-to-night venues | Adjustable mood | Needs two-channel control |
| RGB | Decorative accents | Low cost color | Poor white quality |
| RGBW | Events and daily service | Color plus real white | More wiring and control channels |
| RGB+CCT | High-end scene design | Full color and white tuning | More complex setup |
6. What IP rating is needed for wet bars, kitchens, and outdoor zones?
The IEC’s explanation of IP ratings provides a neutral framework for matching enclosure protection to the actual level of dust, cleaning spray, moisture, and water exposure in each sports-bar zone. Dry shelves can use IP20 if the strip sits in a profile and away from cleaning spray. Bar counters, sink areas, refrigerator fronts, and cleaning-exposed surfaces may require properly sealed waterproof LED strip lights with protected connectors and carefully treated end points. Exterior fascia and signage should follow applicable outdoor lighting safety requirements and use weather-rated enclosures, sealed electrical connections, and UV-stable materials.
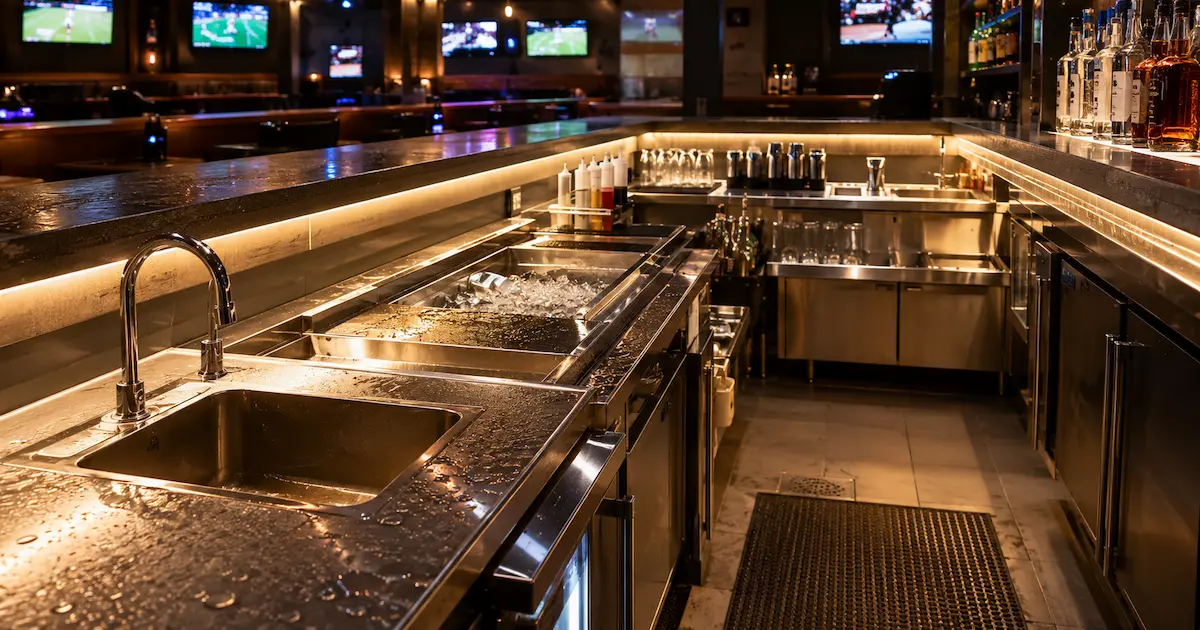
A frequent field example is a strip mounted under a counter lip near an ice bin. It looks protected, but staff wash the area nightly. Moisture reaches solder joints, then the strip flickers or fails. In that case, IP65 silicone coating may not be enough if water collects. IP67 or a sealed profile may be safer.
For kitchens, also check cleaning chemicals and heat. Silicone can yellow near high heat or aggressive cleaners. PVC sleeves can crack in cold outdoor locations. Ask for material details, not just the IP number.
| IP Rating | Protection Level | Best Location | Caution |
|---|---|---|---|
| IP20 | Dry indoor use | Shelves inside profiles | No moisture protection |
| IP65 | Splash resistant | Under counters away from standing water | Ends must be sealed well |
| IP67 | Temporary immersion protection | Wet bar edges, exterior accents | Heat dissipation can be harder |
| IP68 | Long-term water exposure design | Special outdoor or pool-adjacent use | Needs project-specific testing |
7. How do aluminum profiles affect lifespan and appearance?
An aluminum profile for LED strip lighting performs two essential jobs in a sports bar: it transfers heat away from the LED tape and helps shape a smoother, more professional line of light. They remove heat from the LED strip, and they shape the light. Both affect project profit. A strip running too hot loses output faster, shifts color, and may damage adhesive. A strip with no diffuser can create dotting on glossy bottles and counters.
Our Chief Engineer notes that heat dissipation is often ignored in budget quotations, yet it is one of the main reasons a strip fails early in a commercial venue. In a sports bar, strips can run 8 to 14 hours per day. That duty cycle punishes poor thermal design.
Choose profile depth based on LED density and desired dot-free appearance. COB strips can look smooth in shallower profiles. Standard SMD strips often need deeper profiles or high-density layouts to reduce visible dots.
Field example: a bar used bare strip behind acrylic shelves. After three months, several sections detached because the mounting surface warmed and the adhesive softened. A simple profile with mechanical clips would have prevented the callback.
Use profiles anywhere the strip is visible, touchable, or used daily.
8. What driver and dimming system should you specify?
Drivers are not accessories. They are part of system reliability. A poor driver can cause flicker on phones, noise in audio equipment, failed dimming, or early strip damage. For a sports bar with TVs and cameras, flicker control is a serious consideration, and troubleshooting flickering LED strip lights should include checking driver compatibility, PWM frequency, voltage stability, total load, and dimming settings.
Specify constant-voltage drivers that match the strip voltage, total wattage, and dimming protocol. Add headroom. A common target is to load drivers at 70% to 85% of rated capacity, especially in warm ceiling spaces. For example, a 200W strip load should not be paired with a 200W driver in a hot cabinet. Use a larger rated unit and allow airflow.
Dimming choice depends on project scale. Small bars may use wall dimmers and PWM controllers. Larger venues may use DMX zones, scene panels, or building integration. Check frequency if filming sports reactions or social content matters.
| Control Method | Best Fit | Benefit | Risk if Mismatched |
|---|---|---|---|
| PWM dimming | Simple white or RGB zones | Cost-effective control | Flicker if low frequency |
| 0/1-10V | Basic commercial dimming | Familiar to contractors | Limited color scene control |
| DALI | Building lighting systems | Addressable zones | Setup skill required |
| DMX | Sports bars with events | Strong scene control | Needs proper cabling |
| Smart app control | Small retrofit projects | Easy scene changes | Network reliability varies |
9. How should installers plan wiring, cutting, and mounting?
Installation planning protects margin, while professional LED strip light wiring helps prevent voltage drop, overheated cables, reversed polarity, weak connections, and difficult maintenance after the bar opens. Most failures we review are not caused by LED chips alone. They come from weak solder joints, wrong cable size, poor power injection, dust on mounting surfaces, or bent strips at sharp corners.
We often see installers struggle with cutting and reconnecting strips in tight back-bar millwork. Pre-soldered leads, custom cut lengths, and labeled cartons can save hours on site. For chain projects, that also reduces variation between installation teams.
Before installation, confirm run length, feed points, profile type, driver location, control wiring, and service access. Never bury drivers where staff cannot reach them. Do not rely only on adhesive in hot or dusty spaces. Use clips or profile covers.
| Installation Checklist | What to Verify | Field Fix if Missed |
|---|---|---|
| Voltage drop | Brightness at far end | Add power injection or shorter runs |
| Cable gauge | Current capacity and heat | Use thicker cable or split circuits |
| Cut marks | Cut only at marked points | Replace damaged section |
| Polarity | Positive and negative wiring | Test before final mounting |
| Profile contact | Strip seated flat on aluminum | Re-seat and clean profile |
| Driver access | Maintenance reach | Move driver to service panel |
| End sealing | Wet-zone protection | Re-seal with correct caps and adhesive |
10. How do you choose a reliable supplier for sports bar lighting orders?
A supplier should help you reduce technical risk, not just send a price list. Ask for photometric data, CCT tolerance, CRI report, voltage drop guidance, driver recommendations, and sample aging records. For markets that require compliance, check CE, RoHS, UL, or CB documents based on your local rules.
From our manufacturing floor perspective, sports bar projects benefit from customized preparation. Examples include pre-cut lengths for shelves, pre-soldered cable exits, waterproof end treatment, packaging by zone, and matching CCT bins for repeat orders. These small steps can protect installation time and reputation.
Ask direct questions before ordering:
- ● Can the factory keep the same CCT bin for repeat batches?
- ● What is the maximum recommended run length at the chosen voltage?
- ● Has the strip been aged under load before shipping?
- ● Which profile is recommended for the wattage?
- ● Can the supplier provide truthful lead time and production photos?
A cheap strip can look attractive on paper. But if it causes callbacks, project delays, or client rejection, the saved cents per meter disappear fast.
Final Takeaway: what should you specify before ordering?
LED strip lights for sports bar projects need a full system plan: voltage, lumen output, CCT, CRI, IP rating, driver sizing, dimming method, heat control, and installation details. The main message is simple. Specify for the real venue, not just the catalog page. If you are unsure about voltage drop, waterproofing, or control wiring for your project, send our engineering team your drawings. We’ll review the layout and calculate the practical options manually.
Practical specification template: list the target voltage, maximum run length, desired lumen output per meter, CCT and CRI target, IP rating required for each zone, recommended profile and diffuser type, driver wattage with headroom, preferred dimming protocol, and expected installation method. Having that consolidated in your RFQ avoids ambiguity and reduces costly site changes.
On-site testing and commissioning guidance: after installation, perform a full warm-up test for the expected duty cycle (4–6 hours) to detect thermal-related lumen depreciation or color shift. Inspect each run for uniformity, confirm dimming smoothness across scenes, and record measurements at the far end for voltage drop verification. Label circuits and feed points clearly to speed future maintenance.
Maintenance and warranty notes: plan routine inspections every 6–12 months for mounting integrity, end-seal condition, and driver ventilation. Keep spare lengths and replacement drivers in a service kit for rapid swap-outs. Clarify warranty exclusions up front—chemical damage from cleaners, UV degradation, and improper power injection are common non-covered issues—and secure documentation that the supplier performs aging and binning tests before shipping.
FAQ
Q1: What are led strip lights for sports bar projects?
They are flexible linear LED systems used to light shelves, counters, ceilings, TV walls, signage, and exterior accents in sports bar venues. A professional setup includes the strip, aluminum profile, driver, controller, wiring, and mounting accessories.
Q2: How does voltage affect sports bar LED strip installation?
Higher voltage usually allows longer runs with less voltage drop. For most sports bar interiors, 24V is a strong choice. For very long coves, 48V may reduce feed points, but all drivers and controllers must match.
Q3: Is RGB better than warm white for a sports bar?
Not always. RGB is good for team colors and events. Warm white or RGBW is better for premium bottle displays and daily service because it gives cleaner white light and better product appearance.
Q4: Do sports bar LED strips need waterproof protection?
Dry shelves may use IP20 inside profiles. Wet counters, sink areas, and outdoor signs need IP65, IP67, or IP68 depending on water exposure, cleaning methods, and mounting position.
Q5: What causes most LED strip failures in sports bars?
Common causes include heat buildup, voltage drop, poor soldering, wrong driver size, moisture ingress, weak mounting, and mismatched dimming controls. A clear specification and pre-installation checklist reduce these risks.
