
From our manufacturing floor perspective, the best results come from matching the channel to the curve before site installation begins. That small step saves labor, protects the LED tape, and gives the finished ceiling a cleaner light line.
1. Are channels for LED tape suitable for curved ceilings?
Yes, channels for LED tape are suitable for curved ceilings when the project uses a curved LED profile made for bending or a properly planned segmented installation. The main decision is whether the ceiling has a gentle architectural curve, a tight radius, or a free-form shape. Each case needs a different profile strategy.
Standard rigid aluminum channels are excellent for straight runs, but they resist curved drywall and can twist when forced, causing diffuser gaps and uneven light. Flexible channels solve this in many lobbies, coves, and curved corridors, especially when flexible LED profiles are selected according to the direction and radius of the curve. Silicone channels bend smoothly; bendable aluminum offers better heat transfer but has a minimum radius. For very tight curves, short straight aluminum segments can follow the curve like a polygon; once diffusers are fitted, the result often looks smooth from normal viewing distance.
Profile selection should happen during lighting design or shop drawing review.
| Ceiling curve type | Best channel option | Typical risk | Field recommendation |
|---|---|---|---|
| Gentle cove curve | Bendable aluminum profile | Minor spring-back | Use clips plus adhesive |
| Tight decorative arc | Flexible silicone channel | Lower heat dissipation | Use lower wattage tape |
| Large commercial ceiling wave | Segmented aluminum profile | Visible joints | Pre-plan joint positions |
| Free-form gypsum ceiling | Custom-formed profile | Longer lead time | Confirm radius from drawings |
2. Which LED tape channel types work best on curves?
The best channel type depends on bend direction, heat load, and visual expectation. Some profiles bend horizontally, some vertically, and some should not bend at all.
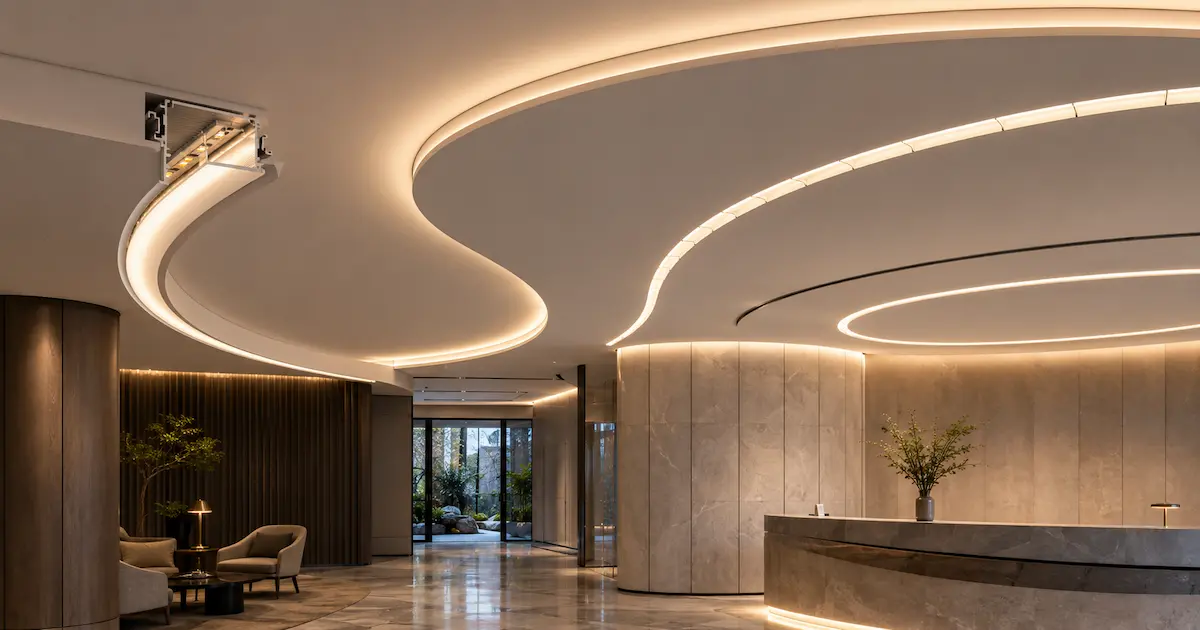
Flexible silicone channels are easy to handle and useful for signage and small arcs, but they have weaker thermal performance. A bendable LED profile is often better for curved interiors because its aluminum body moves heat away from the PCB and maintains a straighter diffuser line. Rigid aluminum can be used in segments for large-radius curves.
| Channel type | Curve performance | Heat dissipation | Best use case | Installer difficulty |
|---|---|---|---|---|
| Flexible silicone | Very good | Low to medium | Decorative curved lines | Low |
| Bendable aluminum | Good | Medium to high | Commercial curved coves | Medium |
| Segmented rigid aluminum | Fair to good | High | Long premium ceilings | Medium to high |
| Custom extruded profile | Project-specific | High | OEM or repeat projects | Medium |
Pro Tip: “Do not judge a curved LED tape channel only by how easily it bends in your hand. Check heat path, diffuser grip, and strip replacement access before approving it for a project.”
3. How does bend radius affect installation difficulty?
Bend radius is a key factor because a wide radius is forgiving, while a tight radius creates stress on the profile, diffuser, adhesive, solder points, and LED PCB.
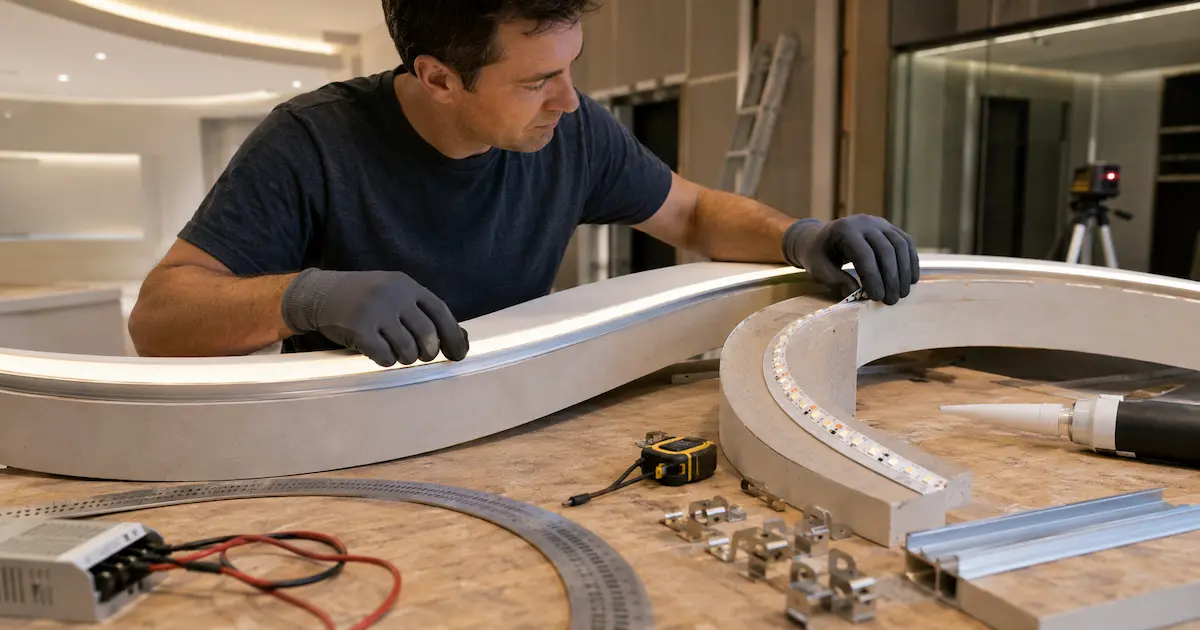
Rule of thumb: the smaller the radius, the more important it is to use a flexible LED profile designed for that bending direction and minimum radius. Standard LED tape bends better along its length than across its width; side-bending strips exist for lateral curves and require different PCB layouts.
| Bend radius | Suitable profile | Strip suggestion | Risk level | Notes |
|---|---|---|---|---|
| Over 1500 mm | Rigid segments or bendable aluminum | Standard 24V tape | Low | Good for long coves |
| 800–1500 mm | Bendable aluminum | 24V high-density tape | Medium | Test diffuser fit |
| 300–800 mm | Flexible silicone | Side-bending or low watt tape | Medium to high | Watch heat buildup |
| Under 300 mm | Custom solution | Special PCB layout | High | Mockup strongly advised |
Curved installations with poor heat transfer show faster lumen drop, especially at higher wattage, which is why thermal management of white LEDs matters for service life, warranty cost, and customer satisfaction.
4. Is flexible aluminum better than silicone for curved ceilings?
Flexible aluminum is often better for commercial curved ceilings because flexible LED profiles with effective heat management provide a straighter finish and help control LED operating temperature. Silicone is easier to bend but less effective at dissipating heat. For a luxury lobby or long runs, flexible aluminum usually provides more reliable long-term performance. For small decorative curves, silicone can be acceptable.
| Flexible aluminum vs silicone | Flexible aluminum channel | Silicone channel |
|---|---|---|
| Bendability | Good on medium curves | Excellent on tight curves |
| Heat control | Better | Lower |
| Finished line | Straighter | Can wave if pulled unevenly |
| Diffuser stability | Stronger | Depends on sleeve design |
| Best wattage range | Medium to higher wattage | Low to medium wattage |
| Long-term service | Better for commercial use | Good for decorative use |
5. What tools and preparation make installation easier?
The safest way to install flexible LED profiles is to use templates, mark fixing points, and dry-fit the channels before applying adhesive. A full-size radius template verifies the actual curve. Dry-fit empty channels (and with diffusers) to check retention after bending.
Plan power feeds in advance; curved ceilings often hide drivers in access panels or voids. Useful tools: flexible curve ruler, laser level, miter saw, deburring tool, neutral silicone adhesive, mechanical clips, and a low-voltage test supply.
| Preparation step | Why it matters | Common mistake | Better practice |
|---|---|---|---|
| Site radius check | Confirms real curve | Relying only on drawings | Use a physical template |
| Dry fit | Finds spring-back | Installing tape too early | Test empty channel first |
| Diffuser test | Checks cover retention | Bending with diffuser removed only | Test both ways |
| Feed wire planning | Reduces rework | Hiding drivers too far away | Confirm access points |
| Surface cleaning | Improves adhesion | Fixing over dust or paint powder | Clean and prime if needed |
6. How should LED tape be selected for curved ceiling channels?
Selection controls brightness, heat, voltage drop, and appearance. High-density tape or COB combined with the right diffuser helps LED tape channels produce seamless dot-free lighting across curved ceiling runs. Side-bending SMD tapes exist for lateral curvature and need matching channel widths.
24V LED tape often performs better for longer curved ceiling runs because its lower current helps reduce voltage drop and the number of required power-injection points. Match wattage to the channel material: high wattage in silicone sleeves can shorten lifetime; aluminum contact keeps temperatures lower.
| 12V vs 24V LED tape | 12V LED tape | 24V LED tape |
|---|---|---|
| Best run length | Short runs | Longer runs |
| Voltage drop | Higher | Lower |
| Current load | Higher | Lower |
| Curved ceiling use | Small decorative lines | Commercial coves and long arcs |
| Field wiring | More injection points | Fewer injection points |
7. How do you mount LED tape channels on curved gypsum or plaster ceilings?
Mounting often requires both adhesive and mechanical fixing. Adhesive alone may work for lightweight silicone, but aluminum profiles under bending stress benefit from clips or screws. Use anchors or fix into framing on plaster ceilings. For recessed finishes, coordinate early with ceiling trades to form grooves before painting.
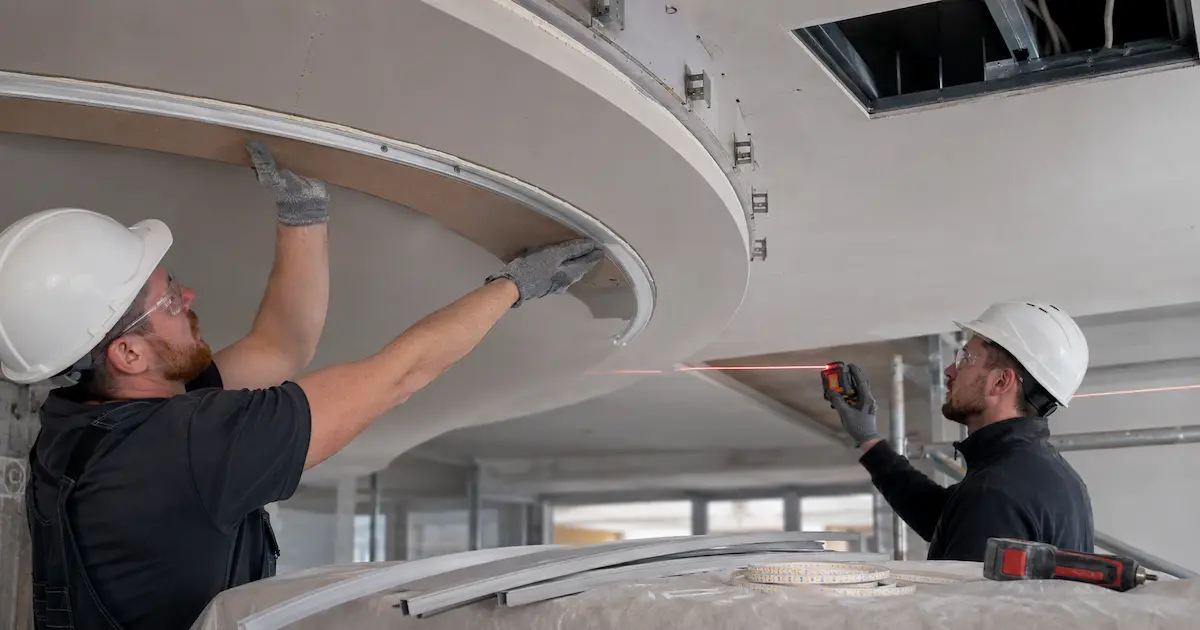
| Mounting method | Suitable ceiling | Strength | Finish quality | Notes |
|---|---|---|---|---|
| Adhesive only | Smooth small curves | Medium | Clean | Best for lightweight silicone |
| Clips plus adhesive | Gypsum and plaster | High | Clean | Good balance for aluminum |
| Screws through base | Hidden or recessed channels | Very high | Screw heads may show | Use diffuser to cover |
| Recessed groove | Premium ceilings | High | Best | Needs early coordination |
8. What wiring and driver details affect curved ceiling installation?
Wiring layout is critical. Long arcs usually need power injection at multiple points. Drivers should have 15–25% headroom over calculated LED load. Ensure the selected dimming method—such as 0–10V, the DALI protocol, TRIAC, or PWM—matches the project control system to avoid flicker and communication problems.
Use thicker cable for long low-voltage runs to limit voltage drop, and keep drivers accessible through service panels. Hidden drivers without access add future labor costs.
| Parameter | Recommended practice | Why it matters |
|---|---|---|
| Driver load | Use 15–25% headroom | Reduces heat and stress |
| Feed points | Inject power on long arcs | Keeps brightness even |
| Cable gauge | Size for current and distance | Limits voltage drop |
| Dimming protocol | Match project control system | Avoids flicker and mismatch |
| Access panel | Keep drivers reachable | Cuts service time |
9. What common mistakes cause failures on curved LED tape channels?
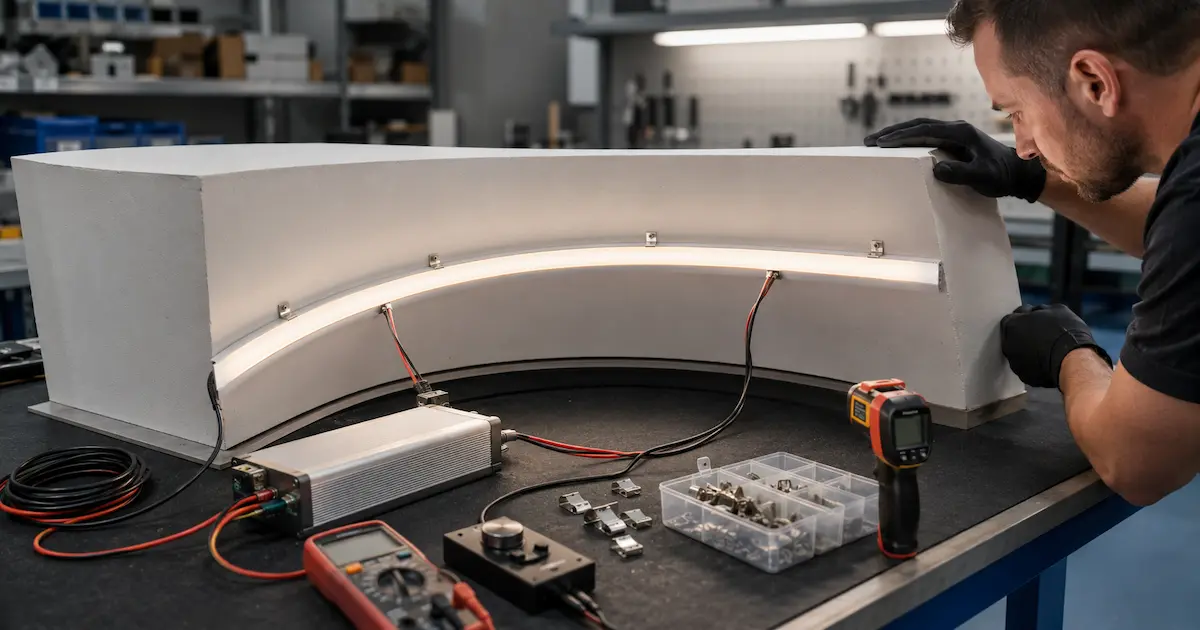
Failures usually stem from mismatched parts, weak fixing, poor thermal design, or rushed testing. Frequent issues include forcing rigid profiles onto tight curves, using high wattage tape in soft enclosed channels, and placing solder joints at stress points.
| Symptom | Likely cause | Fix | Prevention |
|---|---|---|---|
| Channel lifts from ceiling | Spring-back or dusty surface | Add clips and clean substrate | Dry-fit and prime surface |
| Diffuser pops out | Profile twisted beyond radius | Use flexible profile or segment cuts | Check bend radius before install |
| Dark end of run | Voltage drop | Add feed point or thicker cable | Calculate current before wiring |
| LED tape peels off | Heat or poor surface contact | Use better channel and tape backing | Clean aluminum with alcohol |
| Visible dots | Low LED density or shallow diffuser | Use COB or higher density strip | Mockup with final diffuser |
| Color shift | Heat or mixed batches | Replace with matched batch | Specify binning and aging checks |
A one-meter mockup with the final tape, diffuser, driver, and dimmer prevents many reworks.
10. Are curved ceiling LED tape channels cost-effective for commercial projects?
They can be cost-effective when chosen to reduce labor, protect LED tape, and lower callbacks. The channel may cost more than bare tape but provides a stable, serviceable system. Consider installed cost: profile, tape, driver, control, installation time, rework risk, and warranty exposure.
| Cost factor | Low-cost mistake | Better commercial choice | Bottom-line effect |
|---|---|---|---|
| Channel selection | Soft profile for high wattage | Aluminum with heat path | Longer service life |
| Labor | Cutting parts on site only | Pre-cut or marked lengths | Faster installation |
| Wiring | Single feed on long run | Planned injection points | Fewer complaints |
| Diffuser | Loose cover | Tested snap-in fit | Cleaner handover |
| Mockup | Skipped | Built before approval | Lower rework risk |
Conclusion
Curved ceiling LED tape channels are practical and reliable when you match profile type, bend radius, LED tape, thermal path, and wiring during design. Use flexible or segmented solutions for tight radii, and prefer bendable aluminum for commercial, high-duty applications where heat control and straight lines matter. Always mock up and test the final assembly before full installation to prevent costly callbacks.
FAQ
Q1: Are channels for LED tape easy to install on curved ceilings?
Yes, with the right channel type. Flexible silicone and bendable aluminum profiles suit curves better than standard rigid profiles.
Q2: Can rigid aluminum LED channels be used on a curved ceiling?
Yes, but typically on wide curves or when cut into short segments. For tight curves, flexible or custom profiles are safer.
Q3: Do curved LED tape channels need special LED strips?
Sometimes. Tight side curves may need side-bending tape or COB tape. Check PCB bending direction and minimum radius.
Q4: Is silicone channel better than aluminum for curves?
Silicone bends more easily, but aluminum handles heat better and gives a straighter finish. For medium or high wattage strips, bendable aluminum is often preferable.
Q5: How can I reduce callbacks on curved ceiling LED tape projects?
Build a mockup, test diffuser fit, calculate voltage drop, use mechanical fixing where needed, and keep drivers accessible. These steps reduce dark spots, loose channels, flicker, and service complaints.
