
This comprehensive guide covers essential maintenance procedures, troubleshooting techniques, and preventive measures for suspended LED profile systems. You’ll learn professional-grade maintenance strategies that ensure consistent light output, minimize downtime, and maximize your lighting investment returns.
1. What Are the Essential Components of Suspended LED Profile Systems?
Understanding your suspended LED profile system components forms the foundation for effective maintenance protocols. But here’s what many professionals miss: each component requires specific care procedures tailored to its function and materials.
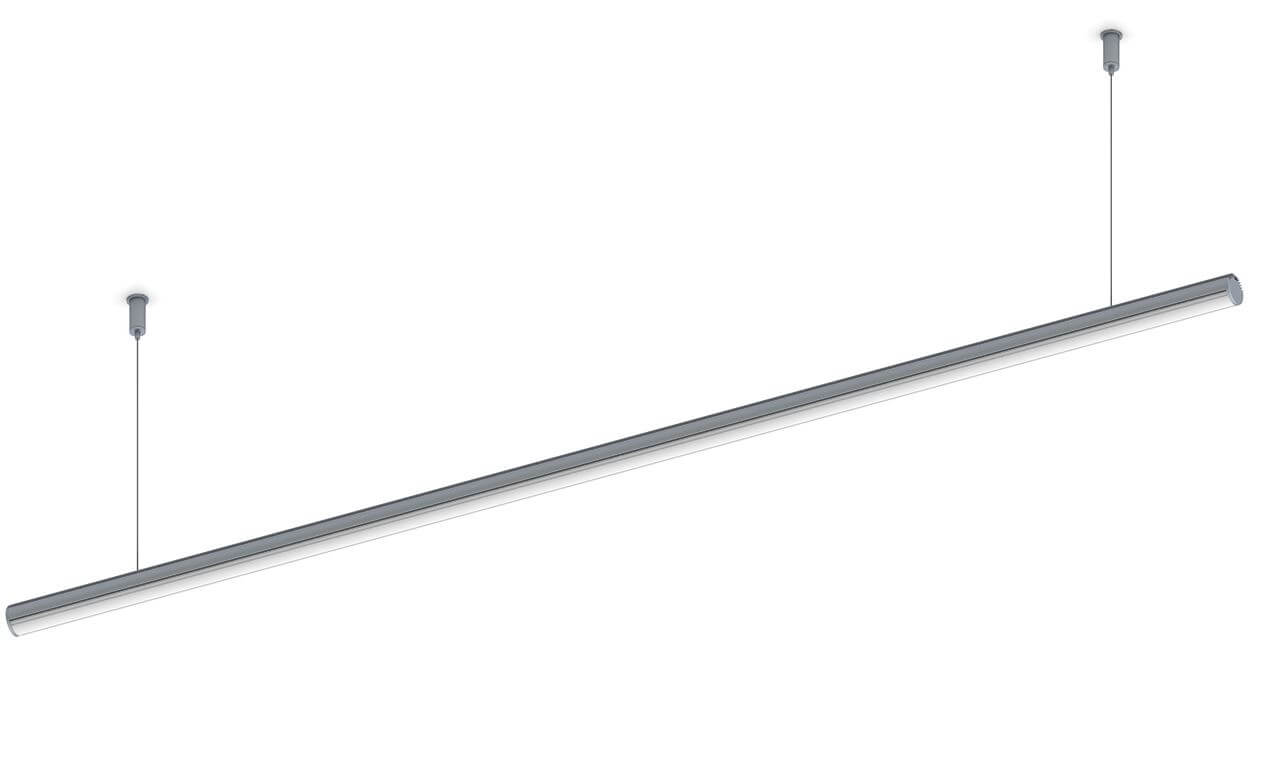
Suspended LED profiles consist of several critical elements working together harmoniously. The aluminum housing provides structural support while facilitating heat dissipation through its engineered thermal properties. This housing typically features mounting brackets, end caps, and suspension cables that bear the system’s weight.
LED strip circuits represent the heart of these systems, containing multiple diodes arranged in series or parallel configurations. These circuits operate within specific voltage and current parameters, making them sensitive to power fluctuations and environmental conditions. Driver units regulate power delivery, converting AC mains power into suitable DC voltages for LED operation.
Diffuser lenses distribute light evenly while protecting internal components from dust and moisture intrusion. These optical elements require careful handling during maintenance procedures to prevent scratches or distortion that could affect light quality.
Suspension hardware includes cables, chains, or rigid mounting systems designed to support profile weight while allowing controlled positioning. This hardware experiences constant stress from gravitational forces and thermal expansion cycles.
Component Maintenance Requirements
| Component | Maintenance Frequency | Key Procedures |
|---|---|---|
| Aluminum Housing | Monthly | Visual inspection, cleaning, thermal check |
| LED Strips | Quarterly | Performance testing, connection verification |
| Drivers | Bi-annually | Electrical testing, ventilation cleaning |
| Diffusers | Monthly | Cleaning, damage inspection |
| Suspension Hardware | Quarterly | Load testing, corrosion check |
What’s the bottom line? Regular component-specific maintenance prevents system failures and maintains optimal performance standards throughout the profile’s operational life.
2. How Should You Establish a Regular Cleaning Schedule?
Developing a systematic cleaning schedule prevents dust accumulation and maintains optimal light output levels. Here’s the reality: neglecting regular cleaning can reduce light output by up to 30% within the first year of operation.
Cleaning frequency depends on environmental conditions and installation locations. Industrial environments with high dust levels require weekly cleaning schedules, while office installations may only need monthly attention. Outdoor installations face additional challenges from weather exposure and airborne contaminants.
Proper cleaning begins with power isolation to ensure technician safety. Always disconnect power at the circuit breaker level and verify zero energy state using appropriate testing equipment. This safety protocol prevents electrical accidents during maintenance procedures.
Aluminum profiles respond well to mild detergent solutions and soft-bristled brushes. Avoid abrasive cleaners that could damage anodized finishes or create microscopic scratches that trap dirt particles. Microfiber cloths provide excellent cleaning results without surface damage.
Diffuser cleaning requires special attention to prevent optical distortion. Use approved lens cleaning solutions and lint-free cloths designed for optical applications. Clean in straight motions rather than circular patterns to prevent swirl marks that could affect light distribution.
Professional Cleaning Protocol
Safety preparation phase:
● Power isolation and lockout procedures
● Personal protective equipment verification
● Tool and cleaning supply preparation
Cleaning execution phase:
● External housing cleaning with appropriate solutions
● Diffuser removal and specialized cleaning
● Internal component inspection and dust removal
● Hardware lubrication and adjustment
Quality verification phase:
● Visual inspection for damage or wear
● Light output measurement and comparison
● System functionality testing
Ready for the best part? Documented cleaning schedules help identify potential issues before they become costly failures.
3. What Are the Critical Safety Procedures During Maintenance?

Safety protocols form the cornerstone of professional LED profile maintenance procedures. This is where it gets serious: electrical systems combined with elevated work positions create multiple hazard scenarios requiring careful risk management.
Electrical safety begins with proper lockout/tagout procedures following established industry standards. Never assume circuits are de-energized without proper verification using calibrated testing equipment. LED drivers can store electrical energy in capacitors even after main power disconnection.
Working at height requires appropriate fall protection systems and equipment inspection protocols. Suspended profiles often require ladder work or aerial platform access, creating fall hazards that demand professional safety equipment and training.
Personal protective equipment selection depends on specific maintenance tasks and environmental conditions. Safety glasses protect against debris during cleaning operations, while insulated gloves provide electrical protection during driver servicing.
Tool selection impacts both safety and maintenance quality. Insulated tools prevent accidental electrical contact, while proper torque specifications prevent over-tightening that could damage delicate components.
Essential Safety Equipment Checklist
| Safety Category | Required Equipment | Inspection Frequency |
|---|---|---|
| Electrical Protection | Insulated tools, voltage testers | Before each use |
| Fall Protection | Harnesses, lanyards, anchors | Monthly |
| Eye Protection | Safety glasses, face shields | Weekly |
| Hand Protection | Insulated gloves, cut-resistant | Before each use |
| Respiratory | Dust masks, respirators | As needed |
Emergency procedures should be established and communicated to all maintenance personnel. This includes emergency contact information, shutdown procedures, and first aid protocols specific to electrical and fall-related injuries.
What’s the takeaway? Comprehensive safety protocols protect personnel while ensuring maintenance quality and legal compliance.
4. How Do You Properly Inspect LED Strip Performance?
Systematic LED strip inspection identifies performance degradation before visible symptoms appear. Here’s what professionals know: early detection of LED degradation prevents total system failures and reduces replacement costs.
Visual inspection begins with overall light output assessment comparing current performance to baseline measurements. Color temperature shifts often indicate aging LEDs or driver issues requiring immediate attention. Flickering or intermittent operation suggests connection problems or driver instability.
Individual LED examination reveals localized failures that could propagate throughout the strip. Dead LEDs appear dark while failing units may exhibit color shifts or reduced brightness. Document all anomalies with photographs and location references for tracking purposes.
Electrical testing provides quantitative performance data beyond visual assessment. Voltage measurements at various strip locations identify voltage drop issues that could affect LED lifespan. Current measurements reveal load imbalances that stress individual components.
Thermal imaging identifies hot spots indicating poor heat dissipation or component stress. Elevated temperatures accelerate LED degradation and reduce overall system lifespan. Regular thermal monitoring helps predict maintenance needs.
LED Performance Testing Procedures
Visual Assessment Protocol:
● Overall light output comparison to baseline
● Color temperature consistency evaluation
● Individual LED status verification
● Connection point inspection
Electrical Testing Protocol:
● Voltage measurements at multiple points
● Current draw verification
● Insulation resistance testing
● Ground fault detection
Thermal Analysis Protocol:
● Temperature measurement at critical points
● Heat sink effectiveness evaluation
● Ventilation adequacy assessment
But here’s the kicker: documenting performance trends helps predict optimal replacement timing and prevents unexpected failures.
5. What Driver Maintenance Procedures Ensure Optimal Performance?
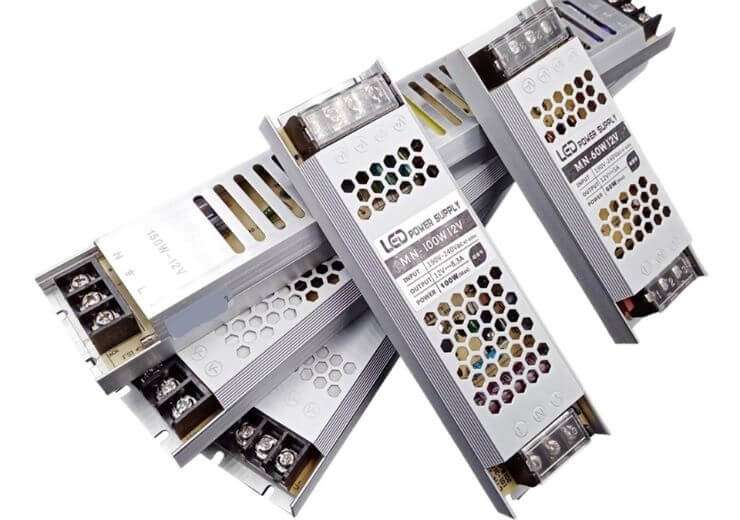
LED drivers require specialized maintenance procedures to ensure stable power delivery and maximize system lifespan. This is crucial: driver failures account for approximately 60% of LED system problems, making preventive maintenance essential.
Driver ventilation systems need regular cleaning to prevent overheating that reduces component lifespan. Blocked ventilation ports force drivers to operate at elevated temperatures, accelerating capacitor aging and reducing overall reliability.
Electrical connections require periodic inspection and retorquing to maintain proper contact resistance. Loose connections create heat buildup and voltage instability that affects LED performance. Use calibrated torque tools to achieve manufacturer specifications.
Capacitor condition assessment helps predict driver replacement needs before complete failure occurs. Electrolytic capacitors exhibit measurable degradation over time, with capacitance reduction and increased equivalent series resistance indicating aging.
Input and output voltage monitoring verifies driver regulation accuracy under varying load conditions. Voltage variations outside manufacturer specifications stress LED components and reduce system lifespan.
Driver Maintenance Schedule
| Maintenance Task | Frequency | Critical Parameters |
|---|---|---|
| Ventilation cleaning | Monthly | Airflow verification |
| Connection inspection | Quarterly | Torque specifications |
| Voltage testing | Bi-annually | Regulation accuracy |
| Capacitor testing | Annually | Capacitance/ESR values |
| Thermal monitoring | Continuously | Temperature thresholds |
Protective device testing ensures safety systems function properly during fault conditions. This includes overcurrent protection, thermal shutdown, and input surge protection verification.
What’s the real story? Proactive driver maintenance prevents cascading failures that could damage expensive LED components and require complete system replacement.
6. How Should You Handle Suspended Profile Installation Issues?
Installation-related problems often manifest months after initial setup, requiring systematic diagnosis and correction procedures. Here’s what many miss: improper installation creates ongoing maintenance challenges that compound over time.
Suspension system evaluation begins with load distribution analysis ensuring proper weight distribution across support points. Uneven loading creates stress concentrations that could lead to hardware failure or profile deformation.
Cable tension measurement verifies proper installation according to manufacturer specifications. Excessive tension stresses mounting hardware while insufficient tension allows unwanted movement that could damage electrical connections.
Alignment verification ensures profiles maintain proper positioning for optimal light distribution. Sagging or twisted profiles indicate suspension problems requiring immediate correction to prevent further damage.
Vibration assessment identifies resonance issues that could loosen connections or cause fatigue failures. Building HVAC systems, machinery, or wind exposure can create vibration problems requiring damping solutions.
Installation Problem Diagnosis
Structural Assessment:
● Load distribution verification
● Support point integrity inspection
● Deflection measurement and analysis
● Hardware specification compliance
Alignment Verification:
● Profile positioning accuracy
● Light distribution pattern assessment
● Suspension geometry evaluation
● Movement restriction confirmation
Environmental Factors:
● Vibration source identification
● Temperature cycling effects
● Moisture intrusion potential
● Airflow pattern analysis
This is where it gets interesting: correcting installation issues early prevents progressive damage that could require complete reinstallation.
7. What Environmental Factors Impact Maintenance Requirements?

Environmental conditions significantly influence maintenance frequency and procedures for suspended LED profile systems. But here’s the challenge: varying conditions require adaptive maintenance strategies tailored to specific installation environments.
Temperature cycling creates thermal stress that affects component lifespan and connection integrity. Extreme temperature variations cause expansion and contraction cycles that loosen mechanical connections and stress electrical joints.
Humidity levels impact corrosion rates and electrical insulation properties. High humidity environments accelerate oxidation processes while extremely dry conditions can create static electricity problems affecting sensitive electronic components.
Airborne contaminants vary dramatically between industrial, commercial, and residential installations. Chemical vapors, dust particles, and corrosive gases require different protection and cleaning strategies.
UV exposure affects plastic components and cable insulation materials. Outdoor installations or environments with high UV levels require special attention to polymer degradation and color stability.
Environmental Impact Assessment
| Environmental Factor | Low Impact | Moderate Impact | High Impact |
|---|---|---|---|
| Temperature Range | ±10°C | ±20°C | >±30°C |
| Humidity Level | 40-60% RH | 30-70% RH | <30% or >80% RH |
| Dust Exposure | Minimal | Moderate | Heavy industrial |
| Chemical Exposure | None | Occasional | Continuous |
| UV Radiation | Indoor only | Filtered sunlight | Direct exposure |
Protective measures adaptation becomes essential in challenging environments. This includes sealed enclosures, upgraded materials, and enhanced filtration systems to extend component lifespan.
Ready for the good part? Understanding environmental impacts allows proactive maintenance planning that prevents premature failures and reduces long-term costs.
8. How Do You Troubleshoot Common LED Profile Problems?
Systematic troubleshooting procedures quickly identify and resolve common LED profile issues. What’s the real story? Most problems follow predictable patterns that experienced technicians can diagnose efficiently using established protocols.
Dimming or flickering symptoms typically indicate driver problems, connection issues, or voltage supply instabilities. Begin troubleshooting with power supply verification, then work systematically through the signal chain.
Color temperature variations suggest LED aging, thermal issues, or driver regulation problems. Compare affected sections to properly functioning areas to isolate the problem source.
Complete section failures often result from open circuits, blown fuses, or driver failures. Use systematic electrical testing to locate fault points without damaging functioning components.
Interconnection problems create unpredictable symptoms including partial operation, intermittent failures, or complete loss of control. These issues require careful connector inspection and signal verification.
Troubleshooting Decision Tree
No Light Output:
● Power supply verification
● Driver functionality testing
● LED strip continuity checking
● Connection integrity inspection
Partial Operation:
● Section isolation testing
● Connection point examination
● Driver output verification
● Control signal analysis
Performance Degradation:
● Light output measurement
● Color temperature assessment
● Thermal analysis
● Component aging evaluation
Intermittent Problems:
● Connection reliability testing
● Vibration impact assessment
● Temperature cycling effects
● EMI interference detection
Common Problem Solutions
| Problem Type | Typical Causes | Resolution Steps |
|---|---|---|
| Flickering | Driver instability, loose connections | Connection retorquing, driver replacement |
| Dimming | LED degradation, thermal issues | Thermal management, LED replacement |
| Color shift | Component aging, temperature effects | Component replacement, thermal control |
| Dead sections | Open circuits, driver failure | Circuit testing, component replacement |
This is where it gets practical: documented troubleshooting procedures reduce diagnosis time and prevent unnecessary component replacement.
9. What Replacement Strategies Maximize System Lifespan?
Strategic component replacement planning maximizes overall system lifespan while minimizing maintenance costs. Here’s the insight: proactive replacement prevents cascading failures that could damage multiple system components.
Preventive replacement schedules based on component lifespan data prevent unexpected failures during critical periods. LED strips typically require replacement after 50,000-70,000 operating hours, while drivers may need attention after 30,000-50,000 hours.
Performance monitoring helps optimize replacement timing by tracking degradation trends rather than relying solely on time-based schedules. This approach prevents premature replacement while avoiding unexpected failures.
Compatibility verification ensures replacement components match original specifications and performance characteristics. Mixing different generations or manufacturers can create integration problems and reduce overall system reliability.
Upgrade opportunities during replacement cycles can improve system performance and reduce future maintenance requirements. Higher efficiency LEDs or improved drivers may justify early replacement in some applications.
Replacement Planning Matrix
Time-Based Replacement:
● LED strips: 50,000-70,000 hours
● Drivers: 30,000-50,000 hours
● Diffusers: 100,000+ hours
● Suspension hardware: 10+ years
Performance-Based Replacement:
● Light output below 80% of initial
● Color temperature shift >200K
● Driver regulation outside ±5%
● Connection resistance >10% increase
Cost-Benefit Analysis:
● Energy efficiency improvements
● Maintenance reduction potential
● Performance enhancement opportunities
● Total cost of ownership calculations
But here’s what professionals know: strategic replacement timing reduces emergency repairs and minimizes system downtime.
10. How Should You Document Maintenance Activities?
Comprehensive maintenance documentation provides valuable data for optimizing procedures and predicting future needs. This is essential: proper documentation enables data-driven maintenance decisions and warranty compliance.
Maintenance logs should record all activities including routine cleaning, component replacement, and performance testing. Include dates, technician identification, procedures performed, and any anomalies discovered during maintenance.
Performance tracking documents changes in light output, color temperature, and electrical parameters over time. This data helps identify degradation trends and optimize replacement scheduling.
Photographic documentation captures visual evidence of component condition and installation quality. Before and after photos demonstrate maintenance effectiveness and identify recurring problems.
Warranty compliance documentation ensures proper record keeping for potential warranty claims. Manufacturers typically require proof of proper maintenance to honor warranty obligations.
Documentation Best Practices
| Document Type | Content Requirements | Retention Period |
|---|---|---|
| Maintenance Logs | Date, time, procedures, findings | System lifetime |
| Performance Data | Light output, electrical measurements | 5+ years |
| Photos | Component condition, installation | 3+ years |
| Warranty Records | Purchase dates, maintenance proof | Warranty period |
| Training Records | Technician certifications, updates | Employment duration |
Digital documentation systems enable easy searching, reporting, and data analysis. Cloud-based systems provide remote access and automatic backup protection for critical maintenance records.
What’s the bottom line? Proper documentation transforms maintenance from reactive problem-solving into proactive system optimization.
Conclusion
Maintaining suspended LED profiles properly requires systematic approaches combining regular inspections, preventive maintenance, and strategic planning. Professional maintenance procedures extend system lifespan, maintain optimal performance, and reduce total ownership costs significantly.
Successful maintenance programs integrate component-specific procedures with environmental considerations and safety protocols. Documentation and performance tracking enable continuous improvement and data-driven decision making for optimal results.
Implementing these maintenance strategies ensures suspended LED profile systems deliver consistent performance throughout their operational lifespan while minimizing unexpected failures and emergency repairs.
FAQ
Q1: How often should suspended LED profiles be cleaned?
Cleaning frequency depends on environmental conditions. Office environments typically require monthly cleaning, while industrial locations may need weekly attention. High-dust environments or outdoor installations require more frequent cleaning to maintain optimal light output. Monitor light output levels to determine if cleaning frequency needs adjustment.
Q2: What are the signs that LED drivers need replacement?
Driver replacement indicators include flickering lights, reduced light output, audible noise from the driver unit, overheating, or complete failure to start. Voltage measurements outside manufacturer specifications also indicate driver problems. Most LED drivers last 30,000-50,000 operating hours under normal conditions.
Q3: Can suspended LED profiles be repaired or must they be completely replaced?
Most suspended LED profile components can be individually repaired or replaced. LED strips, drivers, diffusers, and suspension hardware can typically be serviced separately. Complete profile replacement is only necessary when the aluminum housing is damaged beyond repair or when upgrade benefits justify replacement costs.
Q4: What safety precautions are essential during maintenance?
Essential safety measures include proper lockout/tagout procedures, fall protection equipment for elevated work, insulated tools for electrical work, and personal protective equipment. Always verify power disconnection before beginning maintenance work. Establish emergency procedures and ensure personnel receive appropriate safety training.
Q5: How do environmental conditions affect maintenance requirements?
Extreme temperatures, high humidity, dust, chemical vapors, and UV exposure all impact maintenance frequency and procedures. Harsh environments require more frequent inspections, specialized cleaning procedures, and potentially upgraded components. Document environmental conditions to optimize maintenance schedules and predict component lifespan accurately.
