
1. Why add LED strip lights to a shoe rack?
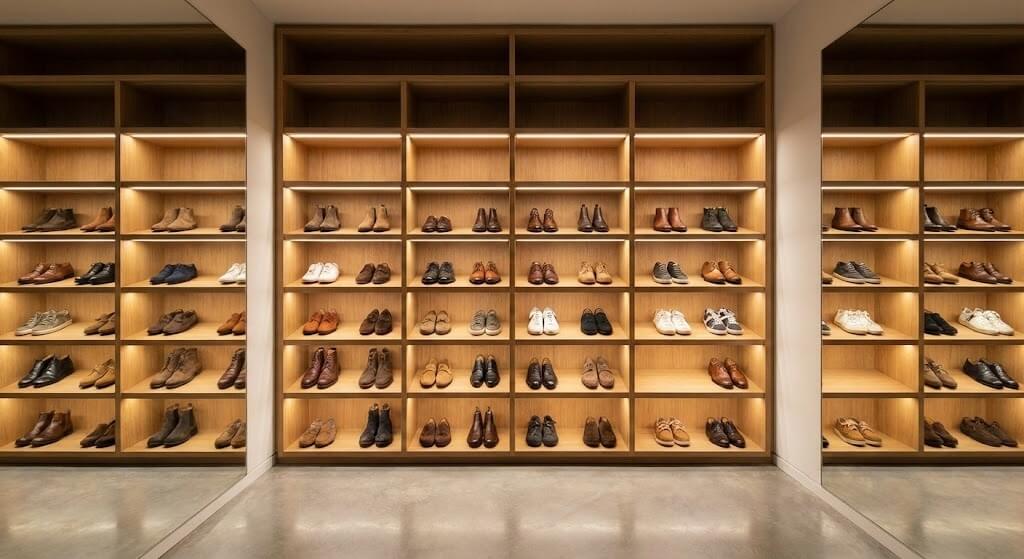
Practical benefits beyond “looks”
Adding LED strip lights for shoe rack projects is not just a styling decision. It’s a usability and risk-control decision. Better visibility cuts trip hazards in closets and entryways. For retail displays, it improves product presentation and reduces “dead” shelves. For furniture makers, it’s an upgrade feature that is easy to standardize.
Where failures hurt your business
But there’s a catch. Bad shoe-rack lighting shows defects fast: uneven dots, yellowing adhesive, and dark corners. Clients notice because the light is at eye level. That leads to reputation damage and wasted crew hours.
Field examples we see
- Walk-in closet: client complains about “patchy light” under each tier.
- Retail shoe wall: color shifts between bays create a mismatched look.
- Hotel staff area: wet shoes lead to corrosion on exposed copper pads.
| Business outcome | What good lighting changes | Typical measurable effect |
|---|---|---|
| Fewer callbacks | Stable power + clean mounting | Less rework time per site |
| Higher perceived value | Uniform illumination per shelf | Better client acceptance |
| Faster installs | Standardized harness + connectors | Shorter install cycles |
2. Which LED strip type fits a shoe rack best?
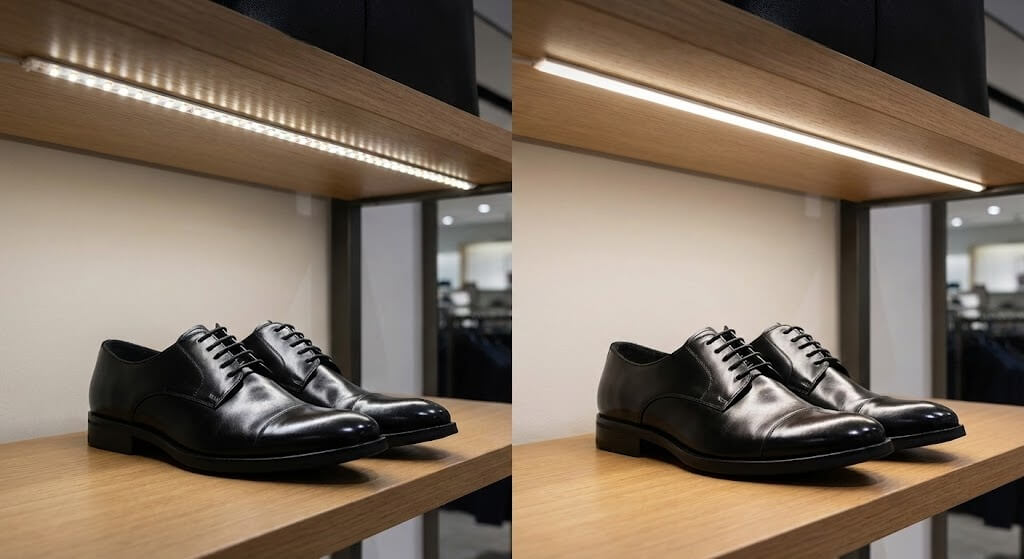
SMD strips vs COB strips (visual comfort)
For shoe racks, the big choice is “point” light vs continuous line. SMD 2835/3528/5050 strips can show hotspots on glossy shoes or when mounted close to the edge. COB strips create a smoother line, which reads more premium in cabinetry.
CCT and CRI choices for shoes and materials
Shoes vary: black leather, white sneakers, colored fabrics. We often measure color rendering in our lab tests using integrating spheres and CRI meters because low-CRI strips make materials look dull or tinted. For closets and retail, CRI 90+ usually reduces complaints.
Three common project picks
- Apartment entry cabinet: COB, 3000K–3500K, CRI 90, soft and warm.
- Retail showroom: SMD or COB, 4000K, CRI 90, neutral and accurate.
- Sports store: 5000K, higher contrast, helps “pop” white soles.
| Strip type (Vs.) | Light appearance | Pros for shoe racks | Watch-outs |
|---|---|---|---|
| SMD strip vs COB strip | Dots vs smooth line | SMD is cost-effective; COB looks premium | SMD hotspots; COB needs better thermal path |
| 60 LED/m vs 120 LED/m | More spacing vs denser | 120 LED/m looks more uniform | Higher load per meter |
| CRI 80 vs CRI 90+ | Acceptable vs accurate | 90+ reduces “why does it look different?” | Slightly higher cost, tighter bin control |
3. Should you use 12V or 24V LED strips for a shoe rack?
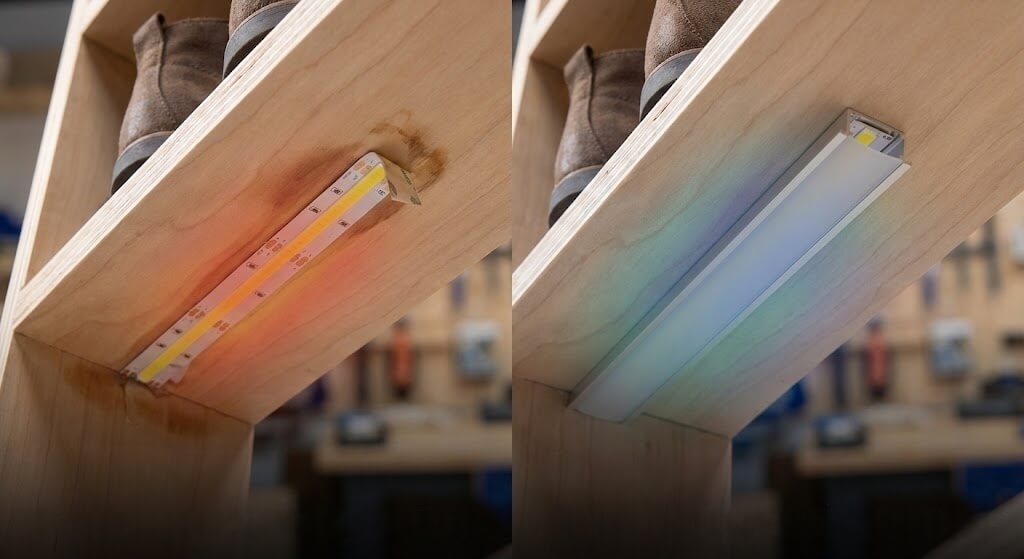
Voltage drop in real shelf layouts
This is where it gets interesting. Shoe racks often run as multiple short branches, but installers still tie them into one driver with long leads. Voltage drop then shows up as dim ends or warm color shift. We often see installers struggle with this on multi-tier racks where the last shelf is fed after a long loop.
Typical wiring approaches
- Home closet: star wiring from a central junction to each shelf.
- Retail fixture: trunk line in a side panel with short taps.
- Modular furniture: pre-made harnesses with consistent lead lengths.
Why 24V usually wins
When we tested this against a standard 12V strip on a 5–8 m total run, 24V held brightness better at the far end with the same wire gauge. That reduces the need for heavier copper and reduces heating in connectors.
| Parameter | 12V LED strip | 24V LED strip | Practical note for shoe racks |
|---|---|---|---|
| Voltage drop sensitivity | Higher | Lower | 24V tolerates longer feeds |
| Current for same watts | Higher | Lower | Lower current = cooler wiring |
| Cut length | Often 25–50 mm | Often 50–100 mm | 12V fits tight shelf lengths |
| Driver availability | Very common | Very common | Both easy to source |
4. How bright should LED strip lights for a shoe rack be?
Target lux and lumen-per-meter ranges
Brightness arguments cause a lot of delays. What you need is simple: enough light to see colors and pairs, but not so much that it creates glare in a narrow hallway. For most shoe racks, 200–400 lux on the shelf surface works well.
Common myth: higher wattage always means brighter light.
Reality: brightness depends on lumen efficacy (lm/W), optical losses from LED profiles, and how close the strip is to the shelf front. A 10 W/m strip at 130 lm/W can beat a 14 W/m strip at 90 lm/W.
Three scenarios with workable numbers
- Closet shelves 250–350 mm deep: 400–800 lm/m is usually plenty.
- Retail display with dark finishes: 800–1200 lm/m helps contrast.
- Premium cabinet with frosted diffuser: raise output 20–30% to offset diffuser loss.
| Shelf depth | Mount position | Suggested output (lm/m) | Notes |
|---|---|---|---|
| 200–300 mm | Front lip, angled inward | 350–700 | Lower glare on glossy shoes |
| 300–450 mm | Under shelf, centered | 600–1000 | Better uniformity across depth |
| 450–600 mm | Two lines or higher lm/m | 900–1400 | Consider dual runs for dark interiors |
5. What IP rating and materials make sense near shoes?
Dust, splashes, and cleaning reality
Shoe racks live with grit, damp shoes, and occasional mopping. IP20 open strips can work in dry closets, but retail or entry benches often need a sealed surface.
Common myth about IP ratings
Common myth: IP65 means “waterproof.”
Reality: IP65 resists water jets, not immersion, and the weak spot is often the end cap or solder joint, not the silicone top coat.
Three environment examples
- Residential closet: IP20 in an aluminum channel is fine.
- Entryway bench: IP65 or a profile with diffuser to keep dirt off.
- Gym locker area: sealed strip plus corrosion-resistant connectors.
| IP rating | Protection level | Good fit for shoe racks | Typical trade-off |
|---|---|---|---|
| IP20 | No sealing | Dry closets, enclosed channels | Needs better cleaning discipline |
| IP65 | Silicone-coated top | Entryways, light splashes | Slightly more heat trapped |
| IP67 | Fully encapsulated | Wet areas, high moisture | Harder to bend, thicker profile |
6. How do you handle heat in tight shoe rack spaces?
Why thermal design changes lifetime
LED strips fail slowly, then suddenly. Heat accelerates lumen depreciation, adhesive creep, and color shift. From our manufacturing floor perspective, the strips that come back are usually the ones stuck directly to wood or laminated boards without a thermal path.
What we see in thermal imaging
In our lab tests using thermal imaging cameras, a 10–12 W/m strip on raw wood can run 10–20°C hotter than the same strip mounted to an aluminum profile. That temperature gap often decides whether the project looks good after 18 months.
Three shelf builds and what works
- MDF shelves: use aluminum channel; avoid direct tape-only mounting.
- Metal retail fixtures: direct mount works, still add diffuser for glare.
- High-density COB in a tiny profile: verify temperature at steady state.
Pro Tip from the VST Technical Team: “If you can’t fit a deep profile, lower watts per meter and run two lines in parallel. You get uniform light with less heat stress.”
| Mounting method | Heat path quality | Install speed | Best use case |
|---|---|---|---|
| Tape directly to wood | Low | Fast | Low power, short duty cycle |
| Aluminum U-channel + tape | High | Medium | Most shoe racks |
| Recessed profile with diffuser | High | Slower | Premium cabinetry, glare control |
7. Which power supplies and controls reduce callbacks?
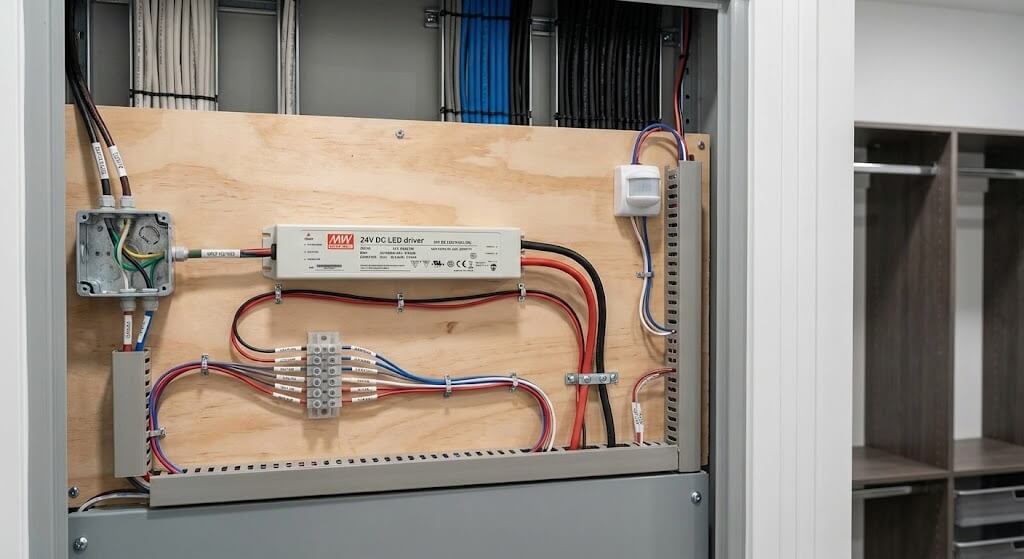
Driver sizing that avoids flicker and overheating
Driver failures are a silent profit killer. Size the power supply with headroom. A practical rule is to load it to 70–85% of its rating in normal operation. That lowers internal temperature and reduces early capacitor aging.
Controls that match how people use shoe racks
- PIR motion sensor: great for closets and entryways.
- Door switch: clean trigger for cabinet doors.
- Timer or step-dimming: limits runtime in commercial areas.
Three project patterns
- Home builder standard: one driver + PIR, 30–60 seconds hold time.
- Retail chain: centralized drivers per bay with 0–10V dimming at night.
- Furniture OEM: integrated touch sensor in side panel, low-voltage safe.
| Control option | Wiring complexity | User experience | Typical risk |
|---|---|---|---|
| PIR sensor inline | Low | Hands-free | False triggers in busy corridors |
| Door reed switch | Medium | Predictable | Alignment tolerance matters |
| PWM dimmer knob | Medium | Adjustable brightness | Cheap dimmers can cause flicker |
| 0–10V / DALI driver | Higher | Central control | Needs correct driver selection |
8. How do you install LED strip lights for shoe rack projects cleanly and fast?
Layout rules that save time on site
Ready for the good part? The fastest installs come from standard layouts. Pick one mounting line per shelf (front lip or centerline), one cable route (left or right), and one junction zone. That keeps every shelf repeatable.
Adhesion and surface prep that actually works
Most adhesive failures trace to dust, oil, or textured laminate. Clean with isopropyl alcohol, let it flash off, then apply pressure along the full length. If the surface is low-energy plastic, use mounting clips or profile screws.
Three install examples
- Closet retrofit: surface-mount profile under each shelf, wires hidden in a side chase.
- Retail fixture: continuous vertical feed in the rear channel with pre-cut jumpers.
- Flat-pack furniture: pre-soldered leads and keyed connectors reduce wiring errors.
| Installation checklist step | What to verify | Common mistake | Quick fix |
|---|---|---|---|
| Measure and cut | Cut only on marked cut points | Off-cut damages circuit | Use end cap or re-cut segment |
| Surface prep | Dry, oil-free substrate | Wiping with water only | IPA wipe + dry time |
| Power test | Full run at load for 15–30 min | Testing only one segment | Test entire harness |
| Strain relief | Cable secured near solder joint | Pulling on pads | Add clip or tie base |
| Light uniformity | Visual check at low and full dim | Bright/dim shelf mismatch | Balance lead lengths or inject power |
9. What are the common failure modes, and how do you troubleshoot them?
Patterns we see in returns and site photos
What’s the real story? Most issues aren’t “bad LEDs.” They’re application mismatches: driver ripple, voltage drop, moisture at terminations, or mechanical stress. In our aging rack checks, weak solder joints fail early under thermal cycling.
Quick diagnosis examples
- Dim at the far end: voltage drop, too-long feed, or undersized wire.
- Flicker on camera: PWM frequency too low or driver instability.
- Sections out: connector contact resistance or broken copper trace.
Three real-world situations
- Boutique store: strips flicker in videos, client demands fix before launch.
- Apartment closet: adhesive peels after summer heat, strip sags.
- Entry bench: corrosion at the end of IP65 strip, caused by unsealed cut end.
| Symptom | Likely cause | Verification method | Fix |
|---|---|---|---|
| Far end dimmer | Voltage drop | Measure V at strip input and end | Power inject, move to 24V, thicker wire |
| Flicker | Driver ripple / dimmer mismatch | Scope or swap known-good driver | Use quality driver, compatible dimmer |
| Color shift | Bin variation / overheating | Compare CCT at start vs end | Better bin spec, improve heat sinking |
| Strip falls | Poor adhesion | Inspect surface and tape | Profile, clips, better prep |
| Dead segment | Bad connector / joint | Wiggle test, continuity | Re-solder, replace connector |
10. What should you specify to a supplier for repeatable shoe rack lighting?
The spec sheet that prevents “same model, different result”
Repeatability keeps projects scalable. Color drift between batches, different PCB thickness, or a driver swap can create visible differences on the same wall of shoe racks. We explain binning and electrical tolerances because ignoring them leads to client rejection and re-installation costs.
Items that matter more than people expect
- CCT tolerance (step bin / MacAdam): tighter bins reduce mismatch.
- CRI and R9: leather and reds look more natural.
- PCB width and copper weight: affects heat and voltage drop.
- Adhesive type and reel labeling: avoids install confusion.
Three purchasing scenarios
- Chain retail rollout: insist on consistent CCT bin across shipments.
- Furniture OEM: request pre-soldered leads and fixed cut lengths.
- Contractor mixed sites: specify driver brand/model to avoid flicker surprises.
| Specification line item | Recommended target | Why it matters on shoe racks |
|---|---|---|
| Voltage | 24V preferred | Lower current, less drop |
| Output | 600–1000 lm/m typical | Uniform shelf visibility |
| CRI | 90+ for premium | Accurate materials |
| CCT | 3000K/4000K common | Matches interior lighting |
| IP | IP20+profile or IP65 | Dust and splashes |
| Mounting | Aluminum profile option | Heat + glare control |
| QC checks | Aging test + CCT check | Fewer surprises on site |
| Compliance | CE/RoHS/UL where needed | Liability control |
Conclusion
LED strip lights for shoe rack applications work best when you treat them like a small lighting system, not just tape with LEDs. Pick the right strip type and CRI, favor 24V for longer runs, size the driver with headroom, and mount to aluminum for heat control. Use a repeatable wiring layout, then verify voltage and uniformity before you close panels. If you’re unsure about voltage drop or driver sizing for your shelf layout, send our engineering team your drawing and intended run lengths. We’ll calculate a wiring plan you can install with confidence.
FAQ
Q1: What are led strip lights for shoe rack applications?
They’re low-voltage LED tape lights mounted under or beside shoe rack shelves to illuminate each tier. The usual goal is even visibility with minimal glare and hidden wiring.
Q2: Should I choose 12V or 24V for a shoe rack?
24V is usually the safer pick for multi-shelf racks because current is lower, so voltage drop and connector heating are reduced. Use 12V mainly when you need very short cut lengths.
Q3: How bright should shoe rack LED strips be?
A common working range is 400–1000 lm/m, depending on shelf depth, surface finish, and diffuser use. Dark interiors or diffusers often need more output.
Q4: Do I need IP65 strips in an entryway shoe bench?
Often yes, since wet shoes and cleaning splashes can reach the strip. Pay attention to sealing the cut ends and connectors because those are the usual leak points.
Q5: Why do LED strips peel off wood shelves?
Heat and poor surface prep are the main reasons. Clean with IPA, press firmly along the run, then use an aluminum profile or clips if the surface is textured or runs warm.
