
This comprehensive guide explores everything you need to know about LED strip lights for under sofa applications, from product selection and installation techniques to advanced control systems and maintenance practices. Whether you’re planning a DIY project or working with professional installers, understanding these critical factors ensures successful results that enhance your living space while providing years of reliable operation.
1. What Are LED Strip Lights for Under Sofa Applications?

LED strip lights designed for under sofa use represent specialized flexible lighting solutions engineered for furniture-mounted installations. Here’s what makes them special: these strips feature low-profile designs, adhesive backing, and appropriate color temperatures for ambient lighting applications.
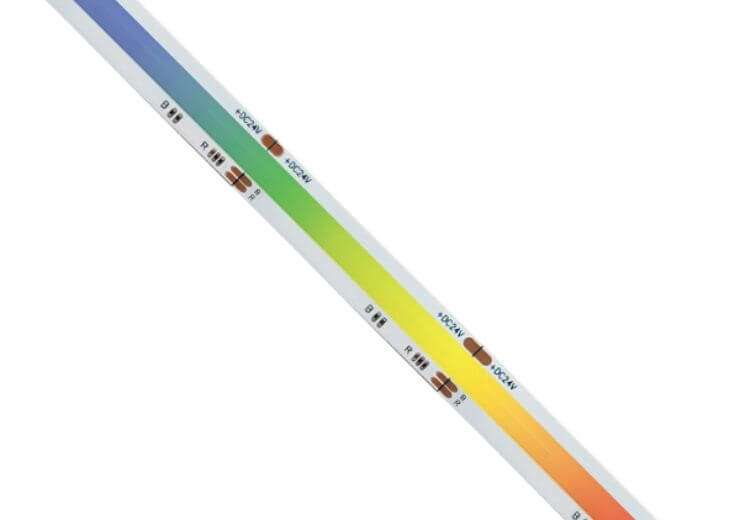
These lighting systems consist of multiple LED chips mounted on flexible circuit boards with integrated resistors and control circuits. The flexible substrate allows strips to conform to furniture contours while maintaining electrical integrity. Professional-grade strips include protective coatings that resist dust, moisture, and mechanical damage common in furniture environments.
Types of Under-Sofa LED Strips
Different strip types serve various under-sofa lighting requirements. Standard RGB strips offer color-changing capabilities for entertainment areas. Single-color warm white strips provide consistent ambient lighting. Smart-enabled strips allow wireless control through mobile applications.
Monochromatic strips deliver consistent color output ideal for ambient lighting applications. Full-spectrum RGBW strips combine color-changing capabilities with dedicated white LEDs for improved color rendering. Addressable strips enable pixel-level control for dynamic effects and patterns.
Tunable white strips adjust color temperature from warm to cool white, allowing users to match circadian rhythms or adapt to different activities. High CRI (Color Rendering Index) strips provide superior color accuracy for spaces where color perception matters.
Key Technical Specifications
Voltage requirements typically range from 12V to 24V DC power supplies. Strip widths vary between 8mm and 20mm depending on brightness requirements. IP ratings determine moisture resistance levels for different installation environments.
LED density affects light quality and power consumption. Higher density strips (120-180 LEDs per meter) provide smoother light distribution but require more power. Lower density options (60 LEDs per meter) work well for basic ambient lighting while consuming less energy.
Cutting intervals determine installation flexibility. Most strips allow cutting every 2-4 inches at designated points marked with scissors symbols. This feature enables precise length adjustments for custom furniture dimensions.
Installation Compatibility
Most furniture types accommodate LED strip installations with proper mounting techniques. Wooden frames, metal structures, and upholstered pieces all support strip mounting when appropriate adhesives or mounting clips secure connections.
Modern furniture designs increasingly include LED-ready features like channels, grooves, or mounting points specifically designed for strip installations. Retrofitting existing furniture requires creative mounting solutions that don’t compromise structural integrity or aesthetics.
Weight considerations remain minimal since LED strips typically weigh less than 50 grams per meter. This light weight prevents furniture balance issues while allowing installation on delicate or lightweight pieces.
| Strip Type | Voltage | Width | IP Rating | Application |
|---|---|---|---|---|
| Standard RGB | 12V DC | 10mm | IP20 | Indoor dry areas |
| Warm White | 24V DC | 8mm | IP65 | Humid environments |
| Smart RGBW | 12V DC | 12mm | IP44 | General indoor use |
| High CRI | 24V DC | 15mm | IP20 | Color-critical spaces |
| Addressable | 5V DC | 10mm | IP30 | Custom patterns |
2. Why Choose LED Strip Lights for Under Sofa Lighting?
Under-sofa LED lighting offers compelling advantages over traditional ambient lighting methods. But here’s the real benefit: these installations create floating effects that visually expand room dimensions while providing practical illumination for navigation and atmosphere.
Traditional floor lamps and table lamps consume valuable floor space while creating harsh shadows and uneven lighting distribution. Under-sofa LED strips eliminate these issues by providing consistent, hidden illumination that enhances rather than dominates room aesthetics.
The psychological impact of under-furniture lighting creates feelings of spaciousness and luxury typically associated with high-end commercial spaces. This effect transforms ordinary living rooms into sophisticated entertainment areas that impress guests while providing comfortable ambient lighting for daily activities.
Energy Efficiency Benefits
LED technology consumes significantly less power compared to incandescent or halogen alternatives. Typical under-sofa installations require only 5-15 watts total power consumption. Operating costs remain minimal even with extended daily usage periods.
Modern LED strips achieve efficacy ratings exceeding 100 lumens per watt, compared to 15-20 lumens per watt for incandescent bulbs. This efficiency translates to substantial energy savings over time, especially for installations that operate several hours daily.
Smart control systems further enhance efficiency through automated scheduling, dimming capabilities, and occupancy sensing. These features can reduce energy consumption by 30-50% compared to manual operation while maintaining desired lighting levels when needed.
Aesthetic Enhancement
Proper under-sofa lighting transforms ordinary furniture into architectural features. Uniform light distribution creates clean, modern appearances. Color-changing capabilities allow mood adjustments for different occasions or activities.
The floating effect created by under-sofa lighting visually separates furniture from floors, creating an illusion of weightlessness that makes rooms appear larger and more open. This technique is commonly used in luxury hotels and high-end residential designs.
Color psychology plays important roles in ambient lighting design. Warm white light (2700K-3000K) promotes relaxation and comfort, making it ideal for evening entertainment. Cool white options (4000K-5000K) provide alertness-promoting illumination suitable for reading or task activities.
Safety Considerations
Low-voltage LED strips operate safely near furniture and foot traffic areas. Heat generation remains minimal compared to traditional lighting options. Properly installed systems eliminate fire hazards associated with higher-temperature lighting technologies.
The 12V or 24V DC operation of most LED strips falls well below dangerous voltage levels, making them safe for installation in areas where children or pets might contact electrical components. This safety factor enables creative installations that wouldn’t be possible with line-voltage lighting.
LED strips generate minimal heat, typically less than 5°F above ambient temperature. This characteristic prevents fire hazards and eliminates concerns about heat damage to furniture finishes or upholstery materials.
Maintenance Requirements
LED strips require minimal maintenance once properly installed. Expected lifespans exceed 25,000 hours under normal operating conditions. Dust accumulation cleaning represents primary maintenance requirement for optimal performance.
Unlike traditional bulbs that fail suddenly, LEDs gradually dim over time, providing advance warning before replacement becomes necessary. This gradual degradation allows planned maintenance rather than emergency repairs.
Quality LED strips maintain consistent color output throughout their operational life, eliminating color-shifting issues common with cheaper lighting alternatives. This stability ensures installations continue looking professional for years without adjustment or replacement.
3. How Do You Select Appropriate LED Strips for Under Sofa Use?

Selecting suitable LED strips requires careful consideration of multiple technical and aesthetic factors. What’s the key consideration? Strip specifications must match intended applications, installation environments, and desired lighting effects for optimal results.
The selection process begins with determining primary lighting objectives. Ambient lighting requires different specifications than accent lighting or task illumination. Understanding these requirements helps narrow product options and ensure optimal performance.
Budget considerations affect product selection since LED strip quality varies significantly across price ranges. Professional-grade strips cost more initially but provide superior performance, longer lifespans, and better warranties compared to economy options.
Color Temperature Selection
Warm white (2700K-3000K) creates cozy, relaxing atmospheres suitable for evening entertainment. Cool white (4000K-5000K) provides task-oriented illumination for reading areas. RGB options offer unlimited color possibilities for dynamic lighting schemes.
Tunable white strips provide flexibility by offering adjustable color temperatures from 2700K to 6500K. This capability allows optimization for different times of day or activities without requiring multiple strip types.
Circadian rhythm considerations support health and wellness by matching lighting color temperatures to natural daylight patterns. Warm light in evenings promotes melatonin production while cooler light during day hours maintains alertness.
Brightness Requirements
Lumen output determines illumination intensity for different applications. Ambient lighting typically requires 50-200 lumens per foot of strip length. Task lighting applications may require higher output levels for adequate illumination.
Ceiling height and room size influence brightness requirements. Higher ceilings require more lumens to achieve adequate floor illumination. Larger rooms benefit from higher output levels to prevent dark corners or uneven lighting distribution.
Dimming capabilities provide flexibility for varying brightness needs throughout different times and activities. Quality dimming systems maintain consistent color output across full brightness ranges without flickering or color shifting.
Strip Length Calculations
Measure furniture perimeter accurately to determine required strip lengths. Account for corners, curves, and connection points when calculating total requirements. Order 10-15% additional length to accommodate cutting and connection adjustments.
Sectional sofas require careful measurement of each section plus connection areas. L-shaped configurations need precise corner measurements to ensure proper coverage without gaps or overlaps.
Installation accessibility affects strip placement and length requirements. Areas difficult to reach during installation may require longer continuous runs to minimize connections in hard-to-access locations.
Power Supply Considerations
Calculate total wattage requirements based on strip specifications and installation length. Select power supplies with 20% capacity overhead for reliable operation. Consider voltage drop limitations for longer installation runs.
Power supply location affects installation complexity and wire routing requirements. Centralized supplies simplify control but may require longer wire runs. Distributed supplies reduce voltage drop but complicate control systems.
Efficiency ratings impact operating costs and heat generation. Higher efficiency power supplies cost more initially but provide long-term savings through reduced energy consumption and longer lifespans.
| Sofa Type | Recommended Length | Power Requirement | Color Temperature | Brightness Level |
|---|---|---|---|---|
| 2-seater | 8-10 feet | 15-25W | 2700K-3000K | 100-150 lm/ft |
| 3-seater | 12-15 feet | 25-35W | 2700K-3000K | 100-150 lm/ft |
| Sectional | 20-30 feet | 40-60W | 2700K-4000K | 150-200 lm/ft |
| L-shaped | 25-35 feet | 50-75W | RGB/Tunable | 100-200 lm/ft |
| Reclining | 10-12 feet | 20-30W | 2700K-3000K | 80-120 lm/ft |
4. What Installation Methods Work Best for Under Sofa LED Strips?
Proper installation techniques ensure reliable performance and professional appearances for under-sofa LED lighting systems. Here’s the critical part: installation methods must accommodate furniture movement, cleaning access, and potential maintenance requirements.
Installation planning should consider future maintenance needs, cleaning accessibility, and potential furniture rearrangement. Permanent installations offer superior reliability but limit flexibility for future changes. Removable systems provide adaptability but may compromise connection security.
Professional installations typically use mounting channels that protect strips while providing clean, finished appearances. DIY installations often rely on adhesive mounting for simplicity, though this approach may limit longevity in challenging environments.
Surface Preparation
Clean mounting surfaces thoroughly to ensure strong adhesive bonds. Remove dust, oils, and residues that could compromise strip adhesion. Allow surfaces to dry completely before applying adhesive-backed strips.
Surface texture affects adhesive performance. Smooth surfaces provide optimal bonding while rough or porous surfaces may require primer applications or mechanical mounting methods. Test adhesion on inconspicuous areas before full installation.
Temperature conditions during installation affect adhesive performance. Install strips at room temperature (65-75°F) for optimal bonding. Cold conditions may prevent proper adhesive activation while excessive heat can cause premature adhesive failure.
Mounting Techniques
Adhesive backing provides simplest installation method for smooth surfaces. Mounting clips offer removable options for temporary installations. Channel systems create professional appearances while protecting strips from damage.
Aluminum mounting channels provide superior heat dissipation, mechanical protection, and professional aesthetics. These channels accommodate various strip widths while offering diffuser options that eliminate individual LED visibility.
Magnetic mounting systems enable easy installation and removal on steel furniture frames. These systems work particularly well for commercial applications where frequent reconfiguration may be necessary.
Mechanical fasteners provide most secure mounting but require drilling or modification of furniture. Use this method only when other options prove inadequate or when permanent installation is desired.
Wire Management
Route power cables discretely to avoid visual interference and physical damage. Use cable channels or clips to secure connections along furniture frames. Plan wire paths that accommodate furniture movement and adjustment.
Power supply location affects wire routing complexity. Consider concealed locations like behind furniture or inside entertainment centers. Ensure adequate ventilation around power supplies to prevent overheating.
Low-voltage wiring rules allow more flexible routing compared to line voltage cables. However, maintain organized installations that facilitate troubleshooting and future modifications.
Connection Methods
Solder connections provide most reliable electrical joints for permanent installations. Connector clips offer convenient options for removable or adjustable systems. Ensure all connections maintain proper polarity and secure contact.
Waterproof connectors prevent moisture infiltration in humid environments. These connectors cost more but provide essential protection for installations near pools, bathrooms, or outdoor furniture.
Quick-connect systems enable rapid installation and easy modification. Quality connectors maintain reliable electrical contact while allowing repeated connection and disconnection cycles.
5. How Do You Achieve Optimal Light Distribution Under Sofas?
Uniform light distribution creates professional-looking installations that avoid hotspots and dark areas. The secret lies in: proper strip placement, spacing considerations, and diffusion techniques that blend individual LED points into smooth illumination.
Light distribution planning requires understanding of photometric principles and furniture geometry. Strip placement affects beam angles, light intensity patterns, and shadow formation. Professional lighting designers use photometric software to optimize installations, but basic principles guide successful DIY projects.
The goal is creating even illumination that appears to emanate from furniture itself rather than obvious point sources. This effect requires careful attention to mounting angles, diffusion methods, and strip spacing.
Placement Strategies
Position strips approximately 2-4 inches from furniture edges for optimal light spread. Avoid placing strips directly under seating areas where shadows might occur. Consider multiple strip runs for wider furniture pieces.
Mounting height affects light distribution patterns. Lower mounting positions create wider light spread but may increase glare visibility. Higher positions reduce glare but may create narrower illumination patterns.
Angle adjustments optimize light distribution for specific furniture geometries. Slight upward angles can improve wall washing effects while downward angles enhance floor illumination. Test different angles during installation to optimize results.
Diffusion Techniques
Aluminum channels with diffuser covers eliminate individual LED visibility. Mounting strips behind furniture lips creates indirect lighting effects. Reflective surfaces can enhance light distribution and reduce shadows.
Diffuser materials range from simple frosted covers to sophisticated optical films that control beam patterns. Higher quality diffusers provide more even light distribution but may reduce overall light output.
Indirect mounting techniques place strips where direct viewing is impossible, creating mysterious floating effects. This approach requires careful planning to ensure adequate light output reaches intended areas.
Spacing Considerations
Maintain consistent distances between strips and floor surfaces for uniform illumination. Account for furniture height variations when planning strip positions. Test different mounting heights during installation to optimize results.
Multiple strip installations require careful spacing to avoid interference patterns or overlapping hotspots. Generally, strips should be spaced at least 12 inches apart for optimal distribution.
Corner treatments require special attention since light patterns change direction. Use flexible strips that maintain consistent output around curves, or plan connection points at corner locations.
Shadow Management
Identify potential shadow-casting elements like furniture legs or cross-braces. Use multiple strip positions to eliminate dark spots. Consider strip angles that minimize furniture-created shadows.
Furniture design significantly affects shadow patterns. Solid base sofas create different challenges compared to sofas with visible legs. Plan strip placement to work with specific furniture geometries.
Reflective surfaces can reduce shadows by bouncing light into dark areas. Consider adding reflective tape or materials to furniture undersides where appropriate.
| Installation Factor | Recommended Range | Impact on Distribution | Adjustment Method |
|---|---|---|---|
| Distance from Edge | 2-4 inches | Light spread pattern | Strip repositioning |
| Height from Floor | 6-12 inches | Illumination angle | Mounting adjustment |
| Strip Spacing | 12-18 inches | Uniformity coverage | Multiple strips |
| Diffusion Distance | 1-2 inches | Hotspot elimination | Channel depth |
| Angle Adjustment | 15-30 degrees | Shadow reduction | Mounting orientation |
6. What Power and Control Options Are Available?

Power supply and control systems determine functionality, convenience, and long-term reliability of under-sofa LED installations. What matters most? Selecting appropriate power ratings, control interfaces, and automation features that match user preferences and technical requirements.
Power system design affects installation complexity, operating costs, and future expansion possibilities. Centralized power distribution simplifies control but may require larger wire gauge for longer runs. Distributed power reduces voltage drop but complicates control systems.
Control system selection depends on user preferences, technical comfort levels, and integration requirements with existing home automation systems. Simple solutions work well for basic applications while smart systems provide advanced functionality for tech-savvy users.
Power Supply Types
Plugged adapters offer convenient solutions for residential applications. Hardwired drivers provide permanent installations for commercial settings. Battery-powered options enable wireless installations without electrical modifications.
Switching power supplies provide high efficiency and compact sizes ideal for hidden installations. Linear supplies offer superior electrical noise performance but generate more heat and consume more energy.
Modular power systems allow future expansion without replacing entire power infrastructure. These systems cost more initially but provide flexibility for growing installations or changing requirements.
Control Methods
Manual switches provide basic on/off functionality for simple installations. Remote controls offer convenient operation from seating positions. Smart controllers enable smartphone apps, voice control, and automation integration.
Wall-mounted controllers provide permanent control access while maintaining clean aesthetics. Choose controller locations that remain accessible but don’t interfere with furniture placement or room traffic patterns.
Wireless controls eliminate control wiring requirements but may experience interference from other wireless devices. Consider wireless protocol selection carefully to ensure reliable operation in existing RF environments.
Dimming Capabilities
PWM dimming provides smooth brightness adjustments across full output ranges. Analog dimming offers simple control interfaces for basic applications. Smart dimming systems integrate with home automation platforms.
Dimming performance varies significantly between LED strip types and control systems. Test dimming performance before final installation to ensure acceptable operation at all brightness levels.
Flicker-free dimming becomes important for video recording or photography applications. Specify high-frequency PWM controllers to eliminate visible flicker in camera recordings.
Timer Functions
Programmable timers automate lighting schedules for energy savings. Motion sensors activate lighting when spaces are occupied. Ambient light sensors adjust brightness based on room lighting conditions.
Smart scheduling systems learn usage patterns and automatically optimize operation for maximum convenience and efficiency. These systems can reduce energy consumption while ensuring lighting availability when needed.
Vacation modes simulate occupancy for security purposes by automatically varying lighting schedules. This feature provides security benefits while preventing energy waste during extended absences.
7. How Do You Troubleshoot Common Under Sofa LED Strip Issues?
Troubleshooting skills help identify and resolve common problems that affect under-sofa LED strip performance. Here’s what professionals know: systematic diagnosis approaches quickly identify root causes and appropriate correction methods.
Troubleshooting methodology follows logical progression from simple to complex issues. Start with visual inspection, progress to electrical measurements, and finally examine system components. This approach prevents unnecessary component replacement while ensuring thorough problem resolution.
Documentation during installation and maintenance creates valuable troubleshooting resources. Record installation details, component specifications, and performance baselines for future reference during problem diagnosis.
Connection Problems
Loose connections cause intermittent operation or complete failure. Check all wire joints and connector contacts for secure attachment. Verify proper polarity at all connection points throughout system.
Corrosion affects connections in humid environments or installations using dissimilar metals. Inspect connections for white or green corrosion deposits that indicate chemical reaction between materials.
Thermal cycling can loosen connections over time as materials expand and contract with temperature changes. Periodically check and retighten mechanical connections to maintain system reliability.
Power Supply Issues
Insufficient power capacity causes dim operation or strip sections not functioning. Calculate total wattage requirements and compare with supply ratings. Voltage drop issues affect longer installations requiring power injection.
Power supply failures often result from overloading, overheating, or component aging. Test output voltages and current capacity to verify proper operation. Replace failing supplies promptly to prevent damage to LED strips.
Electrical noise from switching power supplies can affect nearby electronics or cause LED flickering. Use quality power supplies with proper filtering, or consider linear supplies for noise-sensitive applications.
Adhesion Failures
Poor surface preparation or environmental factors cause strips to detach from mounting surfaces. Clean mounting areas thoroughly and ensure proper surface compatibility. Consider mechanical mounting methods for problematic surfaces.
Temperature cycling stresses adhesive bonds, particularly in installations subject to heating and cooling cycles. Choose adhesives rated for expected temperature ranges or use mechanical mounting in extreme conditions.
Vibration can gradually weaken adhesive bonds over time. Secure installations near audio equipment or high-traffic areas may require mechanical mounting or vibration damping materials.
Color Inconsistencies
Voltage drops or quality variations cause color temperature differences between strip sections. Use higher voltage systems for longer runs. Ensure consistent power supply to all strip segments.
LED chip binning variations create color differences between production batches. Order sufficient strip length from single production runs to ensure color consistency across entire installations.
Thermal effects can shift LED color output as operating temperatures change. Ensure adequate heat dissipation and monitor operating temperatures to maintain consistent color performance.
| Problem Type | Common Causes | Diagnostic Steps | Solution Methods |
|---|---|---|---|
| No Operation | Power failure | Check connections | Verify supply voltage |
| Dim Output | Voltage drop | Measure voltages | Add power injection |
| Flickering | Poor connections | Inspect joints | Improve connections |
| Color Shifts | Temperature drift | Monitor operation | Upgrade components |
| Adhesion Loss | Surface issues | Check mounting | Use mechanical clips |
8. What Safety Considerations Apply to Under Sofa LED Installations?

Safety requirements for under-sofa LED installations focus on electrical hazards, fire prevention, and mechanical protection. Critical safety factors include: proper electrical installation practices, appropriate component ratings, and protection against physical damage.
Safety planning begins during design phases and continues through installation, operation, and maintenance. Understanding applicable electrical codes, fire safety requirements, and mechanical protection needs ensures safe installations that meet regulatory requirements.
Risk assessment identifies potential hazards specific to under-furniture installations. Consider electrical shock risks, fire hazards from overheating, mechanical damage from furniture movement, and environmental factors that affect component performance.
Electrical Safety
Use SELV (Safety Extra Low Voltage) rated components for residential applications. Ensure all connections maintain proper insulation and protection. Install appropriate overcurrent protection devices for permanent installations.
Grounding requirements vary by jurisdiction and installation type. Low-voltage LED systems may not require equipment grounding, but check local codes for specific requirements. Maintain proper grounding for power supplies and control systems.
GFCI protection may be required for installations in wet locations or areas subject to moisture exposure. Consider GFCI protection even when not required for enhanced safety in humid environments.
Fire Prevention
Select LED strips with appropriate thermal management for installation environments. Avoid installations in enclosed spaces without adequate ventilation. Monitor strip temperatures during initial operation periods.
Overcurrent protection prevents electrical fires from short circuits or component failures. Install appropriate fuses or circuit breakers sized for LED strip specifications. Quality power supplies include built-in protection features.
Heat dissipation requirements increase with LED power density and ambient temperatures. Ensure adequate airflow around installations and avoid covering strips with insulating materials.
Mechanical Protection
Protect strips from physical damage caused by furniture movement or cleaning activities. Use appropriate mounting methods that prevent accidental disconnection. Consider flexible conduit for areas subject to movement.
Furniture modification for LED installation should not compromise structural integrity or safety. Consult furniture manufacturers or structural engineers when making significant modifications to load-bearing components.
Child safety considerations include protecting electrical connections and ensuring strips cannot be accessed by small children. Use appropriate enclosures or mounting locations that prevent unauthorized access.
Environmental Considerations
Select IP-rated components appropriate for installation moisture levels. Avoid installations where cleaning liquids might contact electrical components. Consider temperature variations that affect component performance.
UV exposure can degrade plastic components and LED phosphors over time. Protect strips from direct sunlight exposure through windows or skylights that might accelerate component aging.
Chemical compatibility between LED strip materials and furniture finishes prevents damage to either component. Test compatibility in inconspicuous areas before full installation.
9. How Do Smart Controls Enhance Under Sofa LED Lighting?
Smart control systems provide advanced functionality, convenience, and integration capabilities for modern under-sofa LED lighting applications. The real advantage? These systems offer automation, remote access, and customization options that traditional controls cannot match.
Smart technology evolution continues expanding control possibilities through cloud connectivity, artificial intelligence, and improved user interfaces. Modern systems provide capabilities that were impossible just a few years ago while becoming more user-friendly and affordable.
Integration with broader home automation ecosystems creates synergistic benefits that extend beyond lighting control. Smart lighting can enhance security systems, entertainment experiences, and energy management while providing convenient centralized control.
Wireless Connectivity
Wi-Fi enabled controllers provide internet connectivity for remote access and cloud-based features. Bluetooth controllers offer direct smartphone connectivity without network requirements. Zigbee and Z-Wave protocols integrate with existing home automation systems.
Mesh networking capabilities ensure reliable communication across large installations. Self-healing networks automatically route around failed devices to maintain system connectivity. Range extenders expand coverage for installations in large homes.
Security considerations become important with internet-connected devices. Choose systems with strong encryption, regular firmware updates, and secure authentication methods to prevent unauthorized access.
Mobile Applications
Dedicated smartphone apps provide intuitive control interfaces for complex lighting systems. Custom scheduling functions automate daily lighting routines. Scene presets store favorite lighting configurations for quick activation.
User interface design significantly affects user satisfaction and system adoption. Look for apps with logical layouts, responsive performance, and reliable connectivity. Poor app design can frustrate users despite excellent hardware performance.
Multi-user support allows family members to control lighting from their individual devices. User permissions can restrict access to certain functions or prevent accidental changes to system configurations.
Voice Control Integration
Amazon Alexa compatibility enables voice-activated lighting control. Google Assistant integration provides natural language commands. Apple HomeKit support allows Siri voice control and iOS automation.
Natural language processing continues improving, allowing more conversational control commands. Users can say “dim the living room lights for movie time” instead of remembering specific scene names or brightness levels.
Privacy considerations arise with voice-activated systems that continuously listen for commands. Understand data collection and sharing policies before implementing voice control features.
Automation Features
Motion sensor integration automatically activates lighting when spaces are occupied. Ambient light sensors adjust brightness based on room lighting conditions. Integration with security systems provides lighting automation for safety.
Time-based automation creates circadian rhythm support by adjusting color temperature throughout the day. Morning hours feature cooler light to promote alertness while evening hours transition to warmer light that supports relaxation.
Geofencing technology can automatically activate lighting when residents approach home and turn off lights when everyone leaves. This feature provides convenience and energy savings without requiring manual intervention.
Machine learning algorithms analyze usage patterns and automatically optimize lighting schedules. These systems become more effective over time by learning family routines and preferences.
| Smart Feature | Technology | Benefits | Compatibility |
|---|---|---|---|
| App Control | Wi-Fi/Bluetooth | Remote operation | iOS/Android |
| Voice Commands | Cloud integration | Hands-free control | Alexa/Google/Siri |
| Scheduling | Internal timers | Automated operation | Universal |
| Scene Presets | Memory storage | Quick configuration | Device specific |
| Sensor Integration | Wireless protocols | Responsive automation | Platform dependent |
10. What Maintenance Practices Extend LED Strip Lifespan?
Proper maintenance practices significantly extend LED strip operational life and maintain optimal performance levels. Here’s what matters: regular cleaning, environmental monitoring, and preventive measures that address common failure modes.
Maintenance planning should begin during installation with consideration for access requirements and service intervals. Document installation details, component specifications, and initial performance measurements for future reference during maintenance activities.
Preventive maintenance costs less than reactive repairs while ensuring consistent performance throughout system lifespan. Develop maintenance schedules based on manufacturer recommendations, environmental conditions, and operational requirements.
Cleaning Procedures
Dust accumulation reduces light output and increases operating temperatures. Use soft brushes or compressed air for regular cleaning. Avoid harsh chemicals that might damage strip coatings or adhesives.
Cleaning frequency depends on environmental conditions and installation locations. Dusty environments require more frequent cleaning while protected installations may need attention only annually.
Cleaning methods must consider electrical safety and component protection. Power off systems before cleaning and avoid moisture contact with electrical connections. Use antistatic brushes to prevent component damage from static discharge.
Environmental Monitoring
Monitor operating temperatures to identify potential thermal issues. Check for moisture accumulation that might cause corrosion. Inspect mounting adhesion periodically to prevent strip detachment.
Temperature monitoring can identify developing problems before they cause failures. LED strips operating above rated temperatures experience accelerated aging and reduced lifespans.
Humidity monitoring helps identify conditions that promote corrosion or electrical problems. High humidity environments may require more frequent inspection and maintenance.
Connection Inspection
Verify electrical connections remain secure and corrosion-free. Check wire routing for signs of stress or damage. Test control functions periodically to identify developing issues.
Connection inspection should include visual examination and electrical testing. Look for signs of overheating, corrosion, or mechanical stress that might affect reliability.
Torque specifications for mechanical connections ensure proper contact pressure without over-tightening that might damage components. Use appropriate tools and techniques for different connection types.
Performance Evaluation
Document initial brightness levels for comparison during maintenance checks. Monitor color consistency across strip lengths. Note any changes in operation characteristics that indicate developing problems.
Photometric measurements provide objective performance data that supplements visual observations. Simple light meters can track brightness degradation over time.
Color measurement becomes important for applications where color consistency matters. Color temperature meters or smartphone apps can provide basic color monitoring capabilities.
Performance trending helps predict component replacement needs and optimize maintenance schedules. Track key parameters over time to identify patterns that indicate developing problems.
Conclusion
LED strip lights for under sofa applications provide excellent solutions for modern ambient lighting requirements. Proper selection, installation, and maintenance ensure reliable operation and attractive results. Smart control integration offers advanced functionality that enhances user experience and energy efficiency.
Successful under-sofa LED lighting projects require careful planning, appropriate component selection, and professional installation techniques. Safety considerations, power requirements, and control options all influence final system performance and user satisfaction.
The technology continues evolving with improved efficiency, smarter controls, and better integration capabilities. These advances create new possibilities for creative lighting applications while maintaining the reliability and longevity that make LED strips attractive for residential use.
Energy savings, aesthetic enhancement, and convenience benefits justify LED strip investments for most homeowners. The combination of low operating costs, minimal maintenance requirements, and dramatic visual impact provides excellent value for modern lighting applications.
Ready to transform your living space? Consider consulting with lighting professionals who can provide technical guidance for specific applications and ensure optimal results for your under-sofa LED lighting project.
FAQ
Q1: What voltage LED strips work best for under sofa installations?
12V DC LED strips provide optimal performance for most under-sofa applications. These systems offer good brightness levels while maintaining safety requirements for residential use. 24V systems work better for longer installations where voltage drop becomes problematic.
Q2: How much power do under sofa LED strips typically consume?
Typical under-sofa LED strip installations consume between 10-30 watts total power depending on strip length and brightness requirements. This represents minimal electrical load compared to traditional lighting options. Energy costs remain negligible even with extended daily operation.
Q3: Can LED strips be cut to fit specific sofa dimensions?
Most LED strips feature designated cutting points every few inches that allow custom length adjustments. Cutting should occur only at marked locations to maintain proper electrical function. Unused strip sections can often be used for other applications with appropriate connectors.
Q4: Do under sofa LED strips require special mounting hardware?
Basic installations use adhesive backing included with quality LED strips. Challenging surfaces may require mounting clips, channels, or mechanical fasteners. Professional installations often use aluminum channels that provide protection and improve light distribution.
Q5: How long do LED strips last in under sofa applications?
Quality LED strips typically operate for 25,000-50,000 hours under normal conditions. Under-sofa installations often experience longer lifespans due to protected environments and moderate operating temperatures. Proper installation and maintenance can extend operational life significantly beyond manufacturer specifications.
