
LED strip lights for escalator systems are flexible linear LED fixtures used along skirt panels, handrail zones, comb plates, side cladding, or under-step edges to improve visibility, safety, and architectural appearance. The right choice depends on voltage, IP rating, heat control, driver quality, cable routing, and local compliance.
LED Strip Lights for Escalator: Safe Spec Guide
Finding the right escalator lighting is harder than it looks. A cheap strip may pass a short bench test, yet fail after months of vibration, cleaning chemicals, trapped heat, or voltage drop. That failure can create callbacks, site complaints, and safety concerns in a shopping mall, airport, metro station, or hotel.
The solution is a specification-led approach. You need the correct LED strip, aluminum profile, diffuser, driver, wiring plan, and testing process before the installer arrives on site. From our manufacturing floor perspective, escalator projects reward careful planning because access is tight, downtime is expensive, and every visible defect damages the project owner’s confidence.
1. What makes escalator LED strip lighting different from ordinary linear lighting?
Escalator lighting works in a moving mechanical environment. That changes the specification. A retail shelf strip may run well in open air, but an escalator side panel can trap heat and expose the strip to vibration from motors, rollers, and passenger movement. Service access is limited, and cable paths are often shorter than expected.
Good escalator LED strip design focuses on:
● Stable brightness over long runs
● Low surface temperature
● Mechanical protection inside a profile
● Safe low-voltage distribution
● Easy service without removing major escalator parts
● Consistent color temperature across batches
| Escalator Lighting Area | Typical Purpose | Recommended Product Style |
|---|---|---|
| Skirt panel edge | Side visibility and guidance | 24V LED strip in aluminum profile |
| Handrail base | Architectural glow | Diffused COB or high-density SMD strip |
| Comb plate area | Entry and exit safety | Sealed strip with high lumen output |
| Under-step accent | Premium visual effect | Custom low-profile strip module |
| Side cladding | Brand and ambience | Tunable white or RGBW with controller |
Here’s the deal: escalator projects are not only about light. They are about uptime, passenger safety, and the installer’s ability to maintain the system later.
2. Which LED strip type works best for escalator side panels and skirt areas?
For most escalator applications, 24V SMD LED strips or COB LED strips are the safest starting point. SMD strips offer strong efficiency, flexible lumen options, and easier cost control. COB strips provide smoother continuous light with fewer visible dots, so working with an experienced COB LED strip light manufacturer can help achieve a cleaner result in hotels, commercial towers, airports, and premium retail sites.
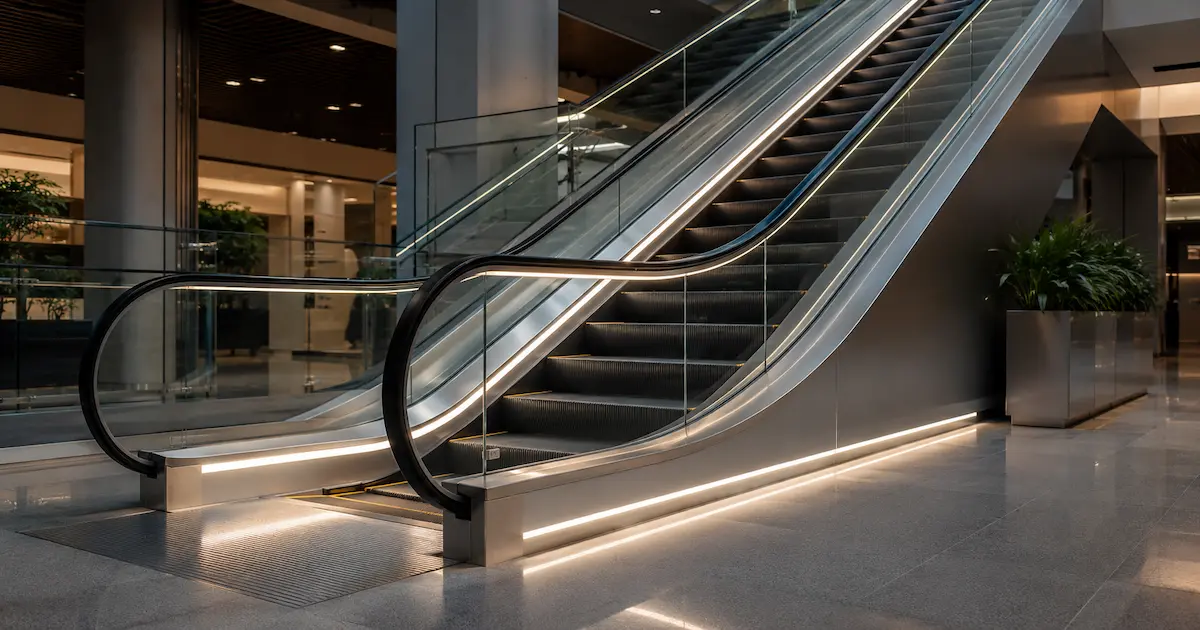
In our lab tests using integrating spheres, we compare lumen output, color temperature, and the colour rendering of white LED light sources before samples move to aging racks.Understanding the fundamental relationship between electrical input, luminous efficacy, heat, and useful output is part of evaluating LED basics, because two strips with the same wattage can perform very differently. A 10W/m high-efficiency strip may produce more useful light than a poorly designed 14.4W/m strip.
Common specifications for led strip lights for escalator projects include:
● Voltage: 24V DC for longer runs
● Power: 6W/m to 14.4W/m, based on brightness target
● CCT: 3000K for hotels, 4000K for malls, 5000K for transit sites
● CRI: Ra80 for general use, Ra90 for premium interiors
● PCB width: 8mm, 10mm, or custom width
● LED density: 120 LEDs/m or higher for smooth output
| LED Strip Type | Strength | Limitation | Best Escalator Use |
|---|---|---|---|
| SMD 2835 | High efficiency, stable cost | Dots may show without diffuser | Skirt panels, side cladding |
| SMD 2216 | High density, smoother line | Higher price | Premium visible channels |
| COB strip | Dot-free light | Heat design must be controlled | Hotels, luxury retail |
| RGB strip | Color scenes | More wiring and control risk | Entertainment venues |
| RGBW strip | Color plus white | Requires larger driver/control plan | Malls and themed spaces |
But there’s a catch: never select the strip alone. Select it with the profile, diffuser, driver, and mounting method.
3. How do voltage and voltage drop affect escalator LED strip performance?
Voltage drop is one of the most common causes of weak end brightness on escalators, so installers should understand how to fix dim LED strip lights by checking cable size, feed location, run length, and power-injection points. Long side runs make this risk worse. A 12-meter illuminated escalator side can look perfect near the power feed and visibly dim at the end if cable size or the voltage plan is wrong.
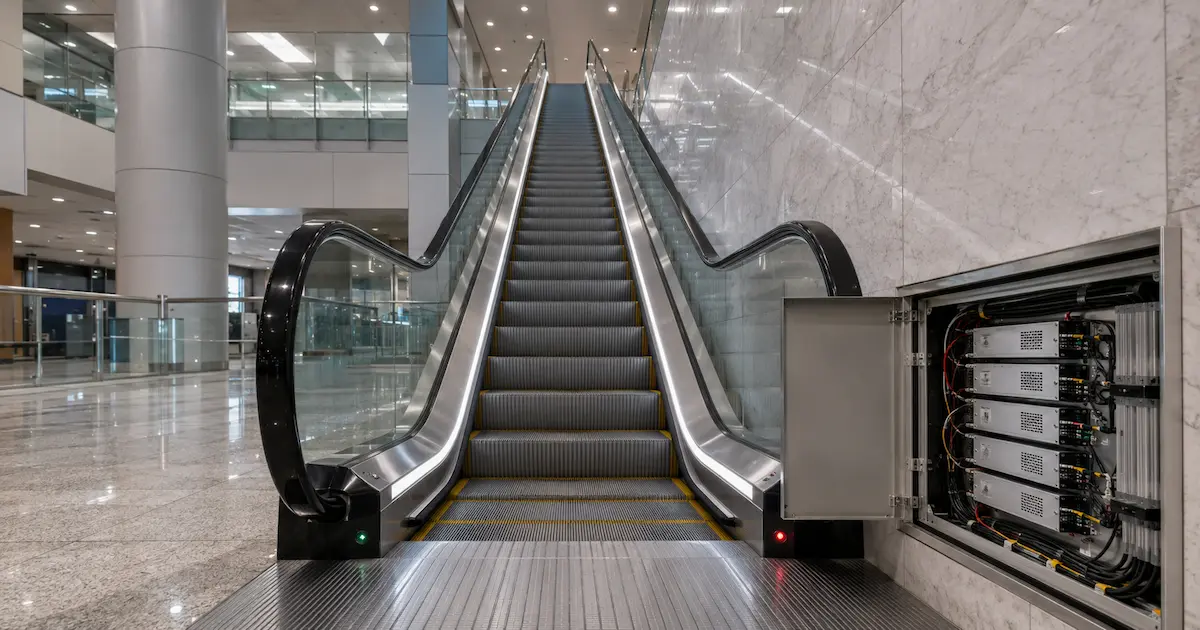
At the same power level and run length, a 24V strip holds brightness more evenly because current is lower. Lower current reduces loss in the copper PCB and feeder cable. Consequently, many professional escalator projects use 24V DC, and a qualified 24V LED strip manufacturer can help calculate run length, current load, cable gauge, driver placement, and power-injection requirements.
Practical patterns:
● Short hotel escalator (≈4 m per side): often one-end feed
● 10 m mall escalator: feed from both ends
● High-lumen transit escalator: segmented injection every 5 m
| Item | 12V LED Strip | 24V LED Strip |
|---|---|---|
| Long-run performance | More voltage drop | Better stability |
| Current for same wattage | Higher | Lower |
| Cable heat risk | Higher on long runs | Lower on long runs |
| Driver availability | Very common | Very common |
| Best use | Short decorative runs | Escalator side runs |
| Installer workload | More power injection | Fewer feed points |
Pro Tip: “If the run is over 5 meters and brightness must stay uniform, calculate voltage drop before confirming the driver layout.”
4. What IP rating and protection level should escalator LED strips use?
The required Ingress Protection ratings depend on the installation site, expected dust exposure, cleaning methods, humidity, and possible contact with water. Indoor escalators in offices may only need IP20 strip inside a protected aluminum profile. Shopping malls often need IP65 because cleaning staff may wipe panels with damp cloths. Outdoor or semi-outdoor escalators need IP67 or stronger mechanical protection, especially where rain splash, dust, or humidity can reach the lighting channel.
Common Myth: Higher IP rating always means better product quality. Reality: Extra silicone can trap heat and reduce LED life if the profile design is poor. Protection must match the environment, not just look stronger on paper.
| IP Rating | Protection Level | Heat Impact | Escalator Application |
|---|---|---|---|
| IP20 | No water protection | Best heat release | Dry indoor, sealed profile |
| IP54 | Dust and light splash | Low to medium | Office and hotel interiors |
| IP65 | Splash-resistant | Medium | Malls, public buildings |
| IP67 | Short-term immersion resistance | Higher | Semi-outdoor escalators |
| IP68 | Higher water resistance | Highest heat concern | Special outdoor projects |
IP rating is only one layer. You still need sealed cable exits, end caps, correct adhesive, and drainage planning for exposed locations.
5. How should aluminum profiles and diffusers be specified for escalators?
Understanding why LED strips need aluminium profiles is important in escalator projects because the channel must provide heat dissipation, mechanical protection, straight mounting, and a smooth finished light line. They spread heat, protect the PCB, create a clean light line, and help installers mount the system straight. Without a proper profile, adhesive alone can fail due to heat, dust, vibration, or cleaning residue.
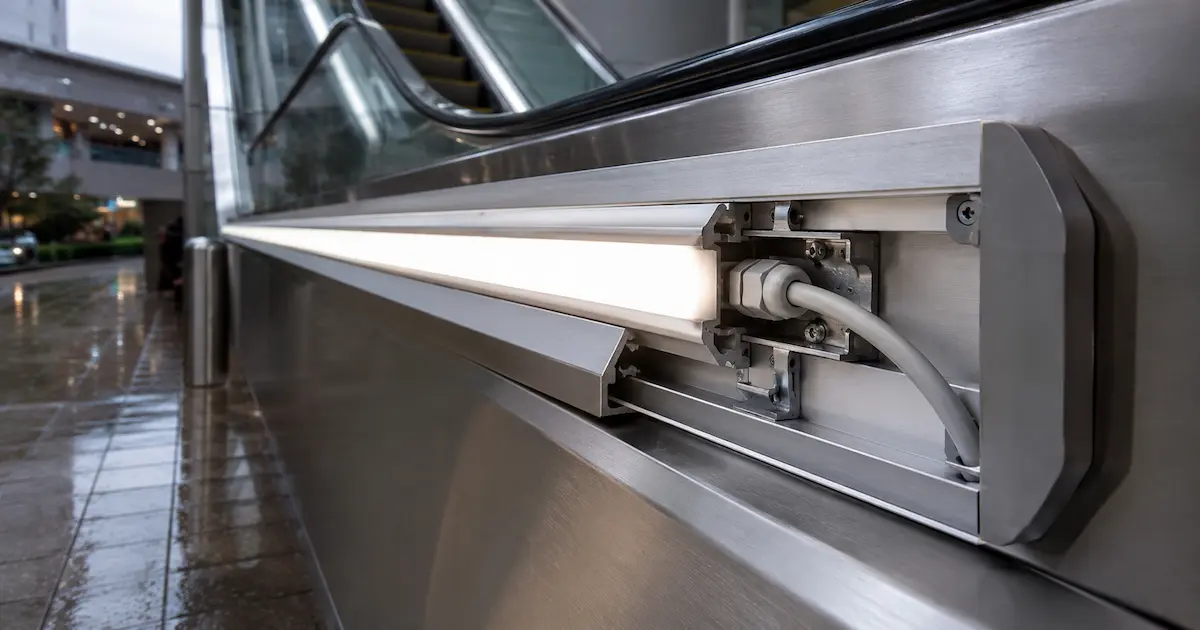
Profile matching is where many escalator projects win or lose, and professional LED aluminium profile manufacturers can help match channel depth, aluminum mass, diffuser type, strip width, and connector clearance to the installation. A high-power strip in a shallow profile may run too hot, so designers should identify the correct solution to LED strip heat issues before approving the profile size, diffuser, and installation method. A deep profile with an opal diffuser may look smooth but reduce lumen output. A narrow channel may fit the escalator panel but leave no room for solder joints or connectors.
| Profile Feature | Why It Matters | Practical Recommendation |
|---|---|---|
| Aluminum thickness | Controls heat spreading | Use heavier profile for over 10W/m |
| Diffuser type | Affects dots and brightness | Opal for smoothness, clear for output |
| Mounting style | Affects installation time | Recessed where space allows |
| Cover material | Affects impact resistance | PC cover for public traffic areas |
| Surface finish | Affects appearance | Match escalator cladding color |
Keep enough internal room for pre-soldered leads. Tight channels can pinch wires and create early failures.
6. Which drivers, dimming methods, and controls suit escalator lighting?
Drivers must match the strip wattage, site voltage, dimming needs, and installation location. For standard white led strip lights for escalator systems, a constant-voltage 24V DC driver is typical. The driver should have headroom, usually 20% above calculated load, so it does not run at full stress every day.
Example: a 12-meter run at 9.6W/m consumes 115.2W. A 150W driver is a sensible choice if cable loss and ambient temperature are controlled. For two sides of an escalator, separate drivers simplify service and reduce downtime.
Dimming choices depend on the building system, and DALI lighting control is commonly considered where addressable zones, standardized dimming, monitoring, and centralized management are required. Hotels may need 0-10V or DALI. Retail projects may use PWM dimming. Entertainment sites may require DMX for color control. Safety lighting should not depend on complex scenes without a reliable default.
| Driver/Control Option | Best Use | Notes for Escalators |
|---|---|---|
| Non-dim 24V driver | Standard safety or accent light | Simple, low service risk |
| 0-10V dimming | Commercial buildings | Works with many control panels |
| DALI driver | Hotels, smart buildings | Good for addressable zones |
| PWM dimmer | Basic brightness control | Check flicker and load rating |
| DMX controller | RGB/RGBW effects | Needs careful wiring and programming |
Consider driver ventilation and avoid packing drivers into sealed pits where heat will shorten life.
7. What certifications and safety points matter for escalator LED strip projects?
Because escalators carry passengers through moving mechanical equipment, lighting design and installation should be coordinated with the applicable Safety Code for Elevators and Escalators and local regulatory requirements. The specification of elevator and escalator electrical equipment should address electrical safety, approved enclosures, insulation, wiring protection, fire performance, electromagnetic compatibility, and local approval requirements. For many markets, CE and RoHS are basic needs. UL or ETL may be required in North America. CB reports help support international project documentation.
Key safety checks include:
● Use low-voltage DC near accessible areas
● Keep drivers and related controls in approved enclosures, following applicable requirements for specific-purpose equipment and installations.
● Protect cables from moving escalator parts
● Use flame-retardant wire where required
● Confirm profile edges do not create passenger hazards
● Verify EMC behavior if controls are near building systems
| Market/Region | Common Requirement | What to Ask Supplier For |
|---|---|---|
| European Union | CE, RoHS, EMC/LVD documents | Declaration, test reports |
| United States | UL/ETL where specified | Listing file or component proof |
| Canada | cUL/CSA related approval | Project-specific compliance data |
| Middle East | Often CE/CB requested | CB report and data sheet |
| Southeast Asia | CE, RoHS, local rules vary | Datasheet, safety report, samples |
A logo in a catalog is not enough. Ask for documents linked to the exact model, voltage, and driver series.
8. How should installation be planned to reduce callbacks and downtime?
Escalator installation has one major challenge: access, and any work performed near moving or energized equipment should follow the applicable control of hazardous energy lockout/tagout procedures. You often work during mall closing hours, airport low-traffic windows, or staged construction periods. A lighting layout that looks simple on paper can become slow on site if wire exits, connectors, and profile lengths are not prepared.
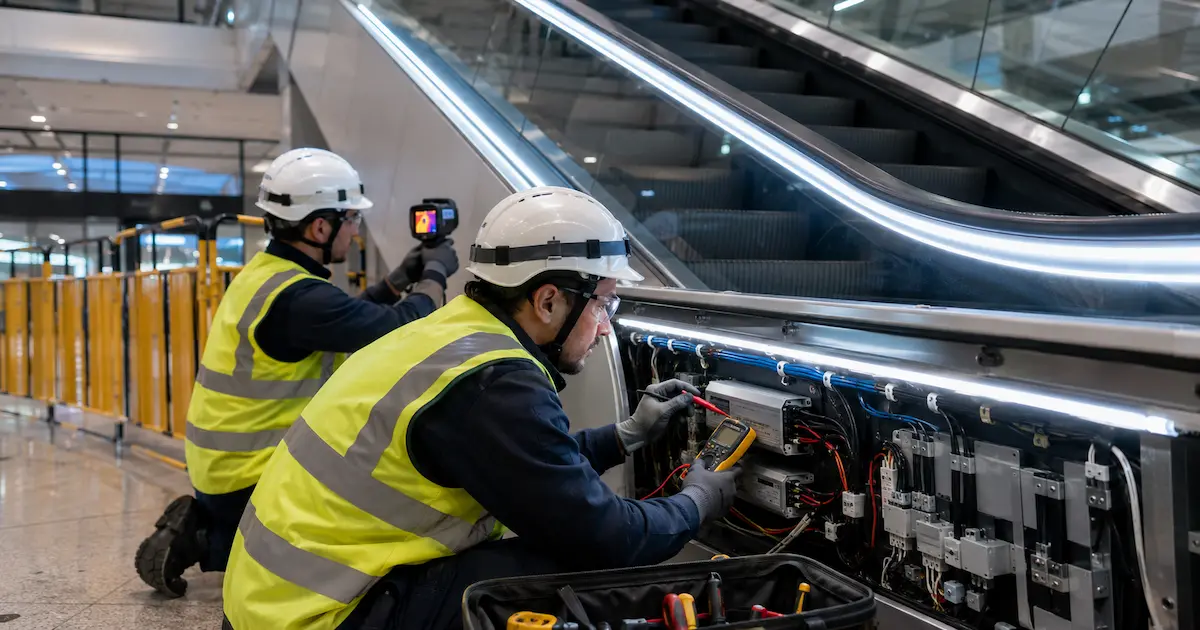
Common on-site problems include incorrect strip cuts near curved panels, drivers placed too far from feeds, reliance on adhesive on dusty surfaces, and other common mistakes in LED strip light wiring that can cause dim sections, loose connections, or early failure. Each issue creates callbacks.
Use a pre-install checklist before shipping products to site:
| Installation Step | Checkpoint | Risk if Missed | Suggested Action |
|---|---|---|---|
| Measure channel length | Confirm per escalator side | Wrong strip cuts | Create cut list per unit |
| Plan power feeds | Mark feed end and injection points | Dim ends | Use 24V and dual-end feed where needed |
| Clean mounting surface | Remove dust, oil, residue | Strip detaches | Use alcohol wipe and mechanical clips |
| Test before closing panels | Run 2-4 hours | Hidden fault | Record photos and voltage readings |
| Label cables | Mark driver and output | Slow maintenance | Use heat-shrink labels |
| Keep spare parts | Strip, driver, diffuser | Long downtime | Stock project-matched spares |
Pre-soldered leads and factory-cut lengths save time and reduce on-site soldering defects in narrow escalator spaces.
9. How can buyers evaluate LED strip quality before bulk ordering?
Samples can be misleading if you only check brightness by eye. A professional evaluation needs data and aging time. In our lab tests using integrating spheres, we check lumen output, CCT, CRI, and power consumption. We then run aging racks to catch early failures before mass production.
For escalator projects, request the same batch control that will be used in bulk production. Color mismatch is not a small cosmetic issue. Even a 300K CCT shift can be visible on a long escalator.
Useful sample tests:
| Quality Test | Tool or Method | Acceptable Target | Why It Matters |
|---|---|---|---|
| Lumen test | Integrating sphere | Match datasheet tolerance | Prevents under-lit areas |
| CCT binning | Color test report | 3-step or 5-step MacAdam | Reduces visible color shift |
| Thermal check | Thermal camera | PCB temperature within rating | Protects LED lifespan |
| Aging test | 8-24 hours for sample, longer for batch | No flicker or dead LEDs | Catches early defects |
| Bend test | Manual radius check | No solder crack | Supports curved installation |
A good supplier should share test photos, batch data, and honest limits.
10. What cost factors affect ROI for escalator LED strip lighting?
Price per meter is only one part of cost. The real cost includes drivers, profiles, diffusers, cables, connectors, installation hours, downtime, replacement risk, and after-sales labor. A cheaper strip can become expensive if it fails inside a closed escalator panel where access requires night work.
| Cost Factor | Low-Cost Choice | Professional Choice | Business Impact |
|---|---|---|---|
| LED strip | Unknown binning | Tested CCT and lumen data | Fewer client complaints |
| Profile | Thin aluminum | Heat-rated profile | Longer service life |
| Driver | Runs near full load | 20% capacity headroom | Lower failure rate |
| Wiring | Minimal copper size | Calculated cable gauge | Stable brightness |
| Installation | Site soldering | Pre-soldered custom leads | Faster work, fewer faults |
| Spares | No batch reserve | Matched spare stock | Faster repair |
A balanced specification and support from a dependable commercial LED lighting manufacturer can protect project margin by reducing rework, warranty claims, site delays, and mismatched replacement parts. It reduces rework, supports warranty confidence, and helps your team quote future escalator lighting projects with fewer unknowns.
Conclusion
Specify the system, not just the strip: choose appropriate voltage and power injection, match strip type to viewing distance, select an aluminum profile sized for heat dissipation, require driver headroom and correct IP rating, verify certifications, and test full-length samples in the intended diffuser and profile. These steps minimize downtime, reduce callbacks, and protect passenger safety and project reputation.
FAQ
Q1: What are led strip lights for escalator systems?
They are low-voltage linear LED lighting products installed along escalator side panels, skirt areas, handrail bases, comb plates, or cladding zones. Their role is to improve visibility, guide passengers, and support architectural design. Professional versions usually include aluminum profiles, diffusers, drivers, and protected wiring.
Q2: Is 12V or 24V better for escalator LED strip lighting?
For most escalator runs, 24V is better because it reduces current and voltage drop over longer distances. A 12V strip can work for short decorative sections, but 24V is usually easier to manage on 5–15 m side runs. Long projects may still need dual-end feeding or power injection.
Q3: What IP rating should I choose for escalator LED strips?
Dry indoor locations can use IP20 strips inside a protected profile. Malls and public interiors often use IP65 due to cleaning and dust. Semi-outdoor or exposed escalators may need IP67. Choose the IP rating based on water exposure, heat control, cleaning chemicals, and service access.
Q4: Can LED strip lights for escalator projects be customized?
Yes. Common custom options include cut length, pre-soldered cable, connector type, CCT, CRI, PCB width, silicone sleeve, profile color, diffuser type, and packaging. Custom leads are especially useful because escalator channels are narrow and site soldering can be slow or risky.
Q5: How do I reduce maintenance problems after installation?
Use 24V where suitable, select a heat-rated aluminum profile, leave driver capacity headroom, avoid poor cable routing, test the full run before closing panels, and keep matched spare strips and drivers. Clear cable labels and installation photos also help maintenance teams solve faults faster.
