
Replacing fluorescent light fixtures with LED strips is an excellent way to enhance your lighting while reaping numerous benefits. LED strips are known for their flexibility, energy efficiency, and longer lifespan. This guide will walk you through the process of making the switch from fluorescent to LED strips, ensuring that you have all the necessary information to complete the task successfully.

By the end of this article, you’ll understand the steps involved, the tools required, and the advantages of upgrading to LED strip lighting. Whether you’re motivated by cost savings, improved lighting quality, or environmental concerns, this comprehensive guide will help you make an informed decision.
To Replace Fluorescent Light Fixtures With LED Strips:
- Turn Off Power: Ensure the power to the fluorescent fixture is turned off at the circuit breaker to avoid any electrical hazards.
- Remove Fluorescent Tubes: Carefully remove the fluorescent tubes by rotating them out of their sockets.
- Disconnect the Fixture: Unscrew and lower the fluorescent fixture, disconnecting the wiring carefully.
- Prepare the LED Strips: Unbox the LED strips and read the manufacturer’s instructions thoroughly.
- Install Mounting Surface: Attach a clean, flat mounting surface where you will adhere the LED strips. This can be done using the provided mounting clips or adhesive backing.
- Connect Wiring: Connect the wiring of the LED strips to the existing power supply, ensuring the wires are matched correctly (black to black, white to white, and ground to ground).
- Secure the LED Strips: Attach the LED strips to the mounting surface securely, making sure they are evenly spaced and properly adhered.
- Test the Strips: Turn the power back on at the circuit breaker and test the LED strips to ensure they’re working correctly.
LED strips are more energy-efficient, reducing your electricity consumption significantly. They also offer a longer lifespan compared to fluorescent bulbs, which means fewer replacements and lower maintenance costs.
LED strips offer better light quality, uniform distribution, and flexible installation. Follow these steps to upgrade and enjoy the benefits instantly.

Now that you have an overview of the steps Replacing Fluorescent Light Fixtures with LED Strips, let’s dive deeper into the benefits and preparations needed for a successful installation. Understanding these aspects will help you see why LED strips are a superior choice.
From energy efficiency and cost savings to environmental advantages and longevity, Replacing Fluorescent Light Fixtures with LED Strips offers numerous benefits, making them an excellent lighting solution. Being well-prepared will ensure a smooth and effective replacement process.
Understanding the Benefits of LED Strips
- Energy Efficiency and Cost Savings: LED strips are significantly more energy-efficient than fluorescent fixtures. They consume less power while providing the same or even better light output. This efficiency translates to substantial savings on your electricity bills. For example, LED strips can use up to 75% less energy than fluorescent lights, making them a cost-effective lighting solution in the long run.
- Longer Lifespan: One of the most notable advantages of LED strips is their longevity. While fluorescent bulbs typically last around 10,000 hours, LED strips can last up to 50,000 hours or more. This extended lifespan means fewer replacements, reducing maintenance costs and inconvenience. With LED strips, you can enjoy consistent, high-quality lighting for many years without the frequent need for bulb changes.
- Environmental Benefits: LED strips are also environmentally friendly. They do not contain hazardous materials such as mercury, which is present in fluorescent bulbs, making disposal safer and less harmful to the environment. Additionally, their reduced energy consumption decreases the demand on power plants, leading to lower greenhouse gas emissions. Switching to LED strips supports a sustainable future by lowering your carbon footprint and promoting environmental responsibility.


Preparing for the Replacement
Tools and Materials Needed: Before you begin the replacement process, gather the necessary tools and materials to ensure a smooth installation:
- LED strips
- Power supply for LED strips
- Mounting clips or adhesive backing (if not included with the LED strips)
- Screwdriver (Phillips and flathead)
- Wire strippers
- Voltage tester
- Wire nuts
- Ladder or step stool
- Safety glasses and gloves
Safety Precautions: Safety is paramount when working with electrical fixtures. Follow these precautions to ensure a safe and successful replacement:
- Turn Off Power: Always turn off the power at the circuit breaker before starting any electrical work. Use a voltage tester to confirm that there is no electrical current running to the fixture.
- Wear Protective Gear: Use safety glasses and gloves to protect yourself from potential electrical hazards and debris.
- Read Instructions: Carefully read and follow the manufacturer’s instructions for both removing the old fixture and installing the new LED strips.
- Use Proper Tools: Ensure you have all the necessary tools and materials before starting the project to avoid any interruptions or unsafe improvisations.
By preparing properly and following these safety measures, you can confidently proceed with replacing your fluorescent light fixtures with LED strips, ensuring a safe and efficient installation process.
Removing the Fluorescent Light Fixture
Step-by-Step Instructions for Removal:
- Turn Off Power: Ensure the power to the fluorescent fixture is turned off at the circuit breaker to avoid any electrical hazards.
- Remove Cover or Diffuser: Carefully remove the cover or diffuser from the fluorescent fixture. This usually involves unscrewing or unclipping it.
- Remove Fluorescent Tubes: Rotate the fluorescent tubes a quarter turn to release them from their sockets, then gently pull them out.
- Disconnect Wiring: Locate the wiring connections, usually hidden behind a metal plate. Remove the plate and unscrew the wire nuts connecting the fixture to the power supply.
- Remove Fixture: Unscrew the fixture from the ceiling or wall. Have a helper support the fixture as you remove the last screws to prevent it from falling.
Handling and Disposing of Fluorescent Bulbs:
- Handle with Care: Fluorescent bulbs contain a small amount of mercury, so handle them carefully to avoid breakage.
- Proper Disposal: Check your local regulations for proper disposal of fluorescent bulbs. Many areas have recycling programs or designated drop-off points for hazardous materials. Avoid disposing of them in regular trash to prevent environmental contamination.
By following these steps, you can safely remove your old fluorescent light fixture, preparing the space for a new, energy-efficient LED strip installation.
Installing the LED Strips
Step-by-Step Guide to Installation:
- Prepare the Area: Ensure the power is still off. Use a voltage tester to double-check that there is no electrical current.
- Mounting Surface: Clean the area where you will install the LED strips. Ensure the surface is flat and free of dust or debris to help the adhesive backing or mounting clips stick properly.
- Install Mounting Clips or Adhesive Backing: If your LED strips come with mounting clips, attach them to the surface at regular intervals. If using adhesive backing, peel off the protective layer and press the strips firmly onto the surface.
- Connect Wiring:
- Match Wires: Connect the LED strips to the power supply, matching the wire colors (black to black, white to white, ground to ground).
- Secure Connections: Use wire nuts to secure each connection, ensuring no bare wires are exposed.
- Power Supply: If your LED strips require a specific power supply unit, connect it according to the manufacturer’s instructions.
- Secure the LED Strips: Attach the LED strips to the mounting surface, ensuring they are straight and evenly spaced. Press firmly to ensure the adhesive backing sticks, or secure with the mounting clips.
- Test the Strips: Turn the power back on at the circuit breaker and test the LED strips to ensure they are working correctly. Check for uniform brightness and proper operation.
- Adjust if Necessary: If any sections are not lit or appear dim, double-check the connections and make sure the strips are properly adhered to the surface.
- Images or Diagrams for Clarity: Including images or diagrams for each step can significantly aid in understanding. Ensure each image is clear and labeled with corresponding step numbers.
By carefully following these instructions, you will successfully install your new LED strips, enhancing your lighting with improved efficiency and quality.
Testing and Troubleshooting
Instructions on How to Test the New LED Strips:
- Turn On Power: Once the LED strips are installed, turn the power back on at the circuit breaker.
- Switch On: Use the light switch to turn on the new LED strips. Observe if they light up immediately and uniformly.
- Check Brightness and Color: Ensure the light output matches the expected brightness and color temperature specified by the manufacturer.
- Inspect for Flickering or Noise: Observe the LED strips for any flickering or buzzing sounds, which can indicate a problem.
Troubleshooting Tips for Common Issues:
- Light Doesn’t Turn On: Double-check that the power is on and the wiring connections are secure. Ensure that the power supply is properly connected and functioning.
- Flickering Light: Ensure that the LED strips are compatible with the dimmer switch (if used) or try tightening any loose connections. Also, check if the power supply is adequate for the LED strips.
- Buzzing Sound: This may indicate an issue with the power supply or transformer. Ensure all parts are installed correctly and consult the manufacturer’s instructions.
- Dim Sections: Check for any loose connections or damaged sections of the LED strip. Ensure the strips are firmly attached to the mounting surface and that there are no obstructions.
By following these steps, you can confirm that your new LED strips are working correctly and address any common issues that might arise during installation.
Comparing LED Strips and Retrofit Kits
Difference Between Replacing the Entire Fixture and Using Retrofit Kits:
When upgrading from fluorescent light fixtures to LED lighting, you have two main options: replacing the entire fixture with LED strips or using retrofit kits to convert the existing fixture. Each option has its unique advantages and considerations.

Replacing the Entire Fixture:
- Pros:
- Modern Aesthetic: New LED strips provide a sleek, updated look that can enhance the overall appearance of your space.
- Guaranteed Compatibility: A new fixture ensures full compatibility with LED technology, reducing the risk of operational issues.
- Advanced Features: Many new LED strips come with advanced features such as dimming capabilities, smart controls, and color temperature adjustments.
- Cons:
- Higher Initial Cost: Replacing the entire fixture generally involves a higher upfront cost compared to retrofit kits.
- More Labor-Intensive: Installing a new fixture can be more time-consuming and may require additional modifications to your ceiling or wall.
Using Retrofit Kits:
- Pros:
- Cost-Effective: Retrofit kits are typically less expensive than purchasing a new fixture, making them a budget-friendly option.
- Quicker Installation: Retrofitting your existing fixtures can be quicker and less labor-intensive, as it involves fewer changes to your current setup.
- Reduced Waste: By reusing your existing fixtures, retrofit kits contribute to less waste, making them a more environmentally friendly option.
- Cons:
- Potential Compatibility Issues: Retrofit kits may not always be fully compatible with all types of fluorescent fixtures, potentially leading to operational issues.
- Aesthetic Limitations: While functional, retrofit kits may not provide the same modern aesthetic as completely new fixtures.
Choosing between replacing the entire fixture and using retrofit kits depends on your specific needs, budget, and desired outcome. Both options offer significant benefits over traditional fluorescent lighting, allowing you to enjoy the advantages of LED technology.
Cost Analysis and Savings
Cost Comparison Between Fluorescent and LED Strip Lighting:
When comparing costs, LED strips typically have a higher initial purchase price than fluorescent fixtures. For instance, a standard fluorescent fixture might cost between $20 and $50, while an LED strip setup could range from $50 to $100 or more. However, this initial cost difference is offset by the long-term savings LEDs offer.
Potential Long-Term Savings on Energy Bills and Maintenance Costs:
- Energy Bills: LED strips are significantly more energy-efficient, using up to 75% less electricity than fluorescent lights. For example, LED strips that consume 20 watts can replace a 40-watt fluorescent fixture, resulting in substantial energy savings. Over time, this reduction in energy usage can lead to notable decreases in your monthly electricity bills.
- Maintenance Costs: LEDs have a much longer lifespan compared to fluorescent bulbs, often lasting up to 50,000 hours versus 10,000 hours for fluorescents. This means fewer replacements and reduced maintenance costs. The longevity of LED strips also means less frequent disruptions for bulb changes, further contributing to cost savings.
- Additional Savings: LED strips generate less heat, which can reduce the need for air conditioning in warm climates, further lowering energy costs. Additionally, the durability of LED strips reduces the likelihood of breakage and the need for frequent replacements.
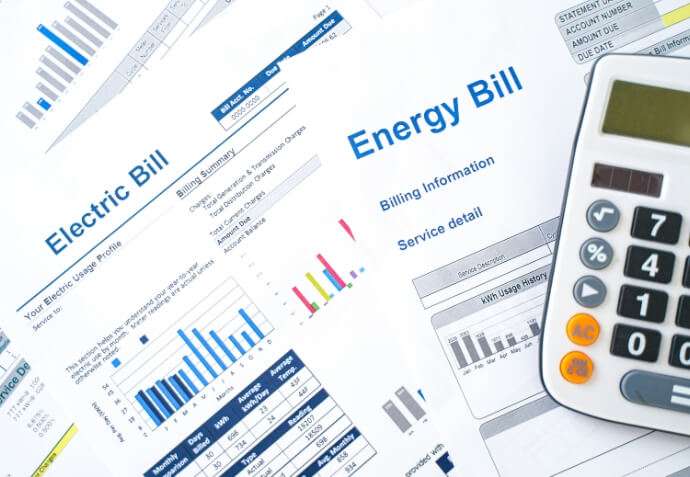
Overall, while the upfront cost of LED strips may be higher, the long-term savings on energy bills and maintenance make them a cost-effective choice for both residential and commercial applications.
Frequently Asked Questions
1. Q: Can I use my existing fluorescent fixture for LEDs?
A: Yes, retrofit kits are available that allow you to convert existing fluorescent fixtures to LED strips without needing a complete replacement.
2. Q: Do LEDs need a special type of dimmer?
A: Yes, not all dimmers are compatible with LED strips. Ensure you use a dimmer specifically designed for LEDs to avoid flickering and other issues.
3. Q: Are LED strips safe for the environment?
A: Absolutely. LEDs do not contain hazardous materials like mercury, which is present in fluorescent bulbs. They also consume less energy, reducing carbon emissions.
4. Q: How do I dispose of old fluorescent bulbs?
A: Fluorescent bulbs should be disposed of at designated recycling centers due to their mercury content. Check with local waste management services for proper disposal procedures.
5. Q: Can I install LED strips myself?
A: Yes, if you follow the instructions carefully and take necessary safety precautions, you can install LED strips yourself. However, for complex installations, it’s best to hire a professional.
6. Q: Do LED strips require special wiring?
A: Generally, LED strips can use existing wiring, but ensure compatibility with your power supply and check if any adapters or additional components are needed.
7. Q: Are LED strips more expensive to install?
A: While the initial cost might be higher, LED strips offer long-term savings in energy and maintenance costs, making them cost-effective over time.
8. Q: Can LED strips be cut to size?
A: Yes, many LED strips can be cut at designated points to fit your specific space requirements. Always follow the manufacturer’s guidelines for cutting and connecting strips.
9. Q: How do I ensure even lighting with LED strips?
A: To ensure even lighting, properly space the strips, and use diffusers if necessary. Also, check the specifications for brightness and color consistency.
10. Q: What are the best applications for LED strips?
A: LED strips are versatile and can be used for under-cabinet lighting, accent lighting, backlighting for TVs, and more. Choose strips based on brightness, color temperature, and intended use.
Additional Tips and Tricks
Optimizing LED Strip Lighting in Different Spaces:
- Use Diffusers: To achieve a smooth, even light distribution, use diffusers over the LED strips. This can help minimize harsh shadows and provide a more uniform glow.
- Proper Placement: Place LED strips under cabinets, along coves, or behind furniture to create an indirect lighting effect. This enhances the ambiance without direct glare.
- Choose the Right Color Temperature: Select warm white (2700K-3000K) for cozy living spaces, and cool white (4000K-5000K) for task-oriented areas like kitchens and bathrooms.
Choosing the Right LED Strips:
- Brightness: Ensure the LED strips provide adequate lumens for your specific lighting needs. Higher lumens are ideal for task lighting, while lower lumens are suitable for accent lighting.
- Flexibility: Opt for flexible LED strips for curved or irregular surfaces to ensure easy installation and optimal lighting coverage.
- Waterproofing: For outdoor or moisture-prone areas, select waterproof LED strips to ensure durability and longevity.

Conclusion
Replacing fluorescent light fixtures with LED strips offers numerous benefits, including energy efficiency, cost savings, a longer lifespan, and improved light quality. This guide has provided detailed steps on how to remove old fixtures, install new LED strips, and troubleshoot common issues.
Additionally, we’ve discussed the advantages of using LED strips and provided tips for optimizing their use in various settings. Now is the perfect time to make the switch and enjoy the many benefits that LED strips offer.
Take action today and start your LED strip conversion project to create a brighter, more efficient, and sustainable lighting environment.
